
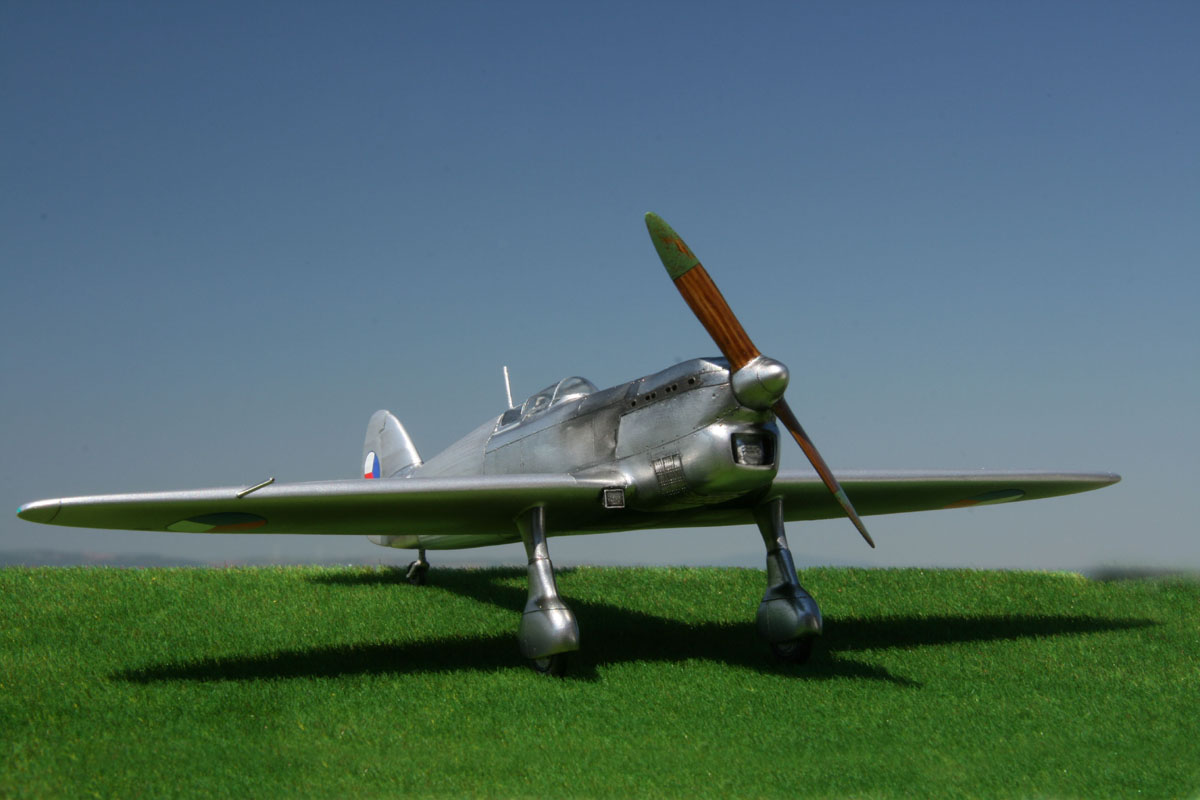
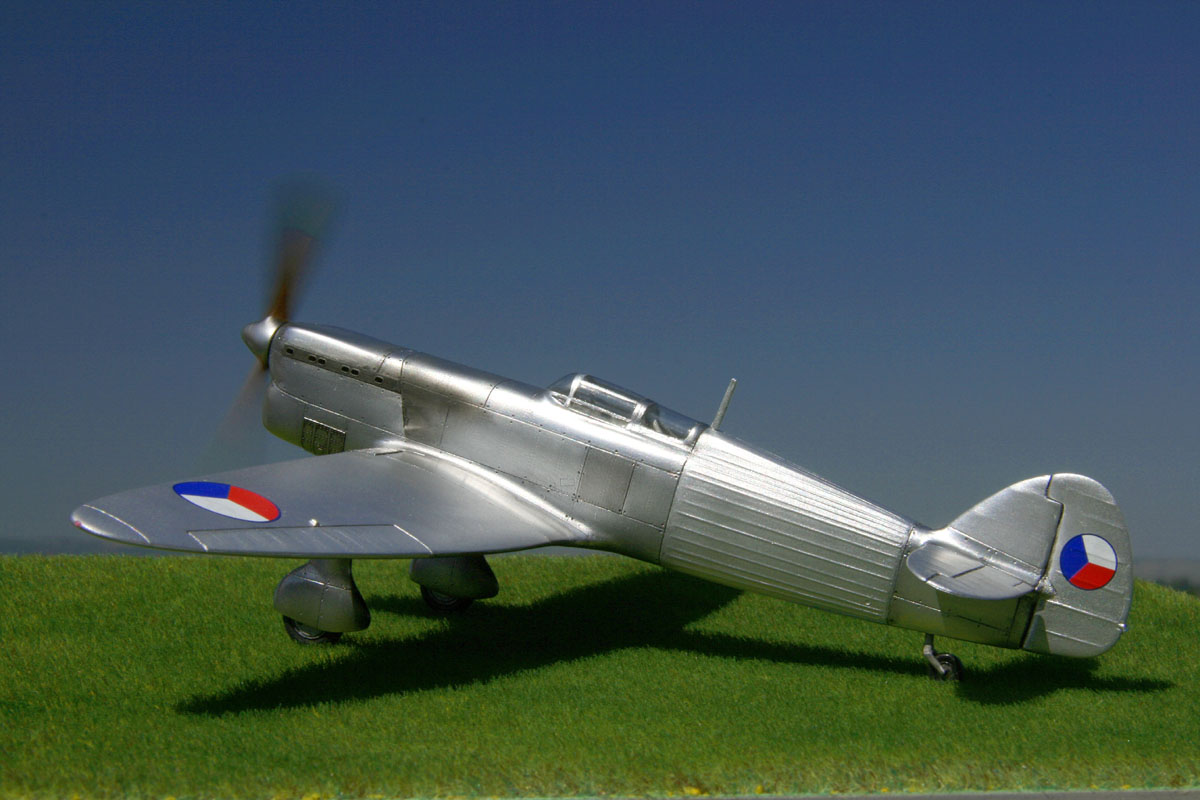
(Second Prototype)
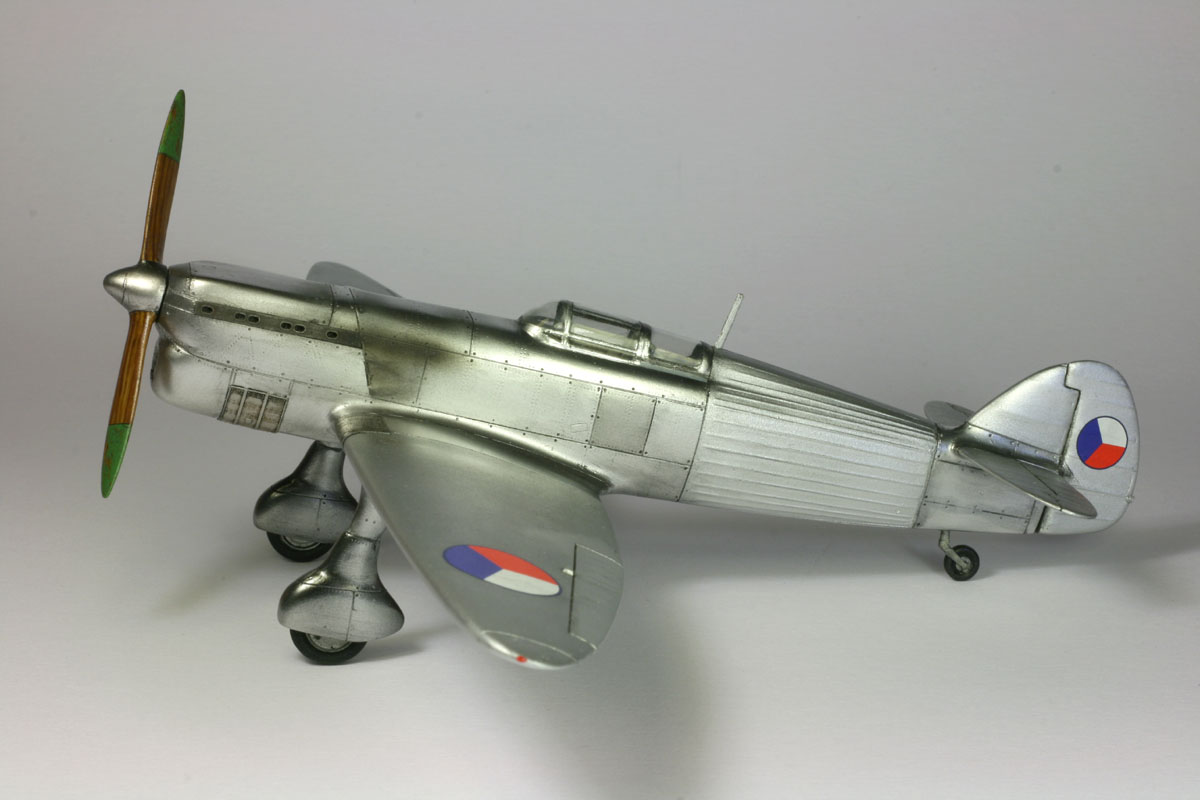
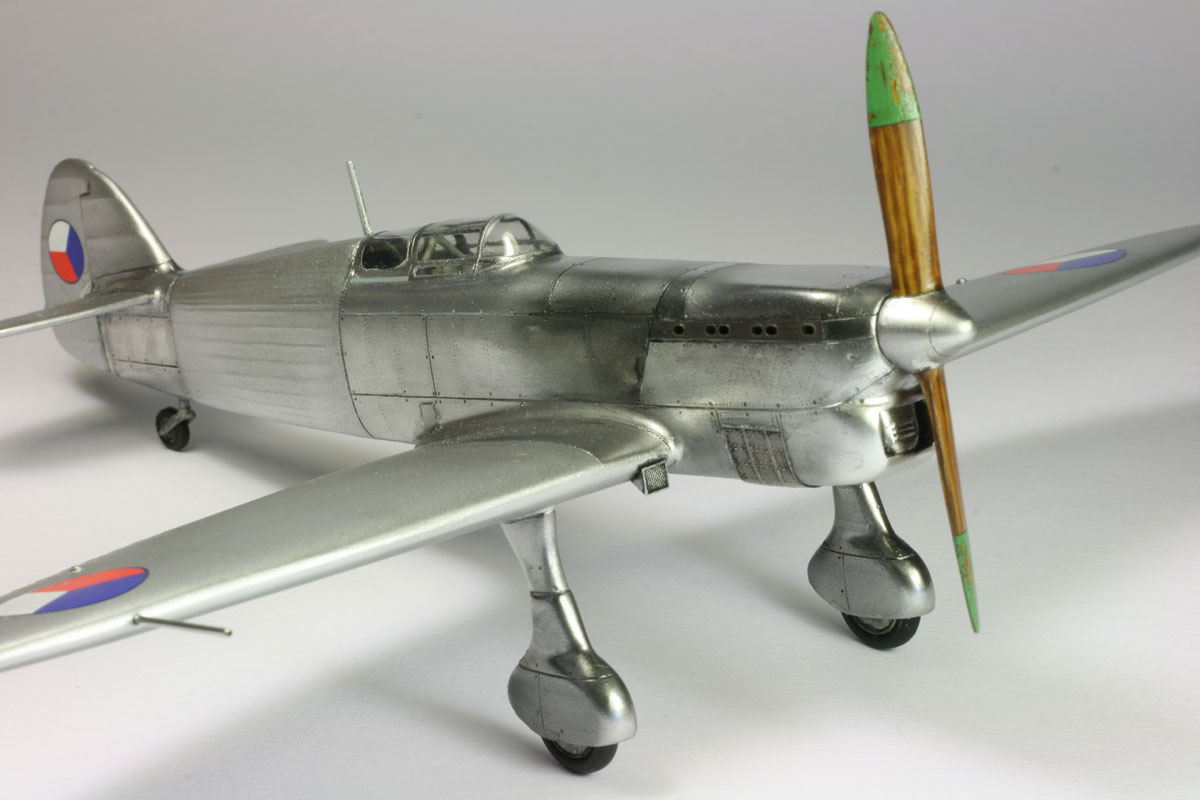
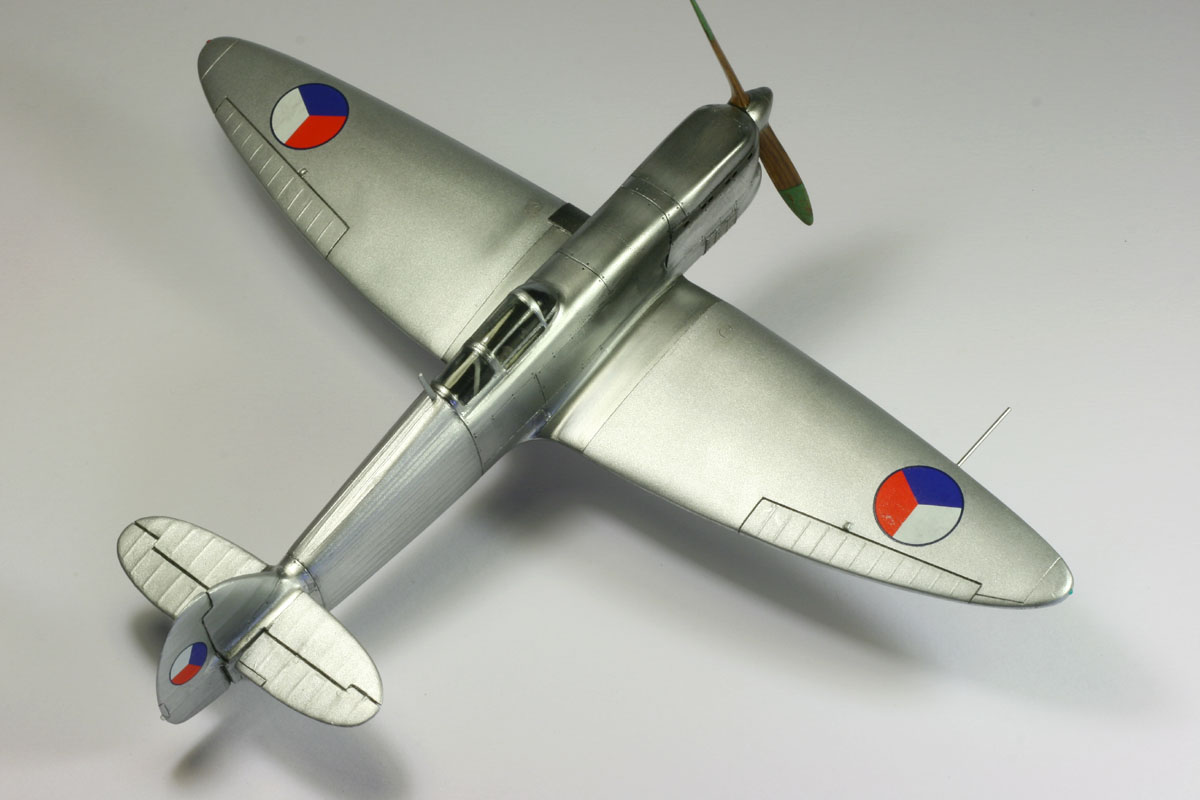
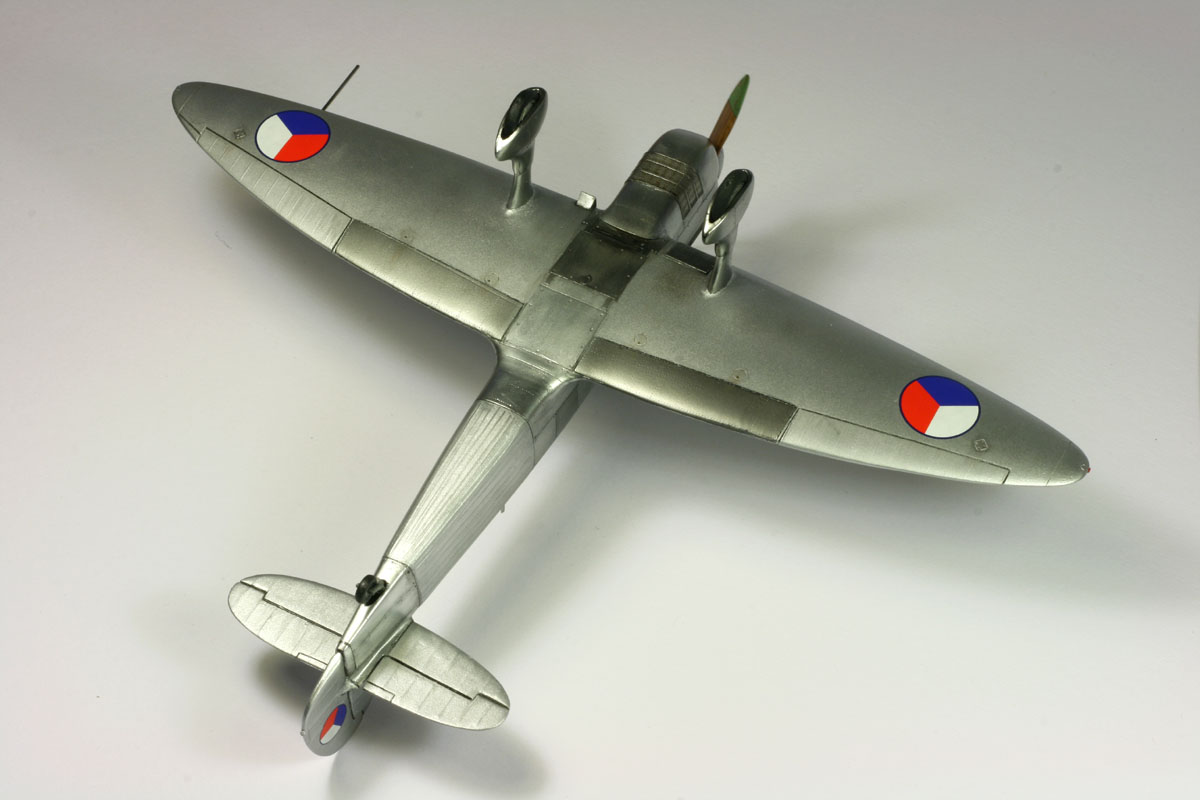
1/48th scale model by Legato Kits / AZ-Models
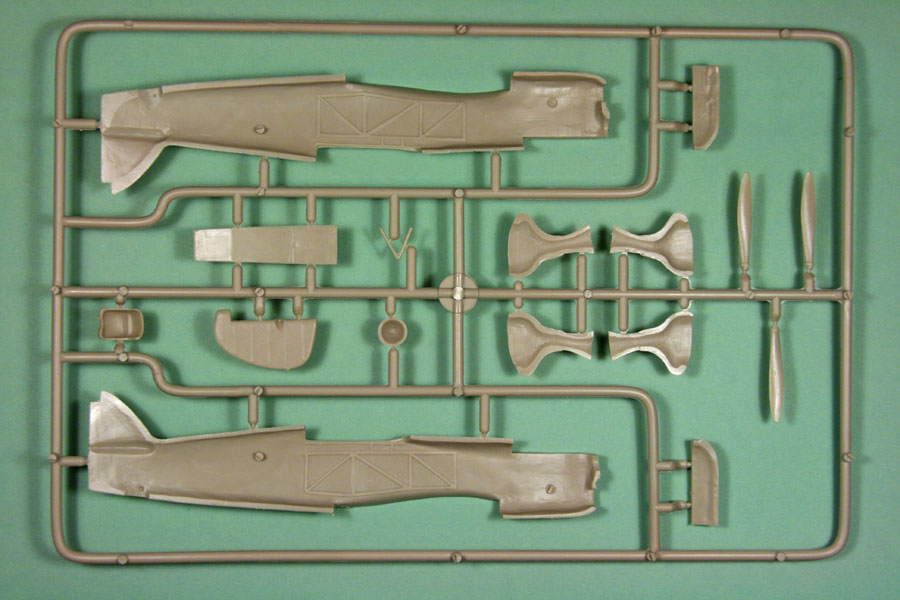
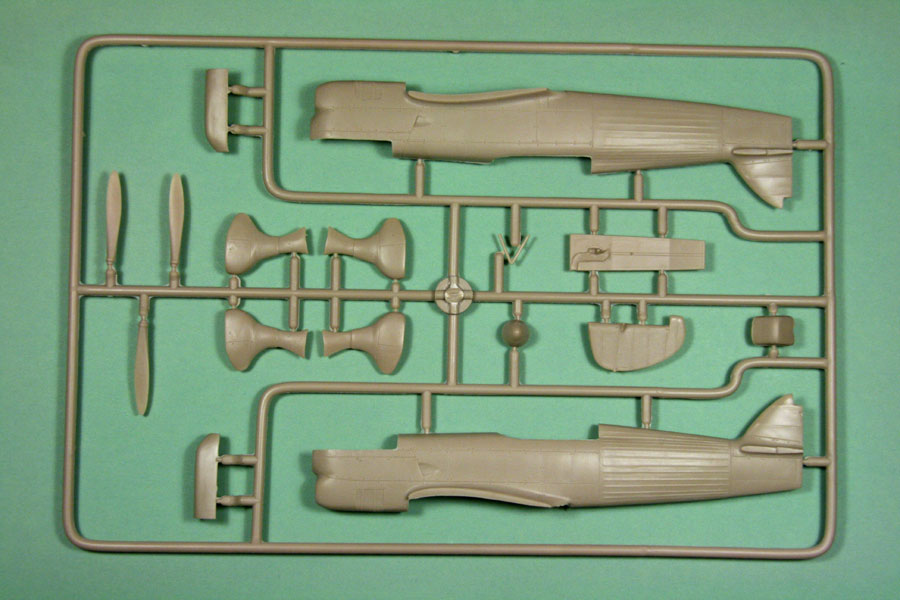
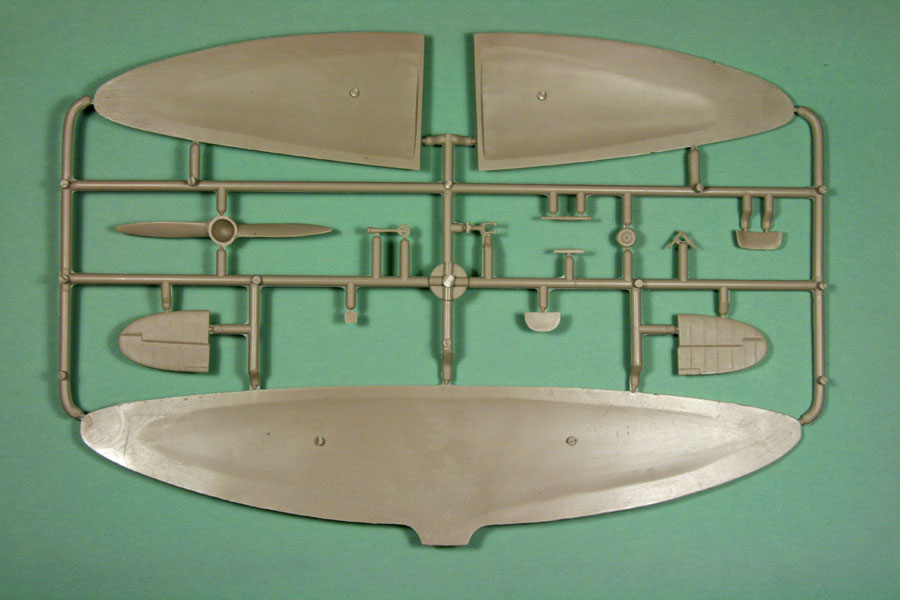
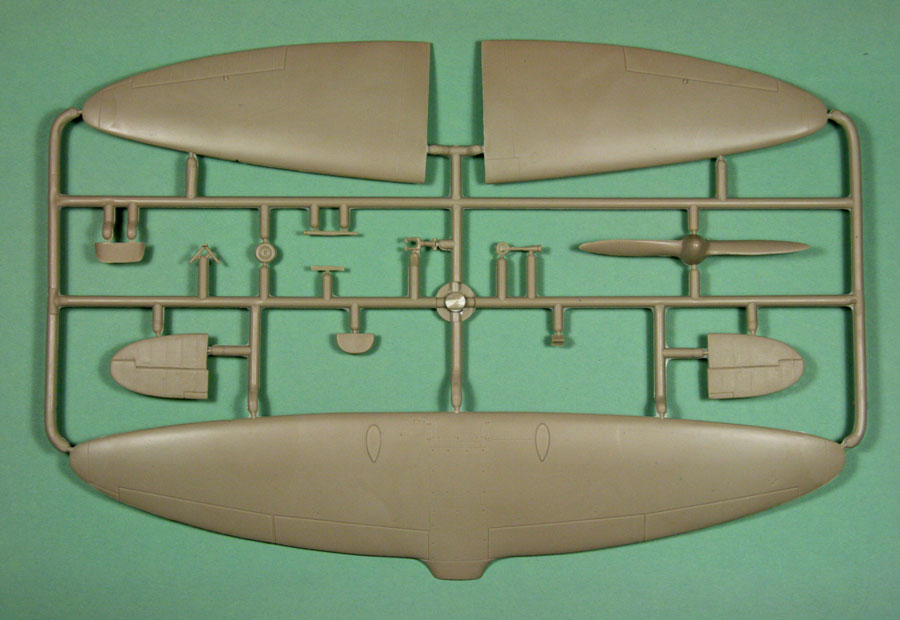
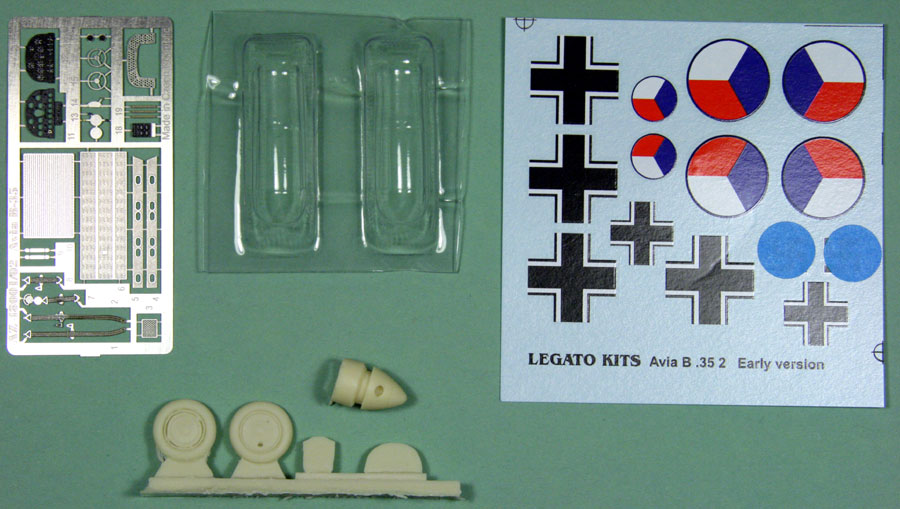
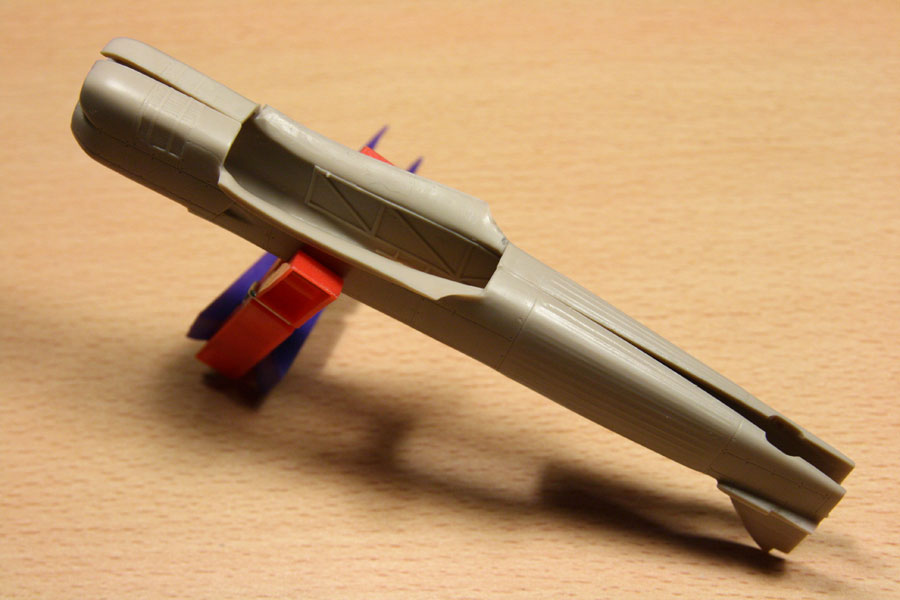
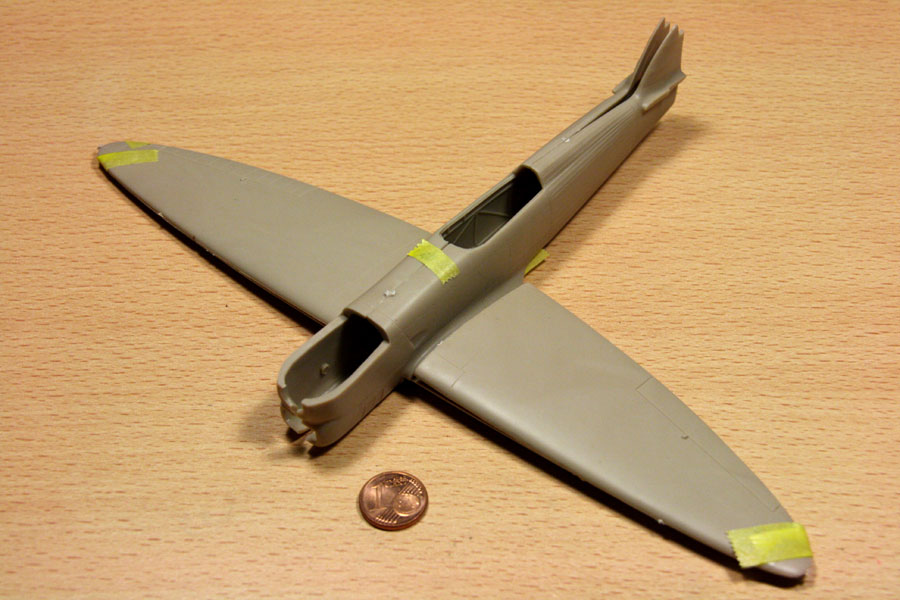
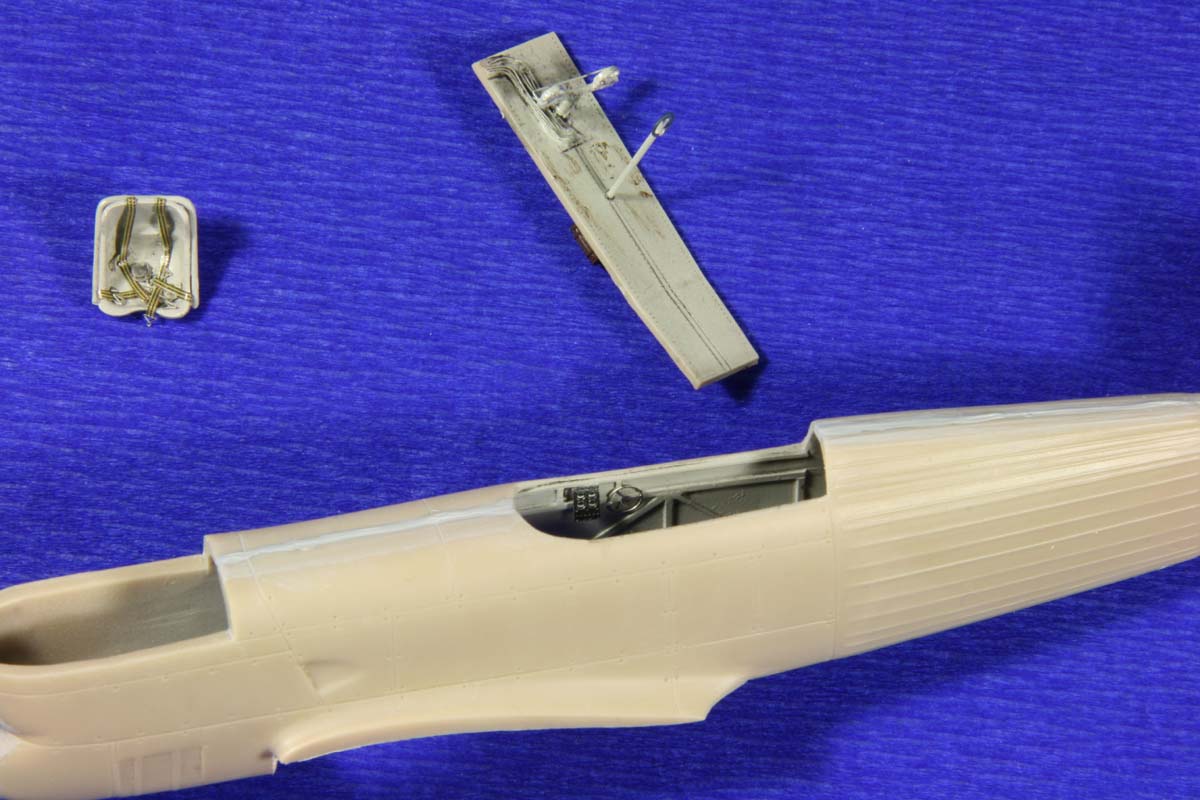
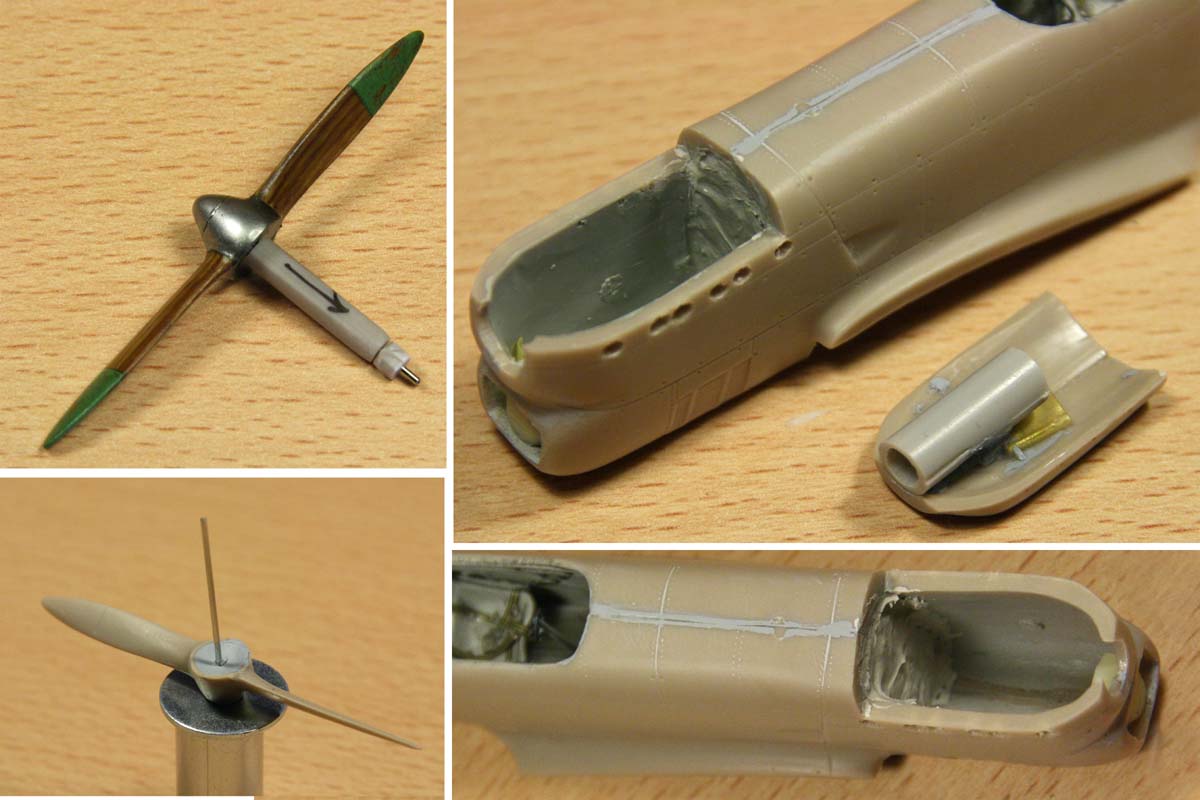
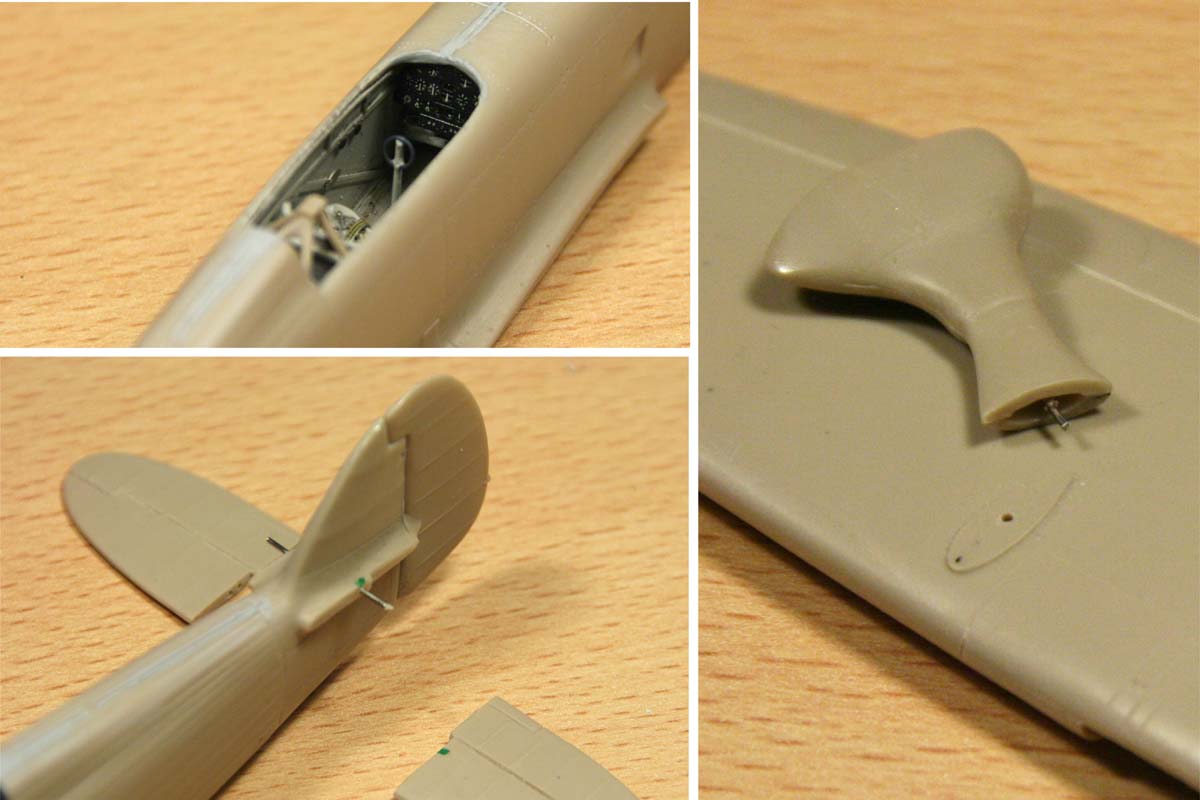
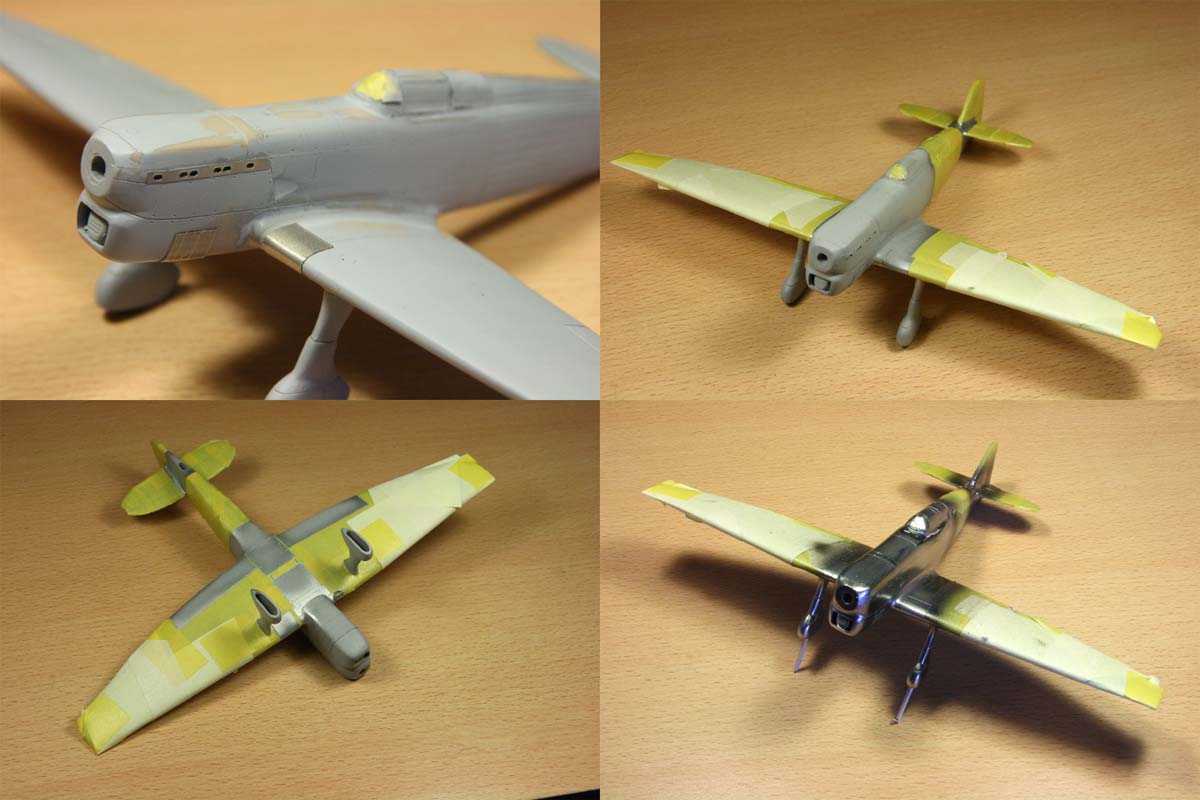
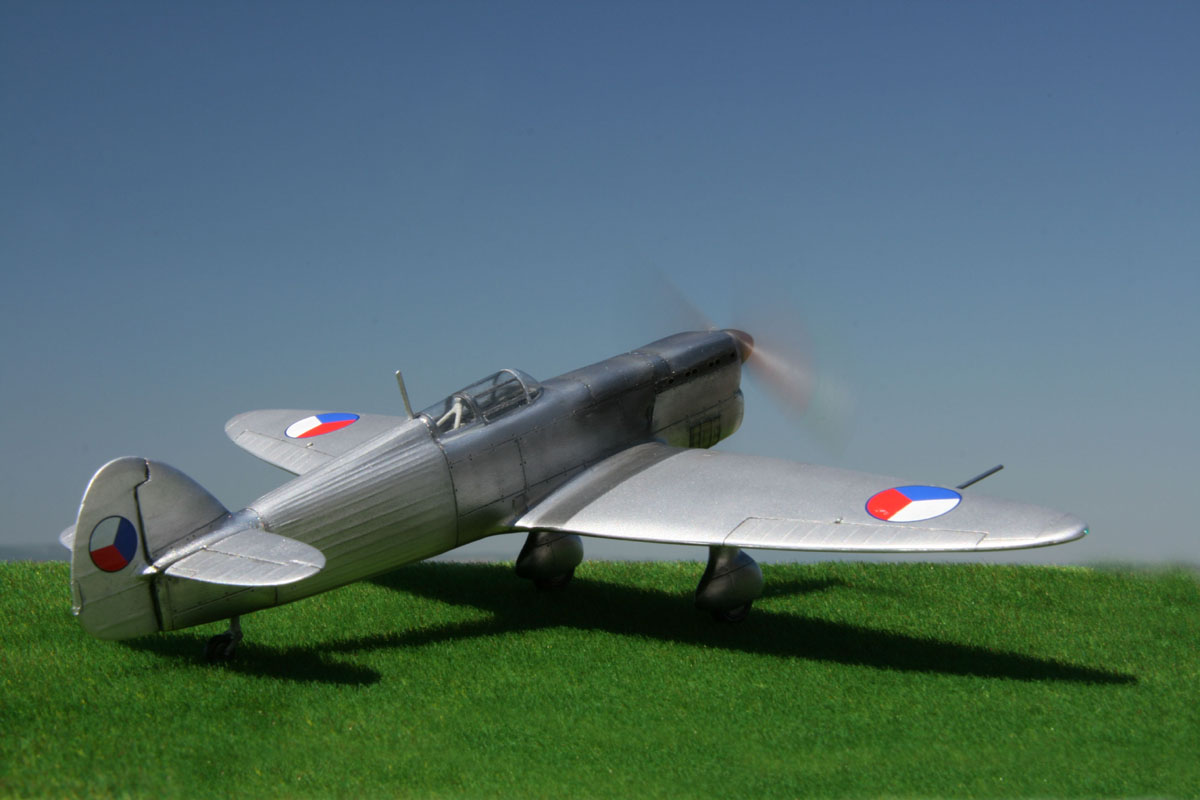
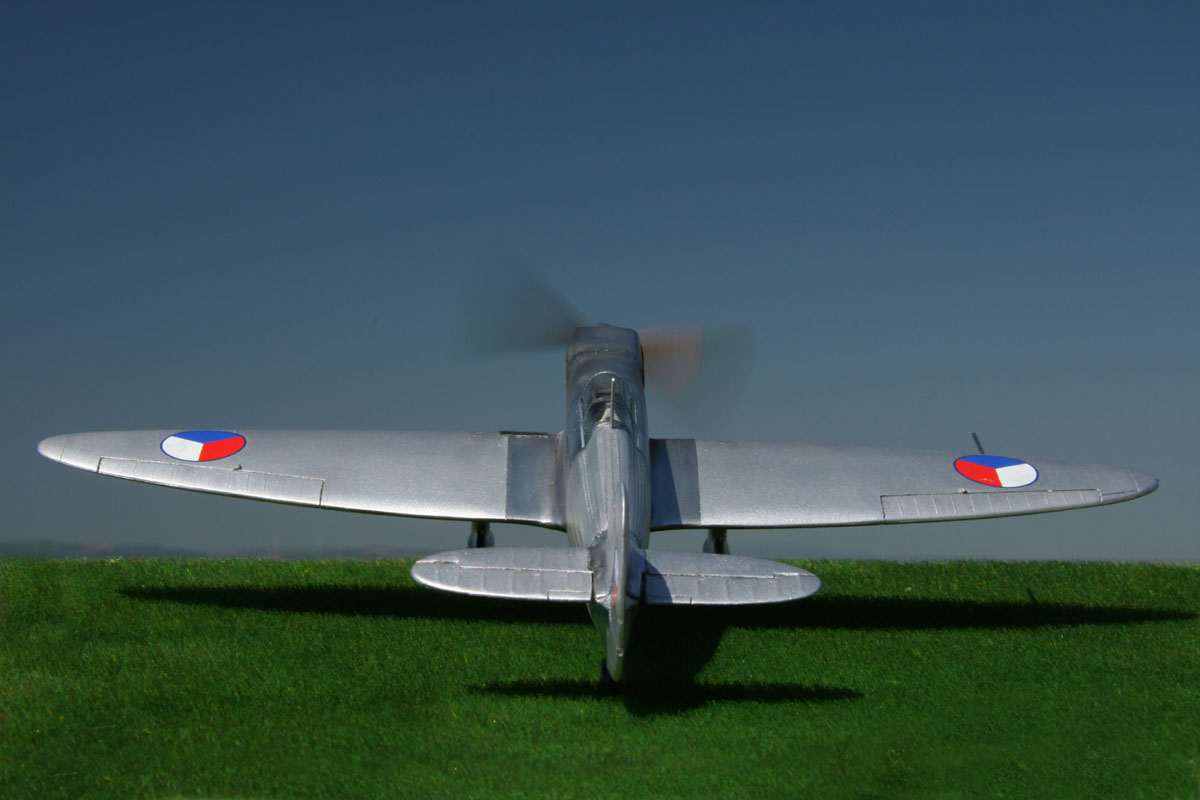
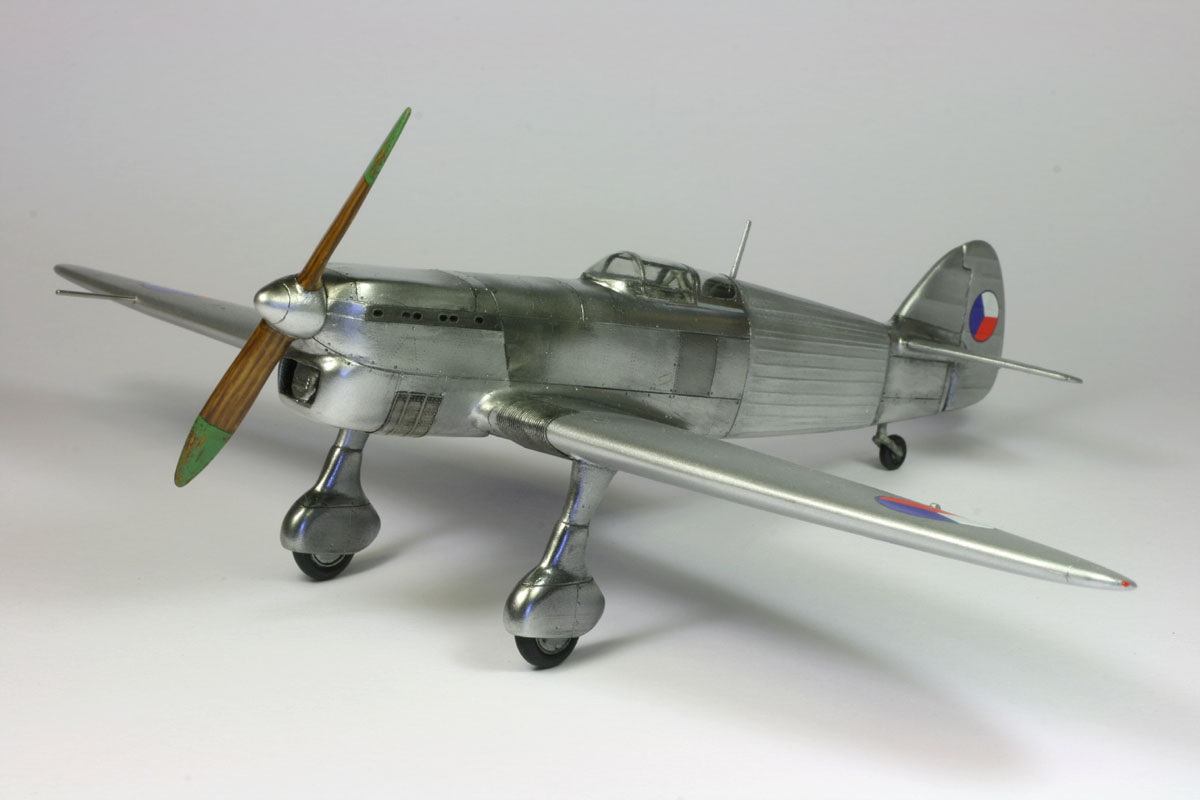
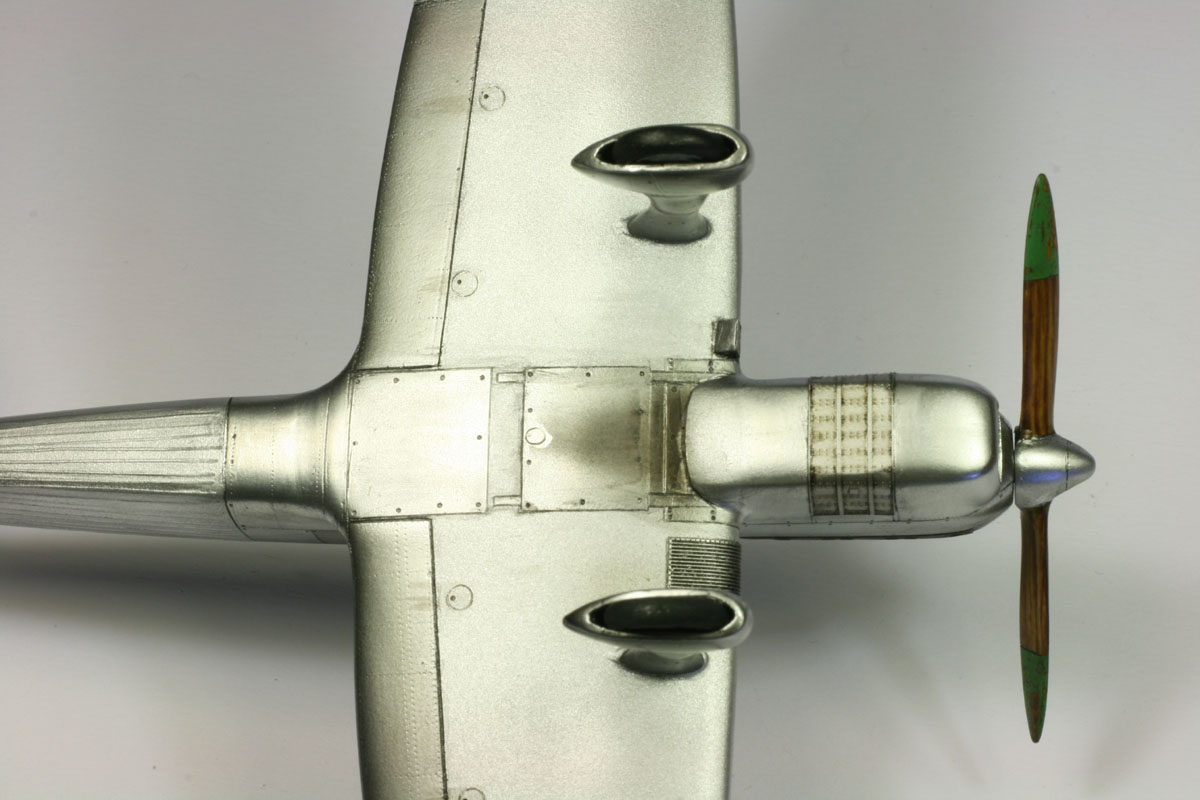
...building the Czechoslovakian Spitfire...Having built my first Avia B35 model at the tender age of around 11, I was quite excited hearing that Legato (www.legatokits.cz) has issues a 48th scale model of this fighter. As a fan of exotic airplanes, I urged my dealer to provide the kit as fast as possible.After a few weeks I've found a box in the mail containing the expected treasure. Legato did a whole job on that, and issued a whole line of B35 models, with different stages of development, as well as the derivatives. I decided for an early version of the planes, still under Czech markings. A few words to the plane itself:The Avia B-35 was a design created 1935 by Frantisek Novotny, as an answer for a specification issued be the Czechoslovakian Airforce to replace their aged B534 fighter. True to the spirit of the thirties, the plane featured a sleek, long nose, and elegant elliptical wings. The aircraft was designed with metal tubing fuselage, and aluminum planking around the engine and in the cockpit area. The wooden wing had partially an aluminum skin. The power plant was a Hispano-Suiza, fitted in later models with a version providing for an auto-cannon located between the banks of the engine.The first prototype flew in September 1938, with reportedly excellent results, but crashed in November 1938 killing the test-pilot. With minor modifications the second prototype, the B-35/2 was put into further testing. Which was interrupted during German invasion, and continued under German marking, ending with an accident in May 1940. Both prototypes featured fixed landing gear, which was changed into a retrievable one, in the last, third prototype. The B-35 did not make it into mass production, but all experiences from that plane was transferred into the design of the Avia B-135, which was sold in small numbers to Bulgarian airforce. The combat record is not well known, there are reports though, of a B-135 downing a B-24 Liberator during the air-raid on Ploesti. The model features the second prototype of the B-35, as it appeared in 1939. Available are German and Czechoslovakian versions. In the box:Opening the box, the kit contains a zip-bag with two sprues in brownish plastic, a small bag of resin parts, a nice fret of photo-etched pieces (done by Eduard), some decals (by TALLY HO!) and two vacu-formed canopies, and a letter-sized instruction sheet in two colors.First looking at the injected parts, the casting looks somewhat rough, and thick-walled - the short run, low-pressure cast may scare modelers used Tamigawa quality, and even some Czech manufacturers provide much better nowadays. On the second look, the surface detail is excellent, with very fine riveting, and recessed panel lines. On first dry fitting, the problem with matching the fuselage parts, experienced already on Legato's Breda 27 comes up again: the halves are somewhat warped, and stand apart. I'm not sure if this is a systematic issue on the tooling, or I just caught a more twisted one. The wings fit together well, and leave hardly a gap to the fuselage. The overall interior detail is not overly generous, but I think it's enough for what can be seen through the narrow canopy. The vacu-canopy is thick, and unfortunately blurred. A lot of sanding and polishing is needed to get a useful part. On the positive side, there are two of them. A nice gesture would be also a separate bag for the canopy, to prevent additional scratches. The printed PE-fret is of typical excellent Eduard quality, and includes cockpit parts, belt and some exhaust bits and pieces. The decals are also very good, with no register, and - judging by formerly applied TALLO HO! decals - excellent in terms of low thickness, elasticity and setting. So considered the kit is excellently equipped, AZ-Models do a good job here. To be really decadent, one could wish for a set of masks, which surely are also provided by Eduard. In spite of some minor issues with the kit I congratulate Legato for continuous courage for issuing some beautiful relics of aviation history. Starting the assembly:During research I've found some plans on the web, and as it seems, the model is actually quite closely resembling the drawing.CockpitAs mentioned the kit is a short run technology offering, which unfortunately shows a lot in the assembly process. I started with painting the fuselage inside, using a neutral gray. Some PE-gages were then fitted onto the cockpit walls. The instrument panel comes as a printed PE-part, with a transparent foil for instrument glasses. The seat got a frame made from a wire paper clip, and the nice PE safety belts. These parts were also sprayed gray, as well as the cockpit floor. The rudder pedals were fixed from PE bits.Since the cockpit can be completely fitted into the fuselage through the bottom, I started with the tedious task of merging the twisted fuselage halves. Initially I considered re-shaping the parts, but then I just decided to go for rough force. I started gluing the fuselage from the center, using capillary glue bit by bit. With a lot of squeezing, gluing, taping, and fixing I managed to merge the halves in many small steps. While the tail was fitting OK, the nose section has an offset of about a millimeter. Unfortunately, also the seam on the top and bottom was not clean, so it was putty-time. The first rough sanding removed the previously acclaimed fine details from around the seam. But not only recessed details went, which are easily restored - also the elevated ribs in the canvass-covered rear area of the fuselage were flat by that time. I restored them by gluing thin threads of stretched sprue, and wetting them with plenty of styrene solvent. This way the stringer patterns in the rear fuselage got back onto the model. The cockpit was inserted through the bottom, first the panel, then the seat, and finally the floor. To prevent any crevices on the side of the cockpit floor, I filled the gap between it and the fuselage wall with thick Surfacer 500. The top engine compartment cover is done separately, which actually makes the shaping of the fuselage even more difficult, but on the other hand probably allows for easy replacement for the later prototype version of the bird, which features openings for the guns in the concerned spot. The fuselage got a “firewall” inside, just behind the cover. This separation will prevent dust from entering the cockpit, during the heavy sanding that is to follow. The quality of the canopy is not the best, but it’s possible to re-furbish it. Using sanding and polishing sticks, as well as Tamiya polishing agent, I managed to bring the clear part into a useful condition. The cage behind the pilot’s head should actually be reaching to the top of the canopy from below. I didn’t notice that in the first step, and positioned it too deep and too far back. I relized the mislocation first after the canopy was glued. In the end I had to rip the canopy off, and re-do these parts. Attaching the vacu canopy is tricky - in particular sanding the putty at the base after filling up the gaps. Fuselage assemblyThe top and bottom half of the wing was merged, after removing as much material from the inside of the trailing edge as I just dared. The wing is extremely thick, so I also removed some from the top of the trailing edge, since there’s practically no structure. The fit of the wing to the fuselage was quite good, with hardly a gap, so happily I glued it with the usual capillary glue.The elevators got metal pins to stay in place, same as the landing gear legs. Wheels would be fitted in later since they have no axle, and just sit in the flared “trouser-legs”. Next step was to add a shaft to the prop, which was prepared using a thick precision syringe. The counter bearing was made out of drilled pieces of sprue. Then the shaft was fixed in place with a small piece of plastic at the free end of the shaft. In order to be able to insert it into the fuselage later, I attached a sleeve below the motor compartment cover, which snugly accommodated the shaft bearing. That way I could close the fuselage without bothering too much about how to apply the prop later, or about dust or spray in the cockpit. PaintingAfter applying Tamiya tape masking to the canopy windows, it was time for all-over coat of primer - as usual, Mr. Surfacer 1000.Quite happy about the result, I got a shock, when looking at the big picture: the wing was quite severely misaligned against the fuselage! Relying on the nice fit of the parts, I forgot to check for the overall geometry of the model! At this point I was seriously considering, tossing the project into the garbage. I‘m usually not giving up easily, but that got me to a point, where I started wondering, if I should keep on wasting my time with this cripple. Finally, I decided for one drastic measure: I ripped the wing off the fuselage, by sheer force, and cut out all connecting edges between the fuselage and the wing about 1mm deep. Now there was no thinking about a nice fit, but a 3D-alignment was now possible. Using modeling clay, I lined up the wing against the fuselage, and fixed everything with a * LOT* of putty. After another sanding orgy, I managed to get the overall shape back in order. But of course, after that maneuver, plenty of the acclaimed details on the fuselage sides and wings was gone too… After another priming, I re-scribed the lost panel lines and these many rivets, and drilled out the exhaust ports. These steps done, the PE parts were applied, and the model looked good again. Since the wings were wood and the fuselage back stretched canvass, I just decided for painting them Tamiya silver. The metal planking on the wings and the front part of fuselage for an Alclad 2 treatment. The prop was painted with half-translucent artist oils, wet in wet, using some 4 different hues of brown. The effect is as usual rather nice. I wanted the greenish prop tips to look worn, so I tried the salt technique. Unfortunately, the salt was too rough, and I didn‘t run it through a sock, so the effect were round marks in the green. I fixed that with fine sanding paper, and some touching-up with a delicate brush. The decals were applied just straight onto the Tamiya paint, and were definitely a highlight of this kit. Perfect register, excellent to apply, no silvering and very thin after drying. After that, only minor details had to be added like position lights, the wheels, antenna and the tail wheel . FinishingSince I didn‘t want to seal off the shiny Alclad, I decided to use water based aquarelle paints as a wash for the panel lines. When this paint dries, it leaves only a faint color - just what I wanted. Some metal panels got a final accent with a differently shaded Alclad, and some panel lines were just accentuated by changing the surface texture by spraying some future here and there. The smoke trails were added with Tamiya smoke, and then Xtracolor flat varnish.ConclusionOverall, the kit allows to make the model of a beautiful airplane, but definitely at a price in nerves and gray hair. While looking great in the box, most of the miniature and delicate detail is gone by the time the parts are put together. This nasty piece of work truly demands and a lot patience and discipline - and probably a masochistic trait, too… |
                |
 |
 |
 |
 |
 |
 |
 |
 |
 |
July 2008