
Italeri 1:72
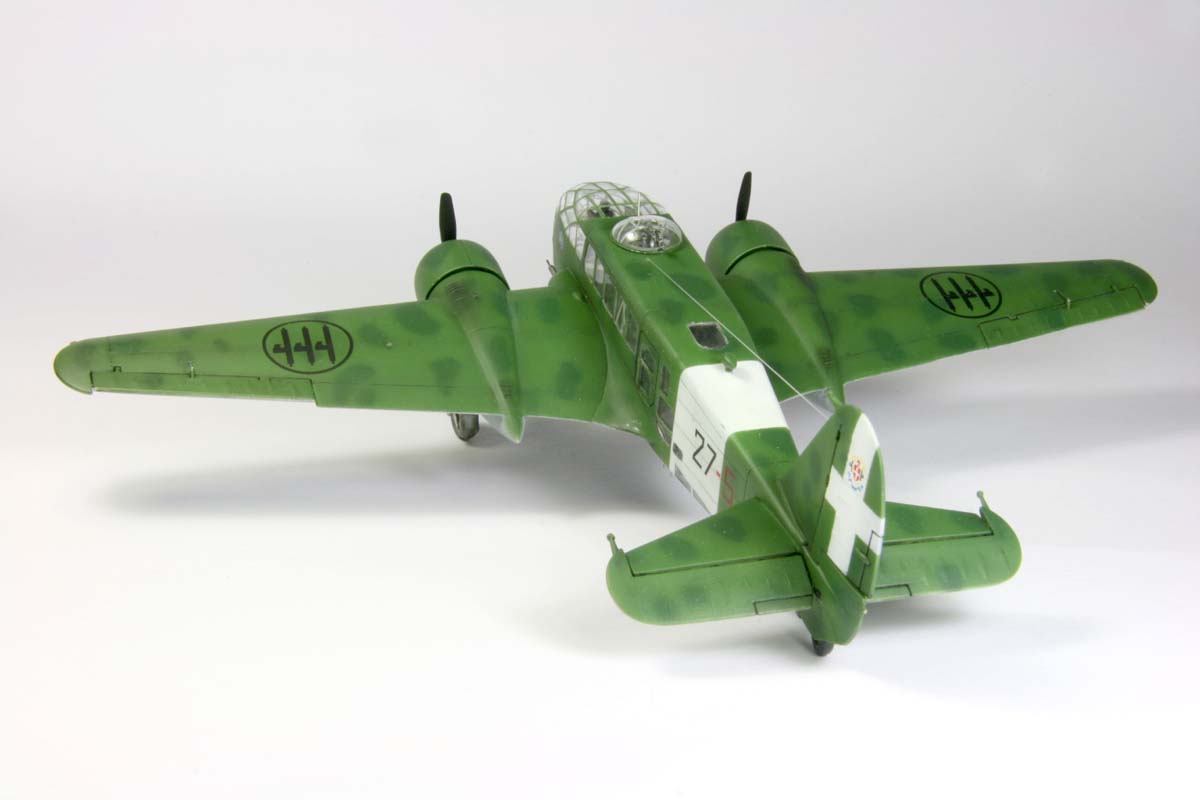
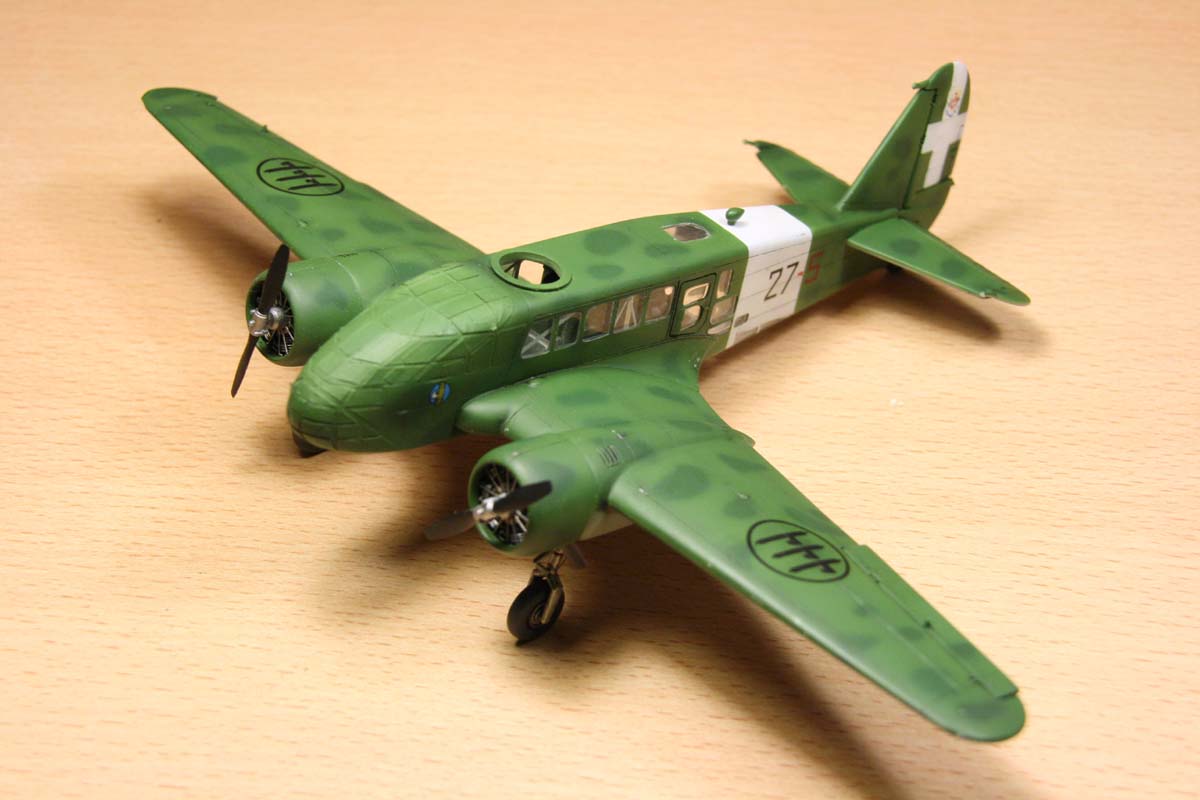
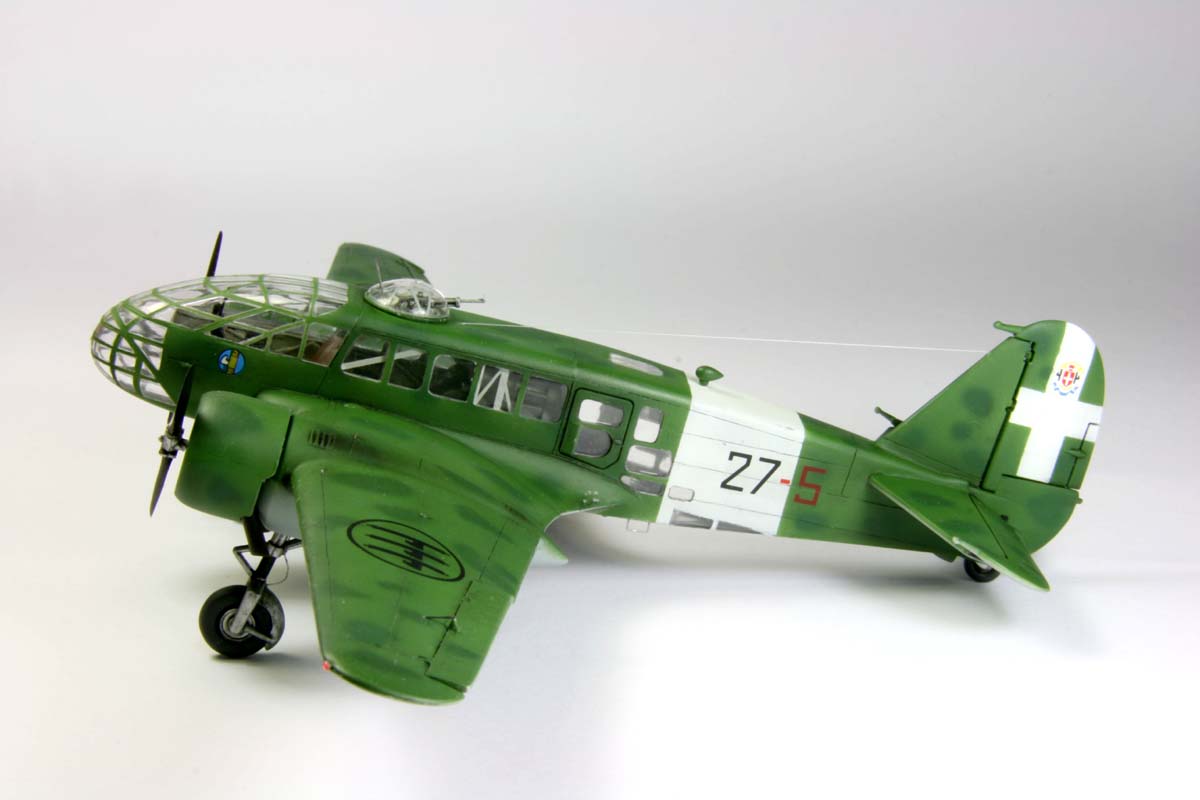
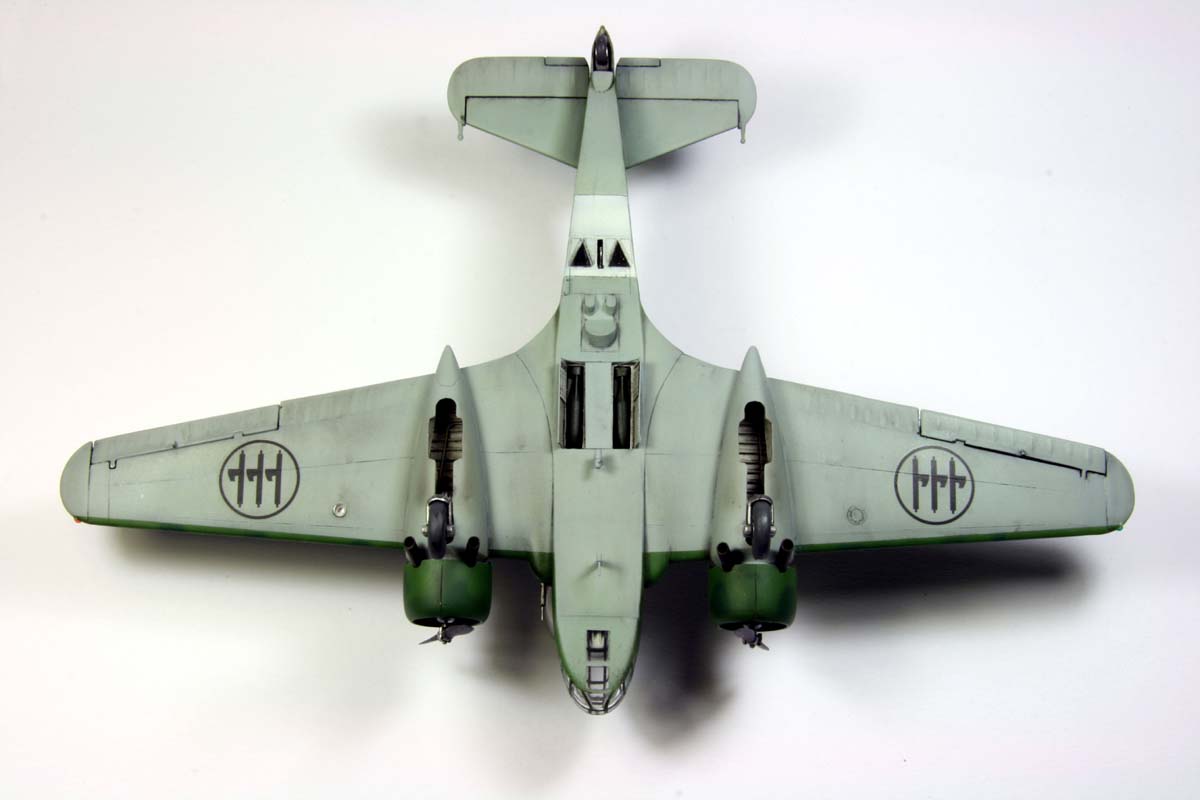
The planeThe CA.111 was a reconnaissance airplane, with a limited bombing capability. It was introduced into the Italian units starting 1940, and was used throughout WWII on all theatres involving Italian forces. The design was a further development of the little successful CA.310 project, which initially was a concept for a semi-military passenger type plane, capable - among others - of performing tasks in the colonies.The family of these airplanes mostly distinguished itself by poor reliability and performance: Export orders for the CA.310 to Norway, Romania and Yugoslavia were cancelled after a few initial units due to noncompliance to contracted specifications. The CA.311 was supposed to be sold to Great Britain as a bomber trainer, which was (initially) actually permitted by Germany, even though WWII was already on, on the western front, which did not indicate a lot of esteem for this type. Due to the extensive glazing, the airplane had an excellent visibility and came to use with nearly all Italian reconnaissance units, up until after the end of the conflict. In total 335 planes were built. The design featured tubing frame with canvass, plywood and metal skin. The end of the fuselage was wooden, control surfaces all canvass covered. It was powered by two 470hp Piaggio 7-cylinder star engines. |
  |
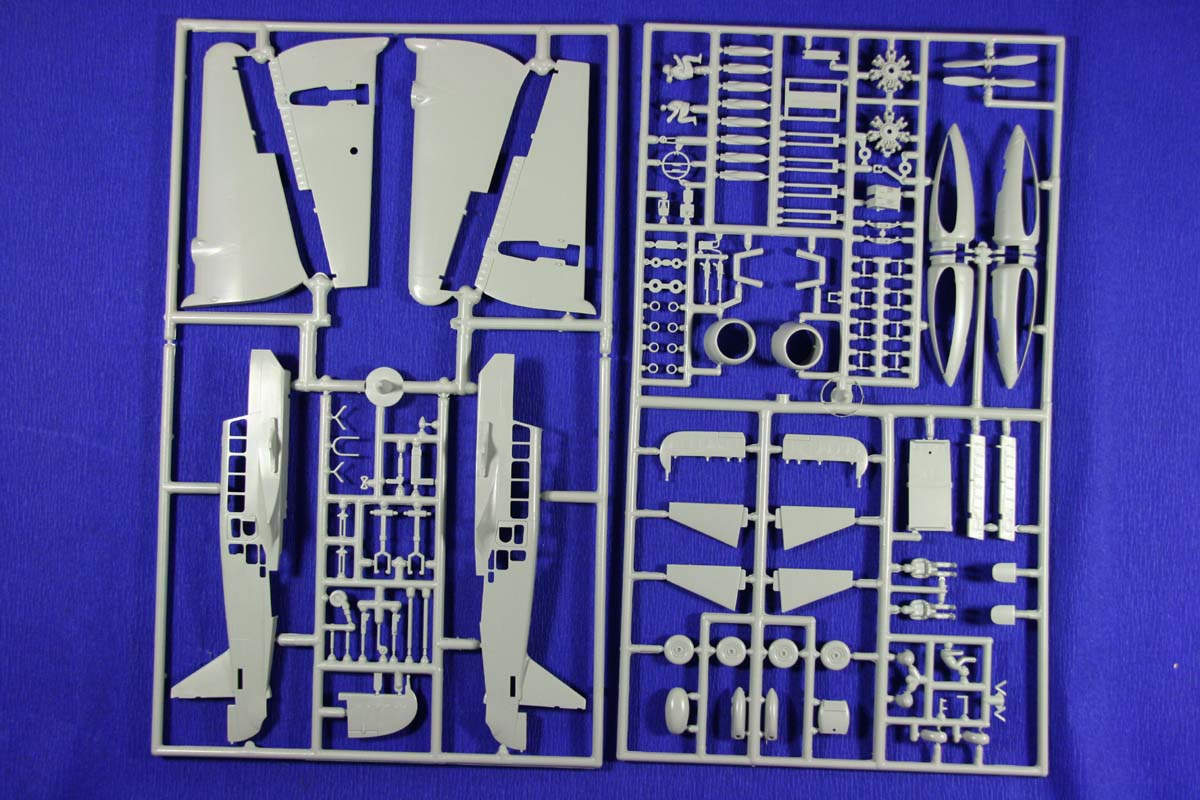
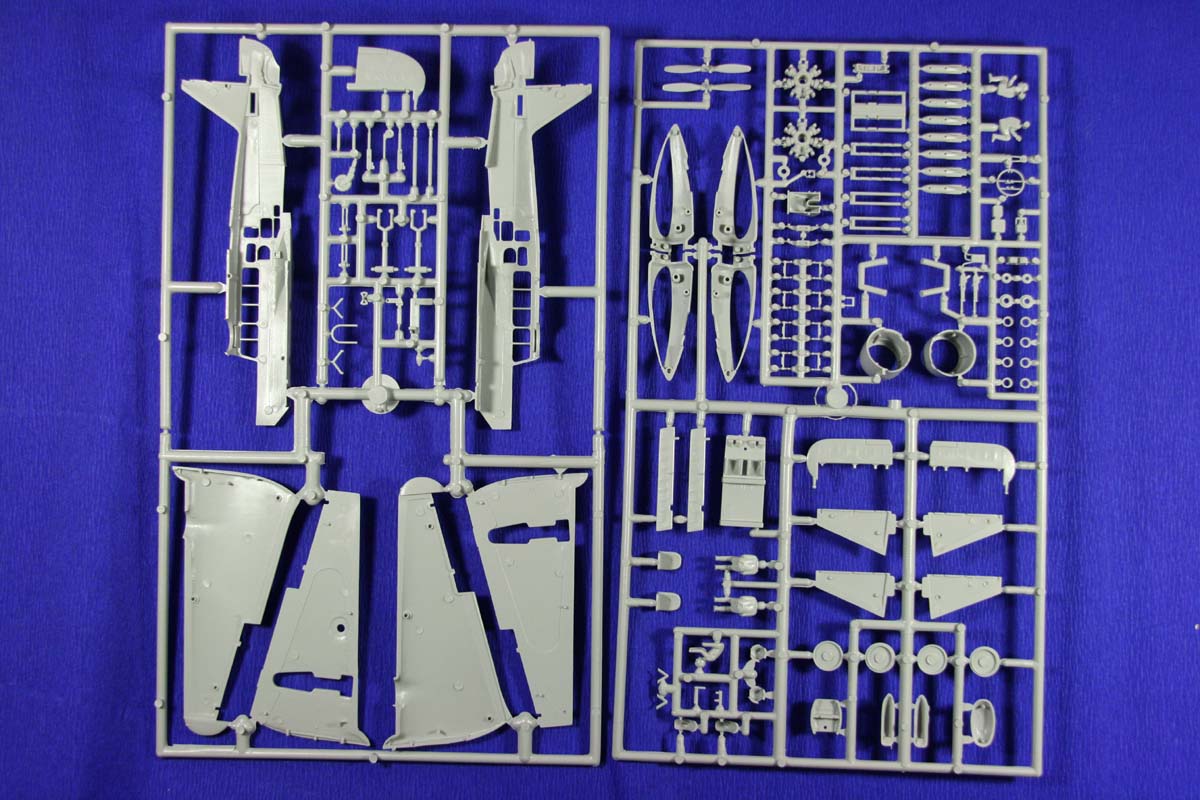
The kitItaleri’s offering is not really state of the art, I presume it’s a re-box of a tooling from the last millenium, containing two gray sprues, one clear one and a set of decals. The quality of the cast is decent, and the clear parts are without blur. Panel lines are practically not existing, and if, then elevated. One drawback are the sink marks in the clear parts. The decals are very good quality. Another problem though, is that the generous instruction sheet does not mention the corresponding military units or locations of use for the proposed painting variants. |
 |
 |
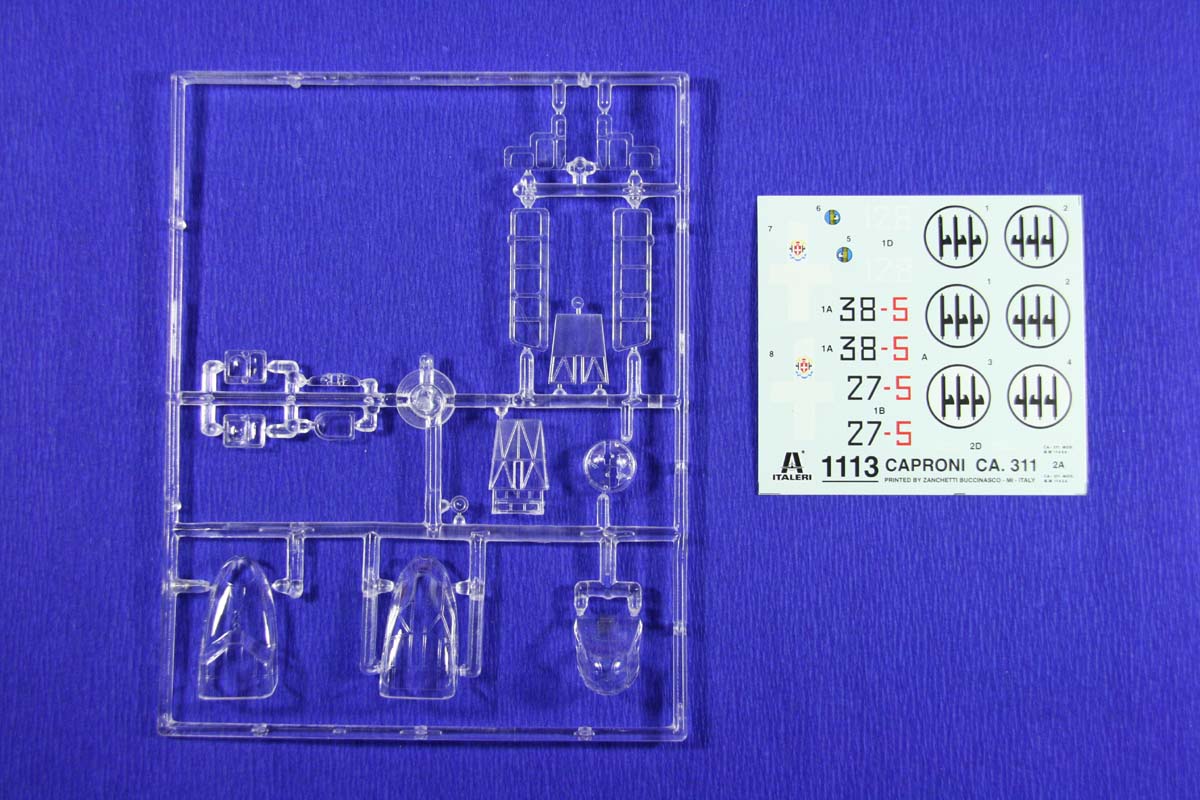 |
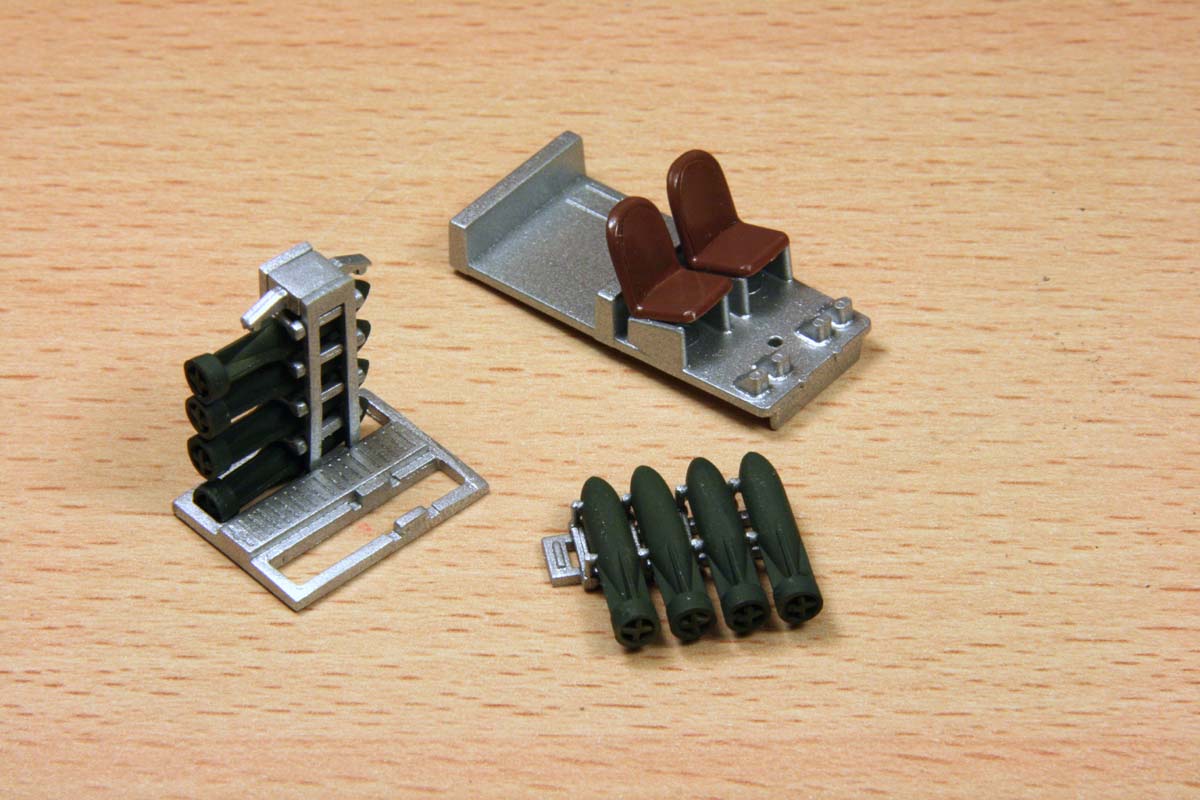
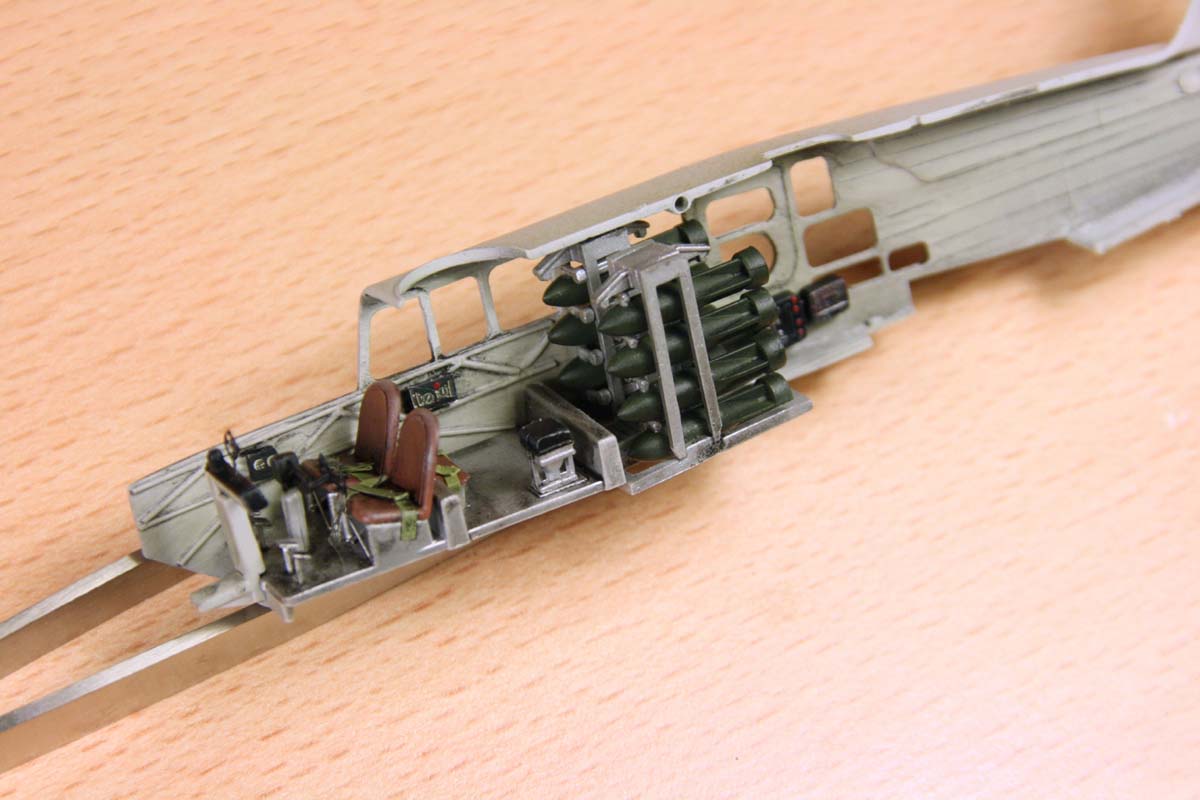
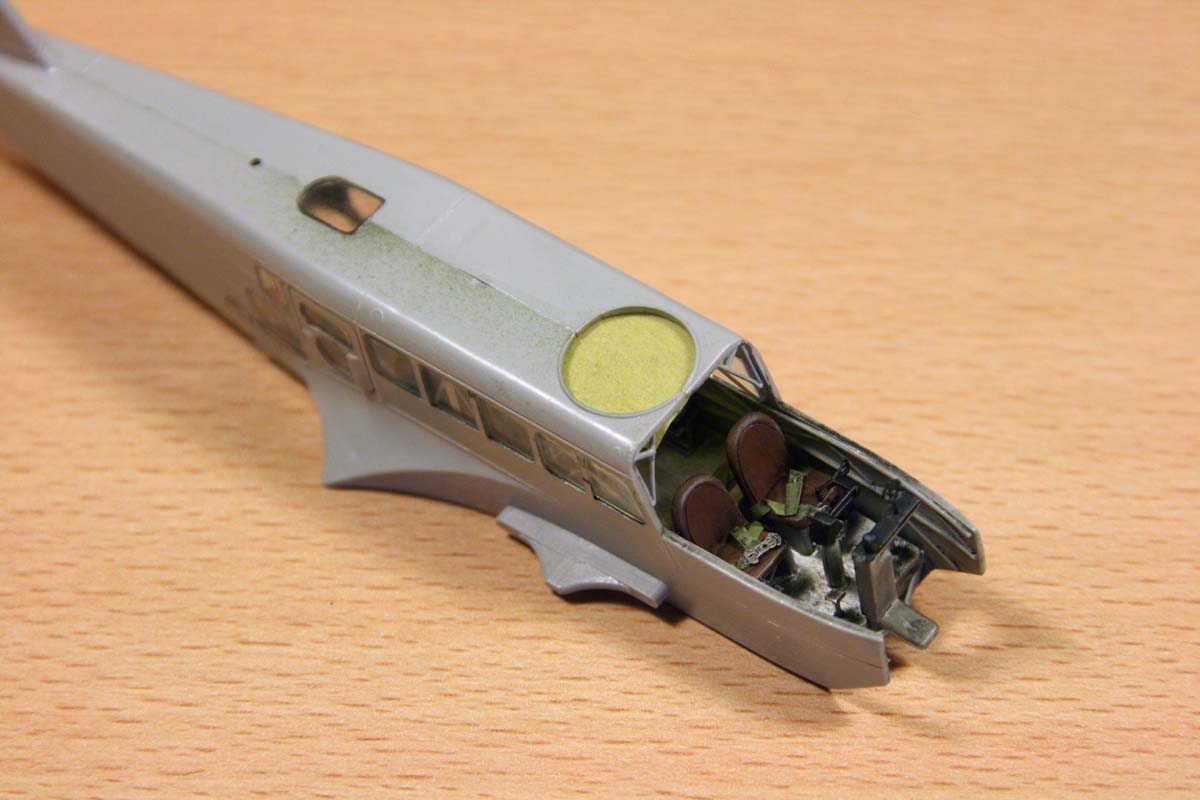
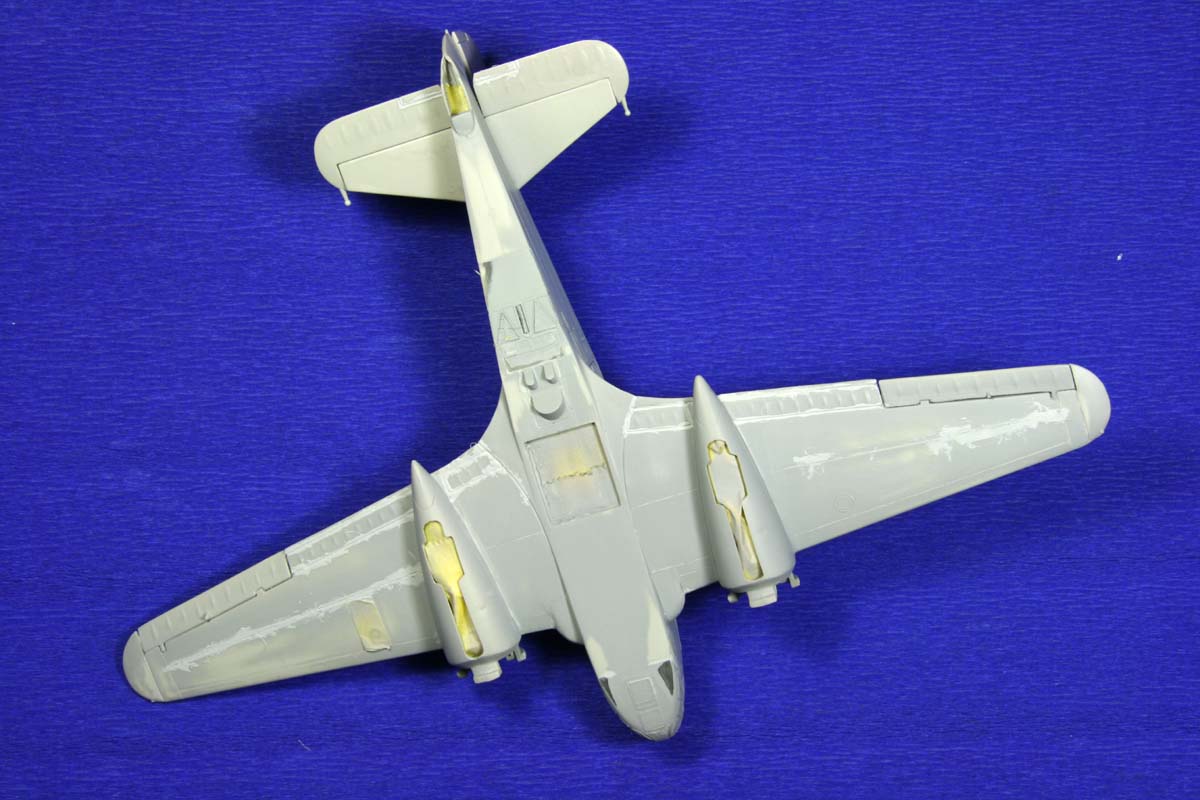
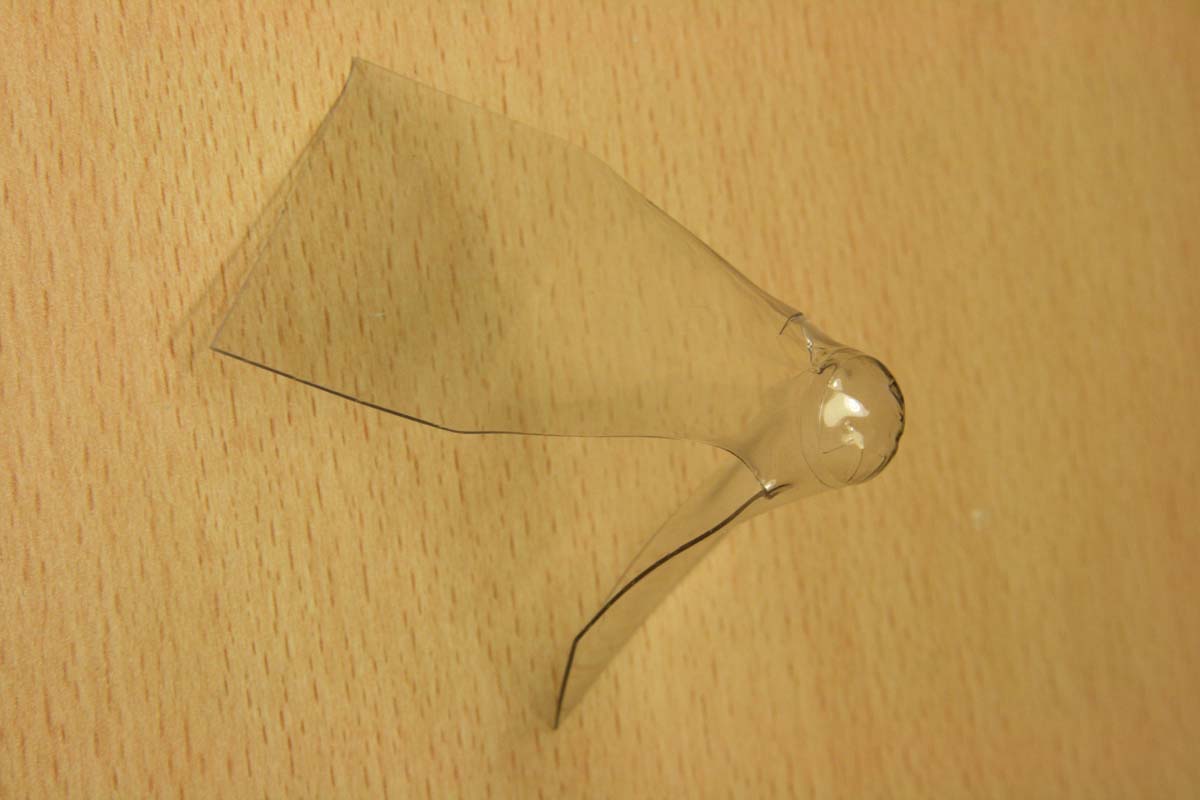
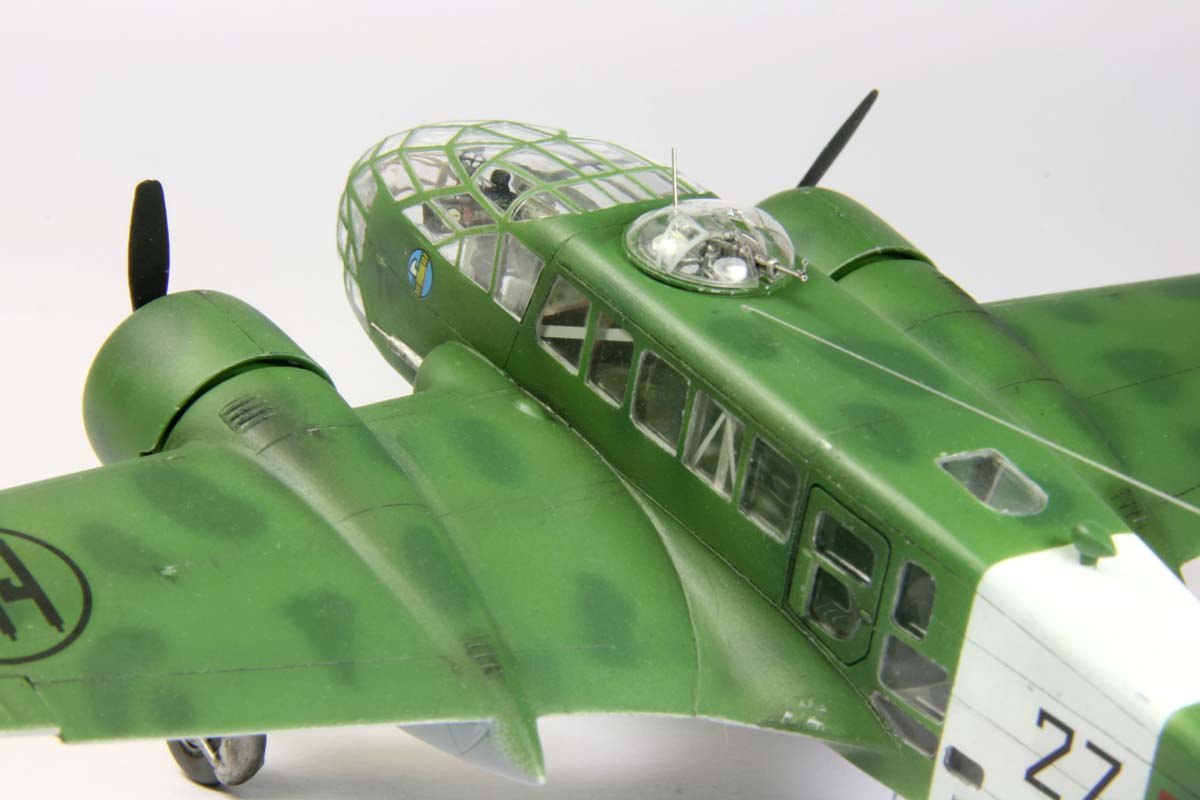
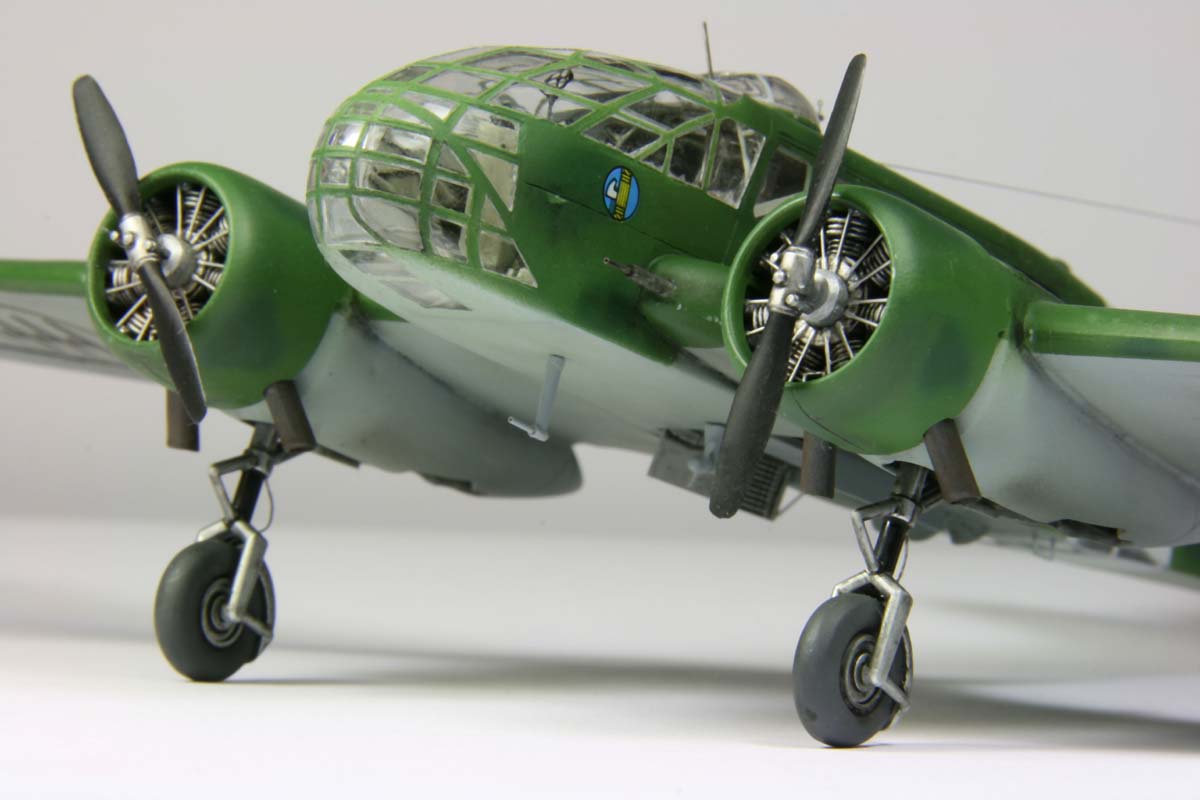
The buildSince the inside of the aircraft is well visible through the ample glazing, the interior has to be beefed up considerably. I have scratch-built a number of struts, framework, gages and cables inside the canopy, since many of these features are apparent when looking at pictures of the real aircraft. I also decided to open the bomb doors.The sink holes in the flat clear parts provide a specific problem: they distort the view into the fuselage. They had to be sanded out from every window, reducing the thickness to about one-half. To make them fit, either the undercut had to be removed, or – if many small windows were held together on one clear part – the wall of the fuselage had to be thinned. |
 |
 |
 |
 |
 |
|
After the weathering, the fuselage was closed, and this is where the fun really started. The biggest challenge on this model was the masking of the myriad of windows. This process took me about six weeks, because I couldn’t force myself to do more then three per day. I cut pieces of Tamiya tape directly on the glass of the curved nose with a very sharp scalpel. For the flat windows I used a different technique: I attached a piece of paper adhesive tape on the fuselage before the window panes were applied, and sprayed through the window opening on the tape. This shape was then used as a positive to create masks out of Tamiya tape. |
 |
|
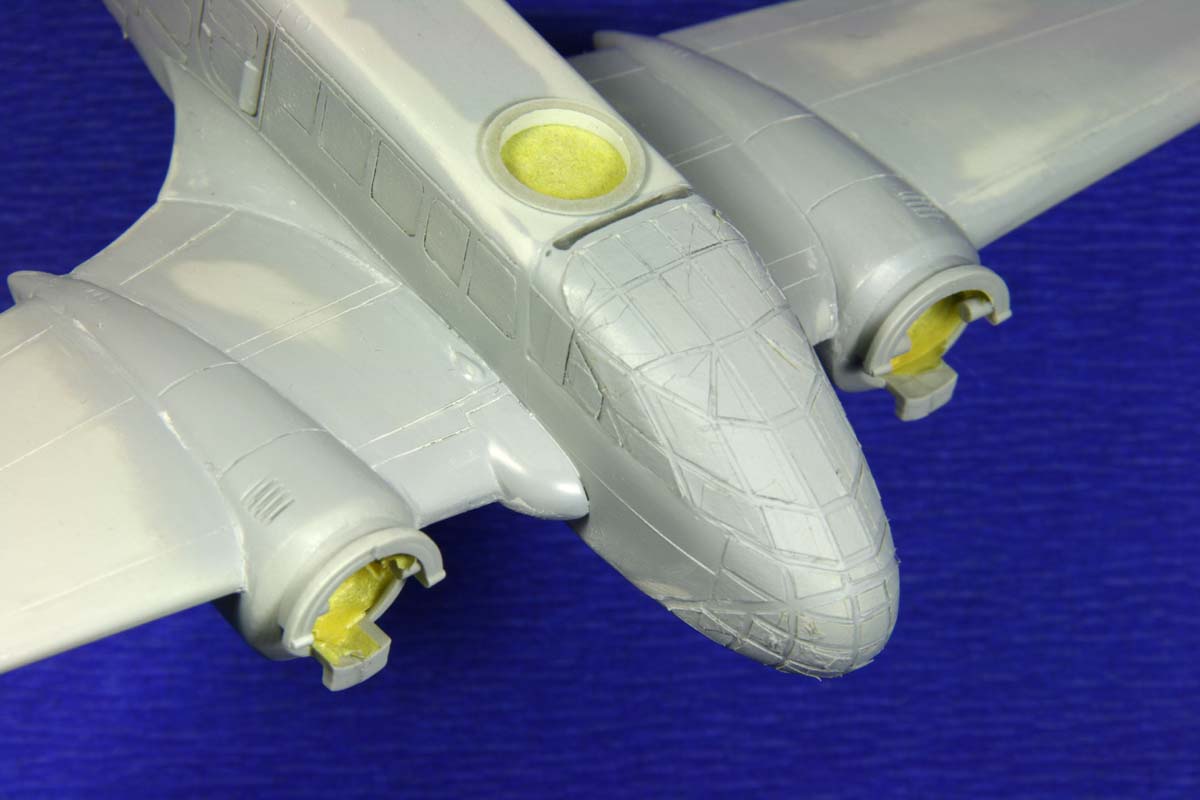
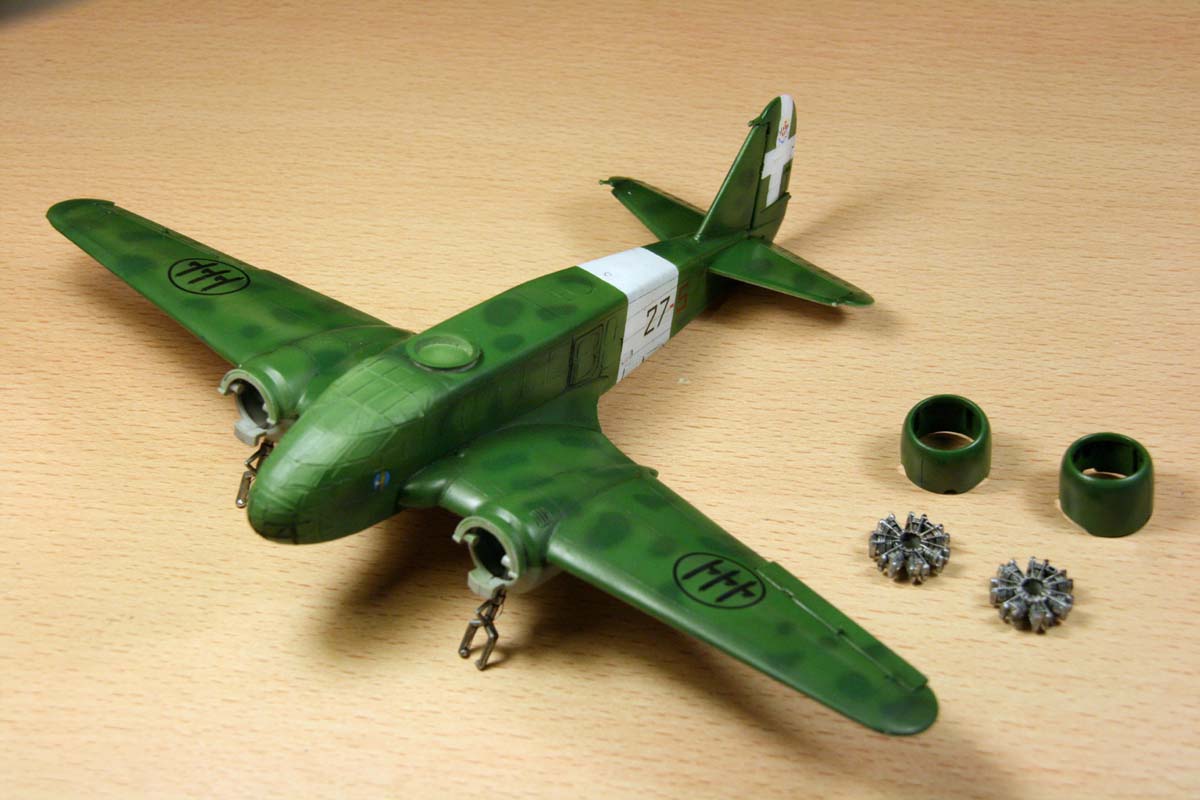
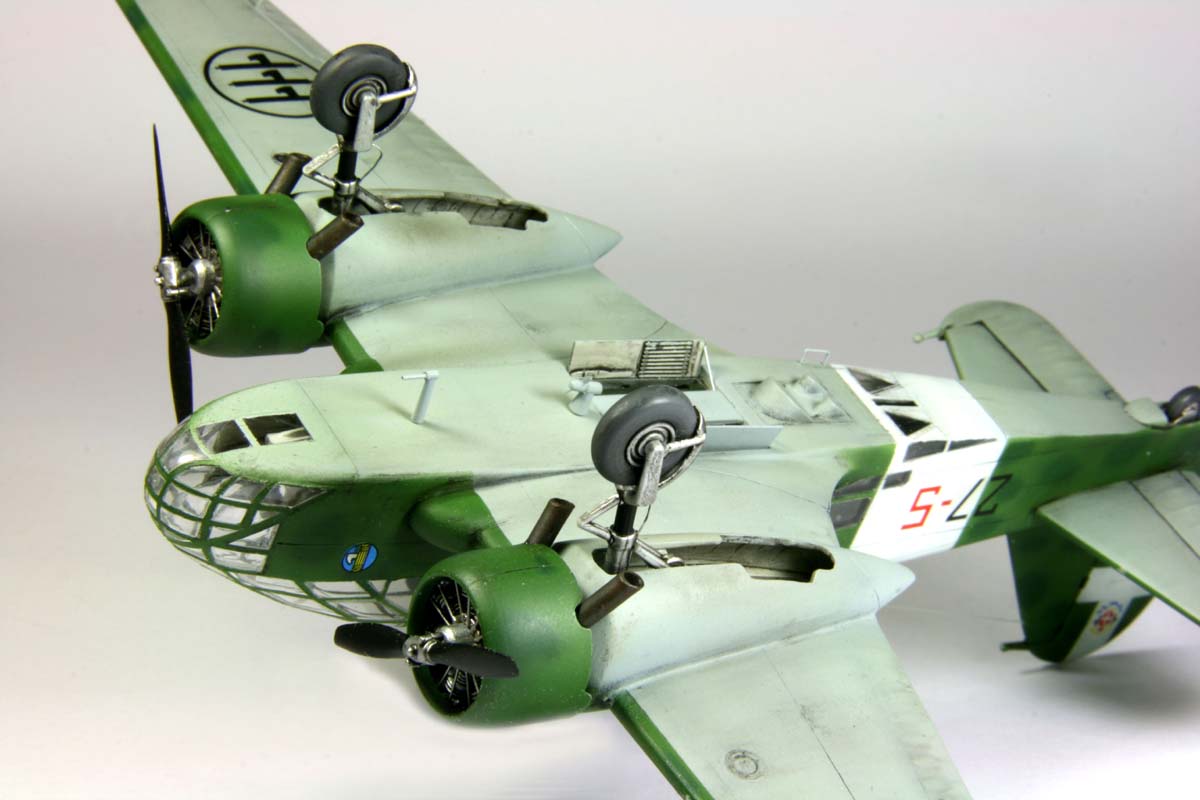
The wings and tail were simple to apply. The engine nacelles were somewhat weird,
because they were to be glued on top of the wing, without any orientation points.
That’s an invitation for misalignment of parts. This is particularly to be considered
for the prominent landing gear legs. I had to re-align them after the final assembly. On top of that, I added some bits and pieces inside the nacelles, as well as the brake lines for the gear legs. |
 |
|
The engine cowlings were not yet applied, because I wanted to have spinning props.
For that purpose I re-vamped the engine first: I turned the start back to front,
re-applied the cooler scoops and the push-rods, and then drilled through the center.
The props got axles made from pins, so that they could rotate freely. The whole assembly
would be applied at the end of the build, together with the drilled-out exhausts. |
 |
|
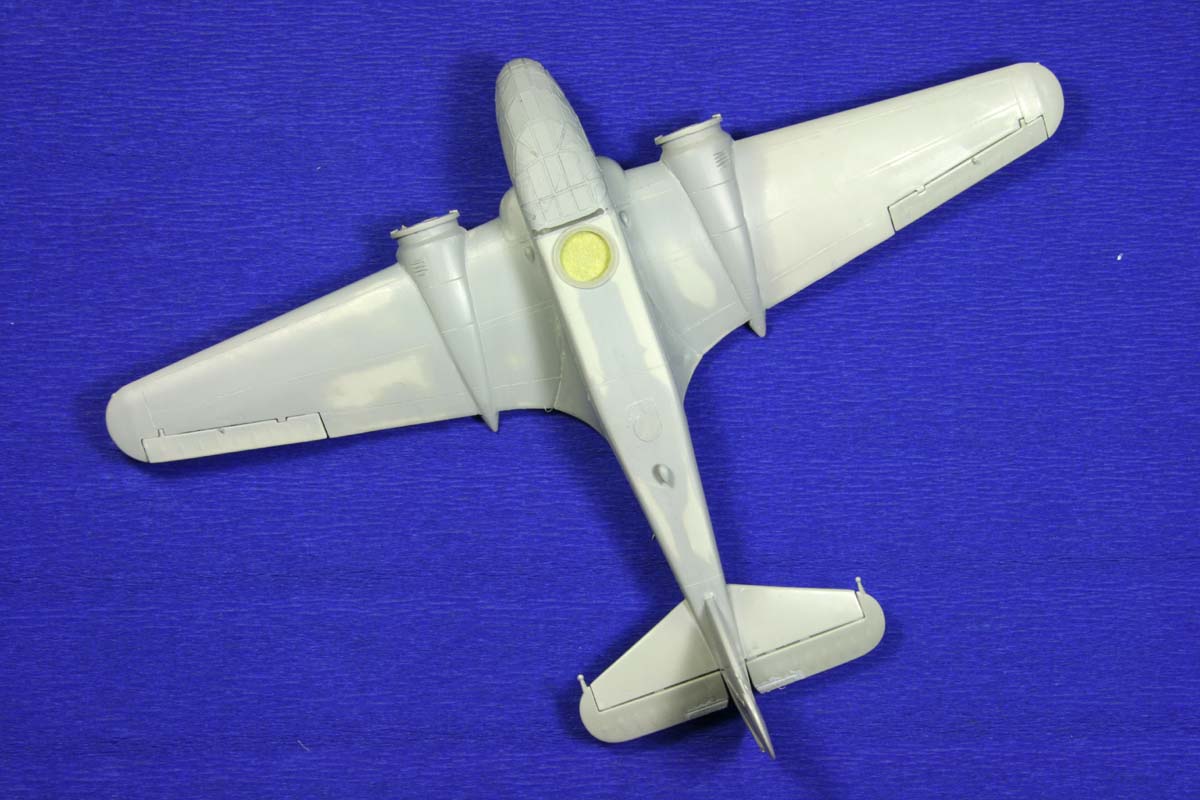
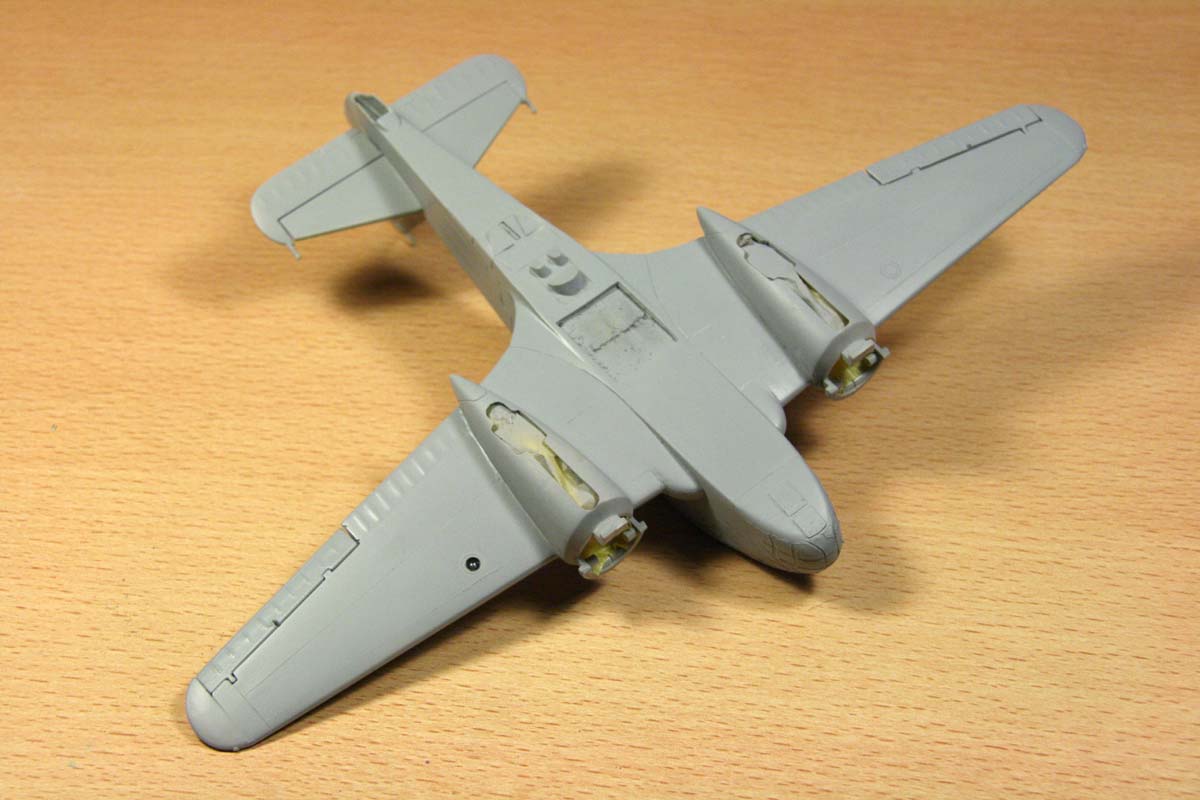
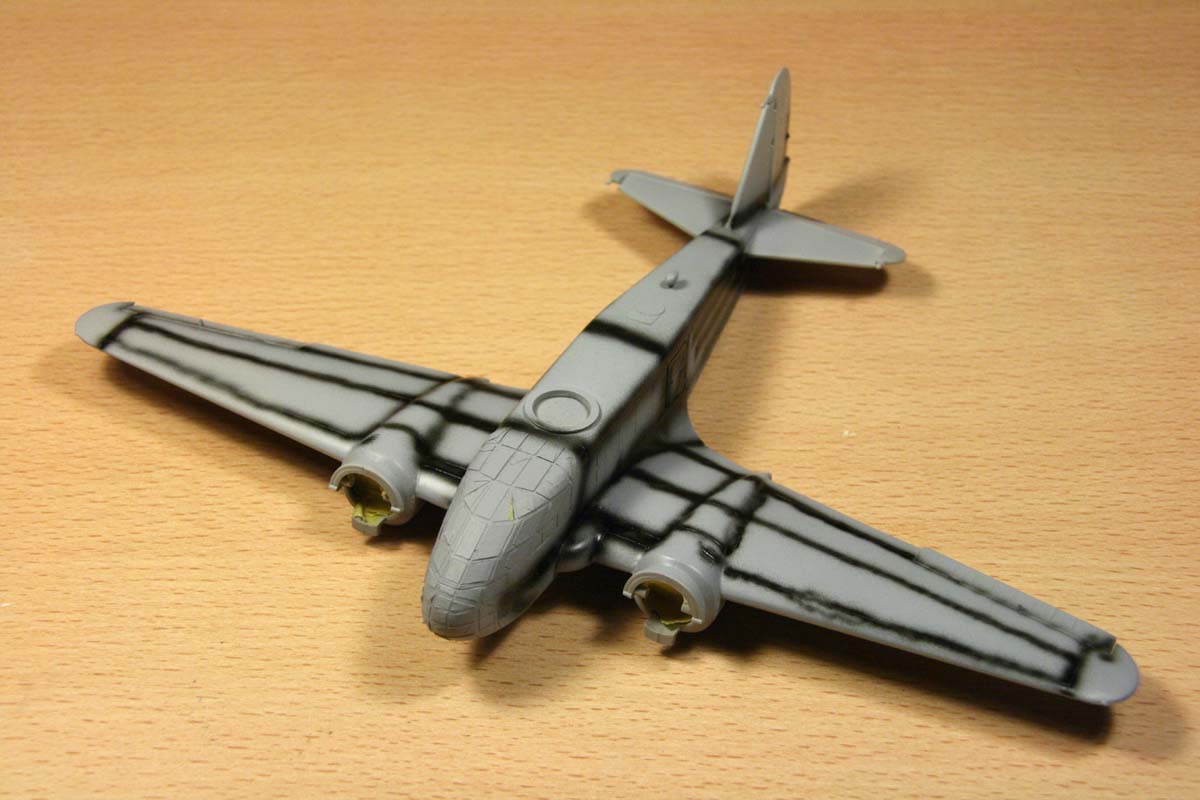
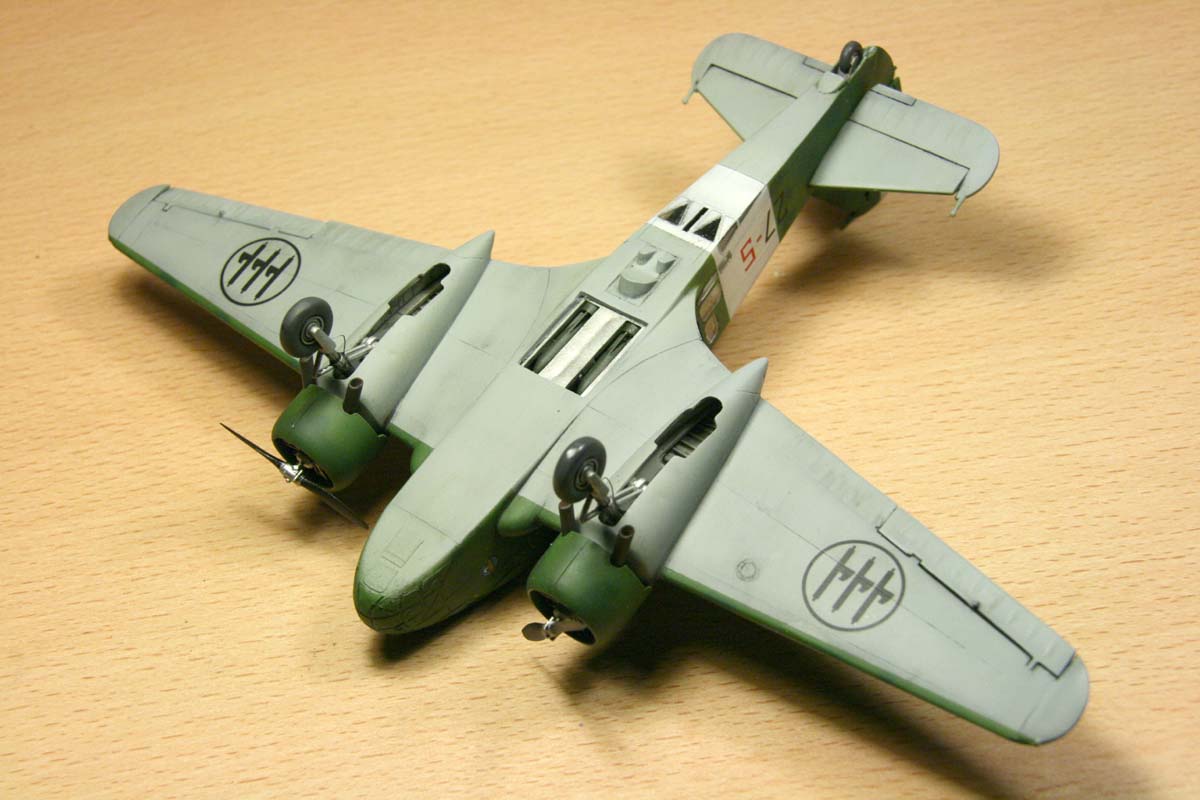
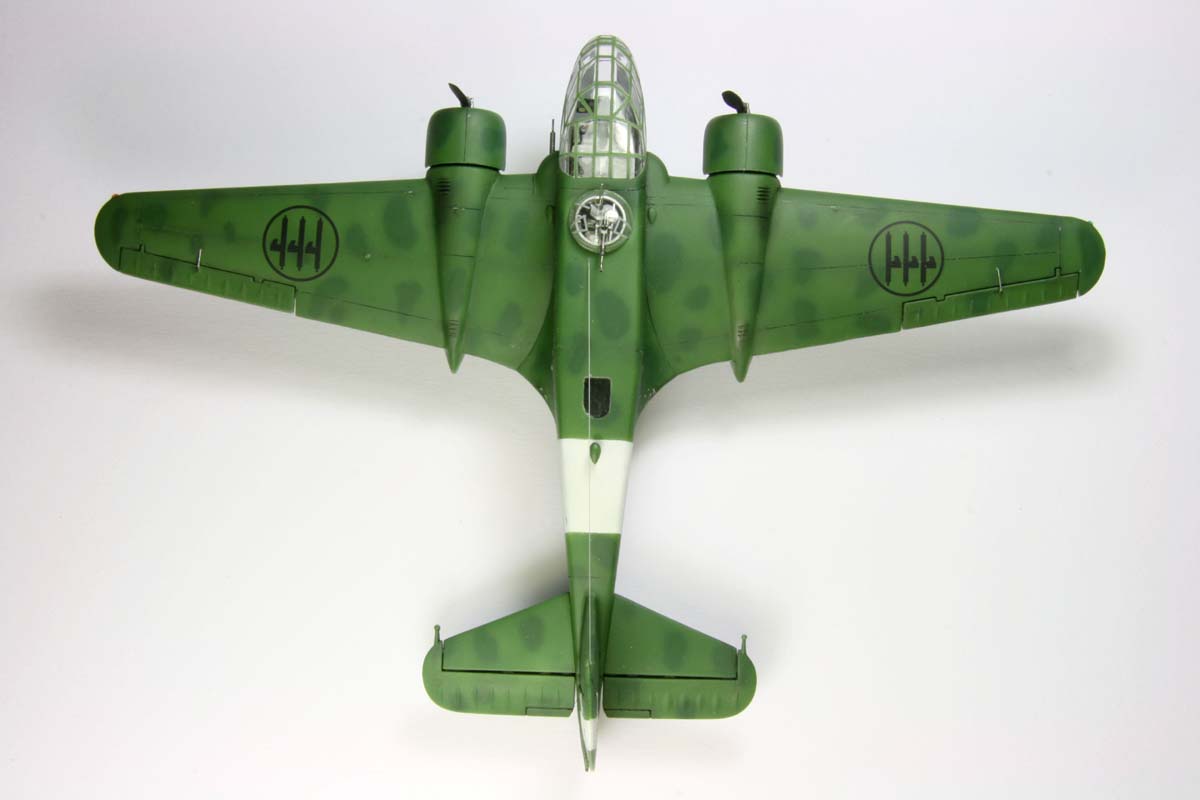
After the assembly, a coat of Mr. Surfacer was applied. Since at this step usually
all flaws are visible, I noticed that the lines separating the flaps were way too
deep and broad. I puttied them with thick Surfacer, and after re-sanding, I had to
re-apply the profile of spars pressing through canvass. This was done using again
the liquid putty and a plain brush, in a number of layers. I have re-done the panel lines with a razor-saw, and then applied the pre-shading with black paint. |
 |
 |
 |
 |
 |
|
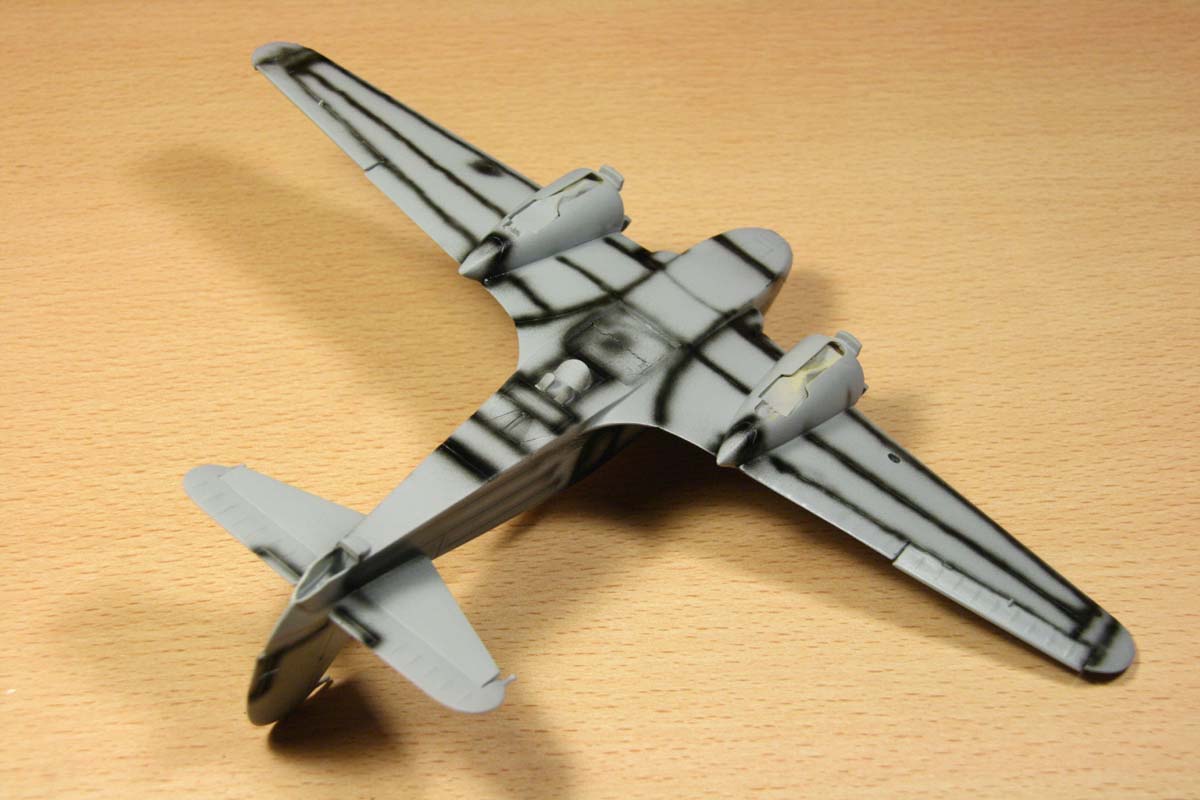
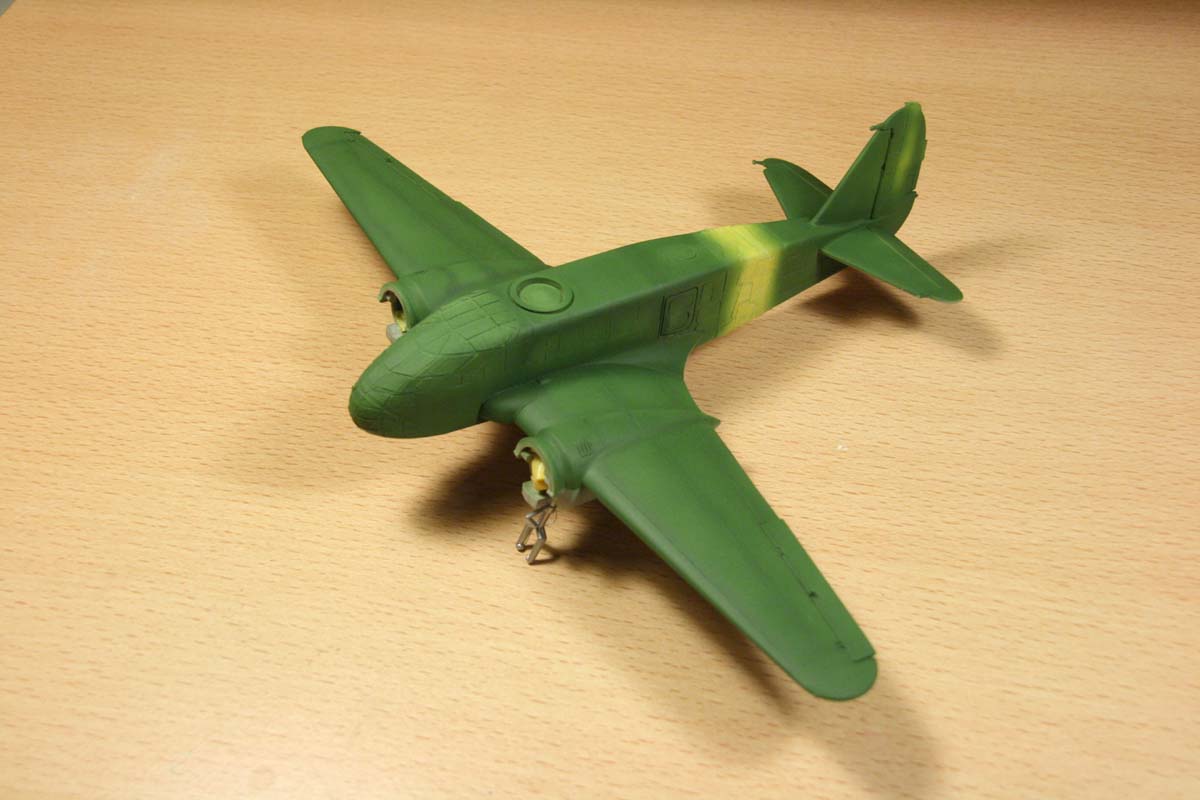
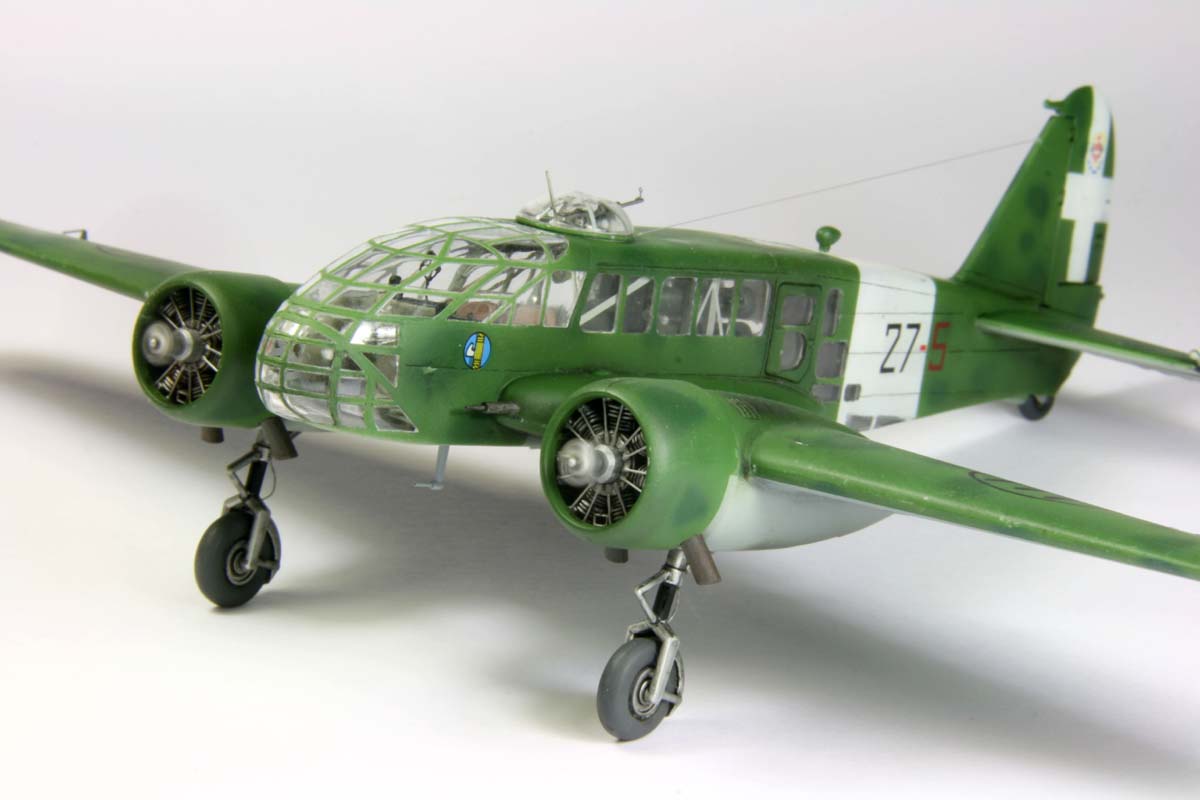
For painting I used the recommended Model-Masters paints, which generated an excellent
surface. Unfortunately, this was not the end, so I had to seal everything with Future,
in order to proceed with the following steps. I decided to apply the light-green with dark-green mottles type of camouflage. The mottles were to be applied free-hand with airbrush. For this purpose, the paint needs to be thinned to the maximum. In this condition, unfortunately the flat Model-Master did not dry homogeneously, and left bright rims, which were not possible to remove or avoid, around the drying spot. This was solved by using a glossy paint from Revell’s offering. After this, the model was washed with thinned artist oils, and fixed with my trusty Xtracolor flat lacquer. |
 |
|
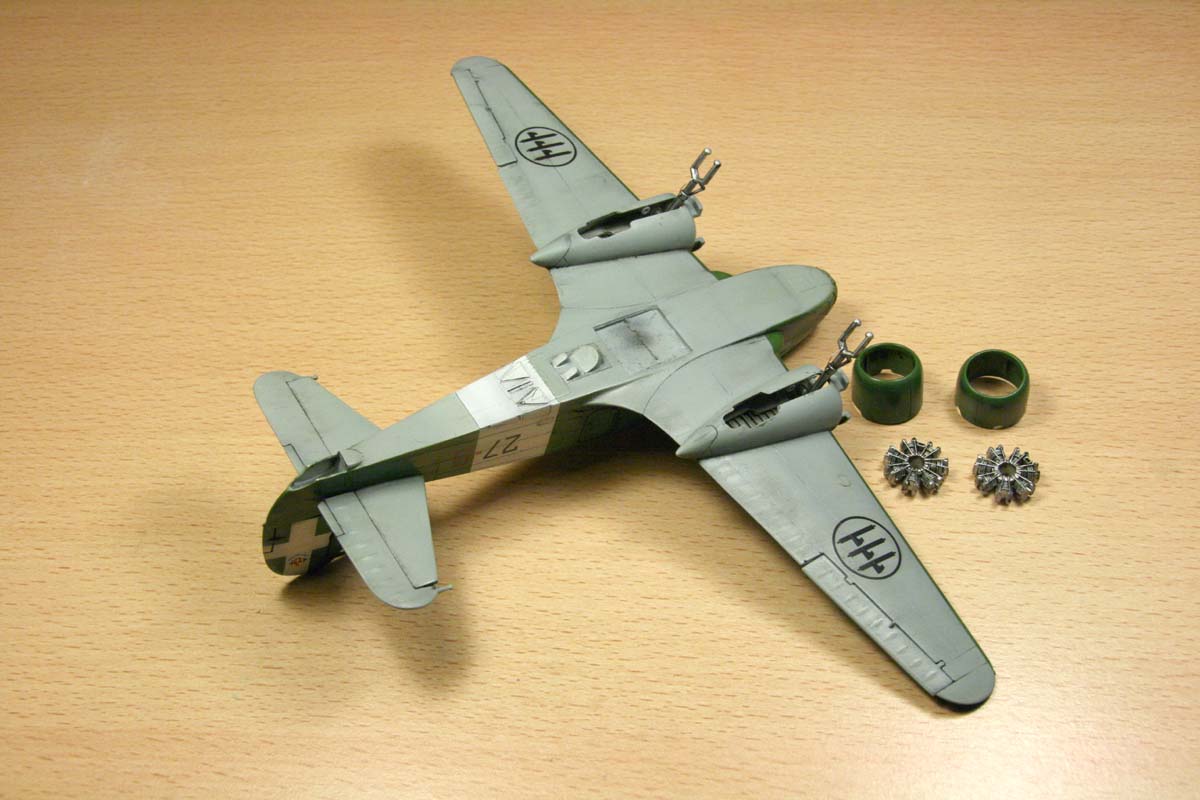
After removing the masks, the bird already appeared in nearly all its beauty. Just a few more
details were to come: the wing-root gun was added, the pitot-tube, as well as a scratch-built
generator prop and the bomb doors. The dorsal turret was also scratch-built. The original part has very thick walls, which looks bad on this tiny bit. For that reason I have drawn a new part from a clear sheet using the old turret as a base. The old turret was cut horizontally, and its rim served – flipped upside-down – as a base for the new turret. The machine gun got the sights from PE-parts, and the two antennas were added. The wing positioning lights did the last finishing touch. |
 |
 |
 |
 |
 |
ConclusionWhile not shining with the best technological achievements, the Italian aerospace industry for sure provided for some most interesting designs, resulting in another Italian beauty in my collection (and surely not the last one - next already in progress). The kit is asking for a lot of scratch-building, since there’s not much in terms of aftermarket. In particular a set of masks would be a blessing. | |
|
 |
 |


|
All photographs (c) J.Kierat