
or
Grumman Night Hellcat F6F-5N
1/48th scale plastic scale model kit by Eduard
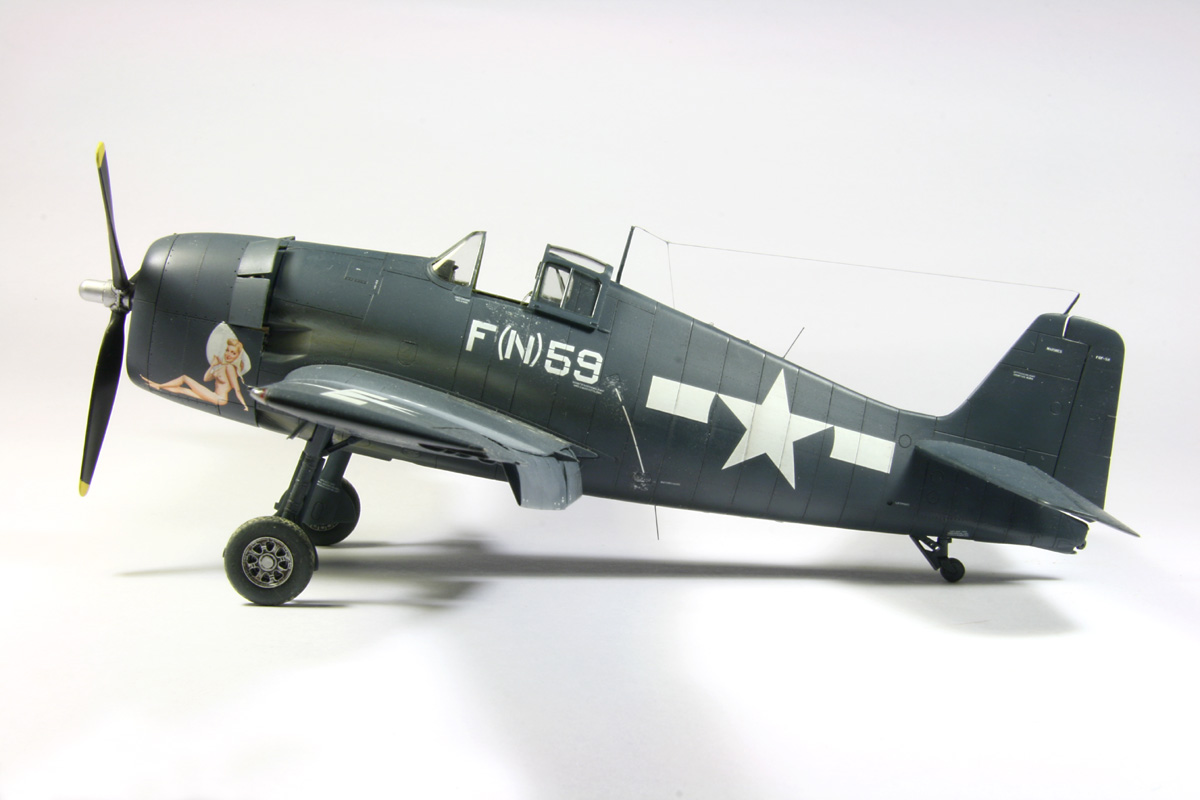
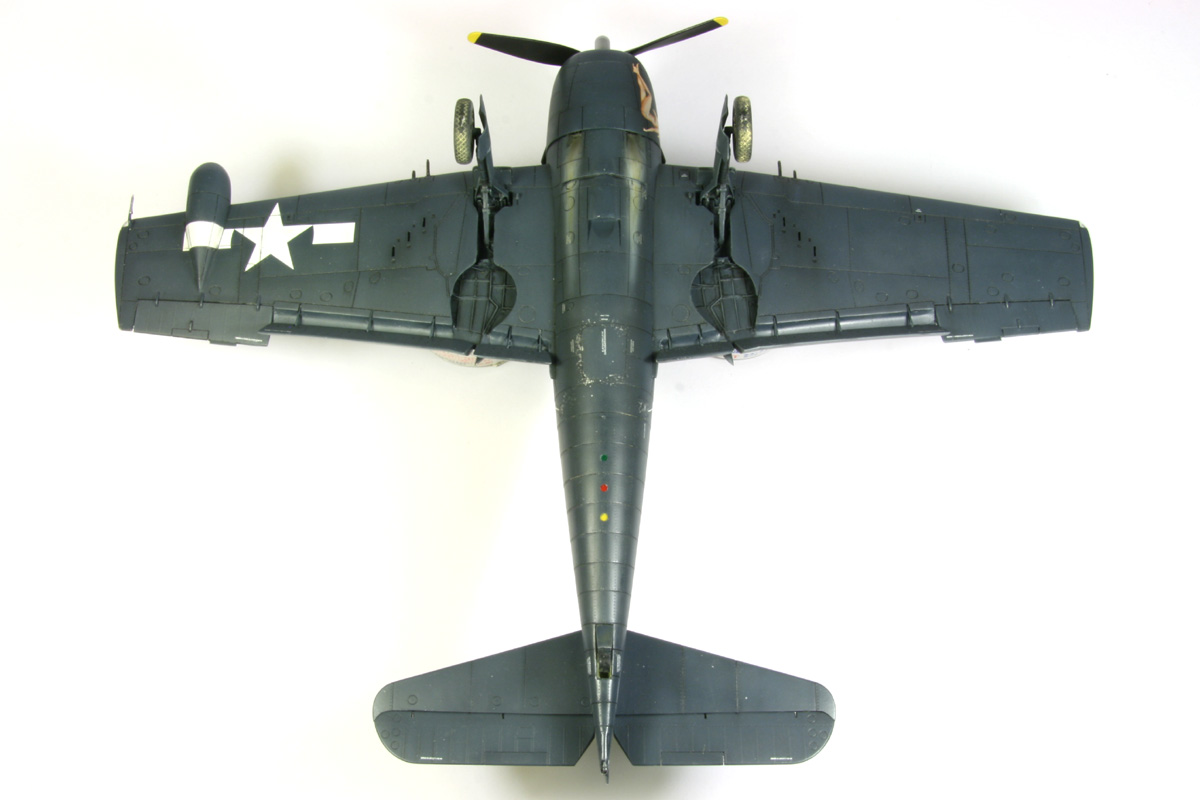
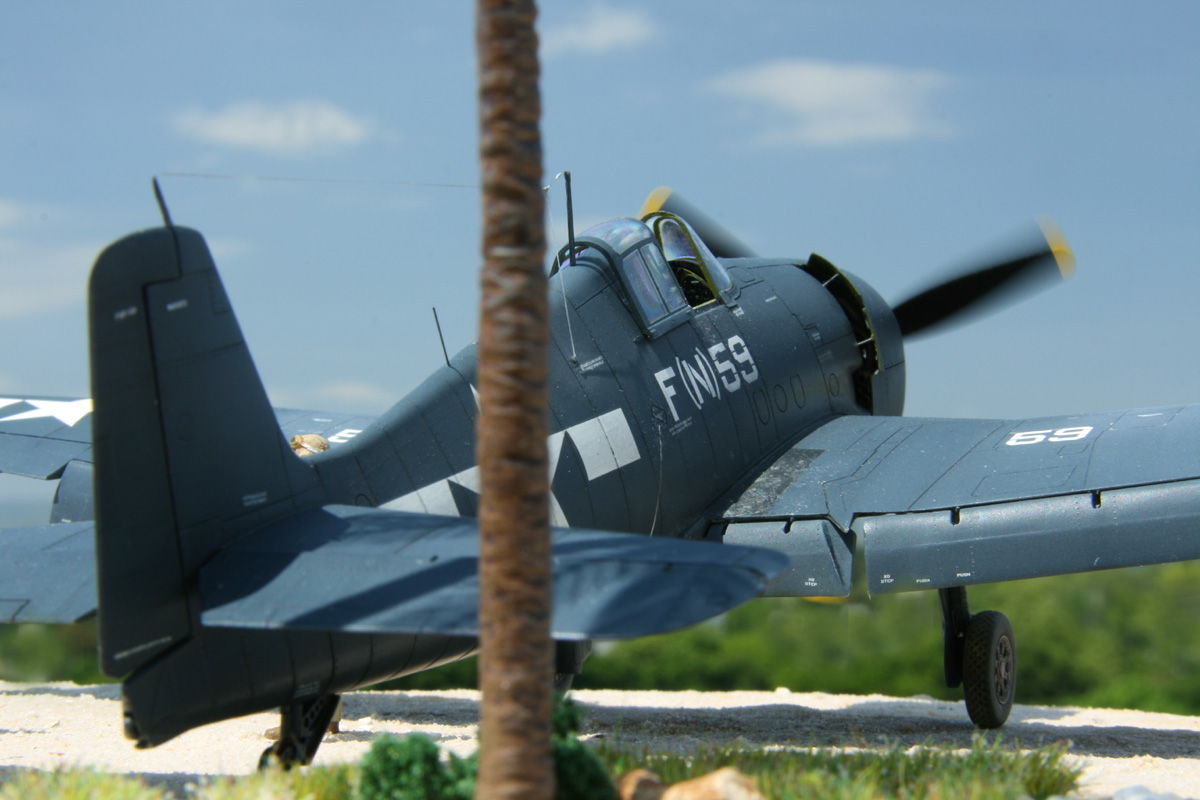
Historical backgroundThe Hellcat was created by the Grumman company as a further development of its aging F4F Wildcat fighter. While the Wildcat did cope with the initial war struggle, the US Navy urgently needed an improved fighter, to gain air superiority over the Japanese Zero. The Chance Vought Corsair was the designated successor for the Wildcat, but due to technical problems, in particular with the carrier implementation, Grumman decided to follow up with another design - in came the Hellcat. Powered with the R-2800 Double Wasp engine, improved armouring, armament, landing gear and being an overall larger aircraft, the Hellcat proved to be an ultimate success.The new machines reached the Navy and Marines units in early 1943, and were used from large carriers as well as from land based air stripes. Hellcats were delivered in two variants, the F3 and F5, of which the most distinctive difference was the removal of the window behind the canopy. It operated day and night operations, the later ones with the AN/APS-4 wing mounted radar. The night sorties proved more and more necessary, as the US forces gained air superiority, and the Japanese had to reduce daylight flying. In the end, Hellcats achieved the most favourable kill to loss ratio of all allied aircraft: a whopping 19 to 1 in its favour. The model is featuring a F6F-5N night-fighter, of VMF(N)-541 Marine Corps unit stationed on the Falalop Island, Ulithi Atoll (some 1500km east off the Philipines, nowadays known as Yap, the diver's paradise) in May 1945. |
| |
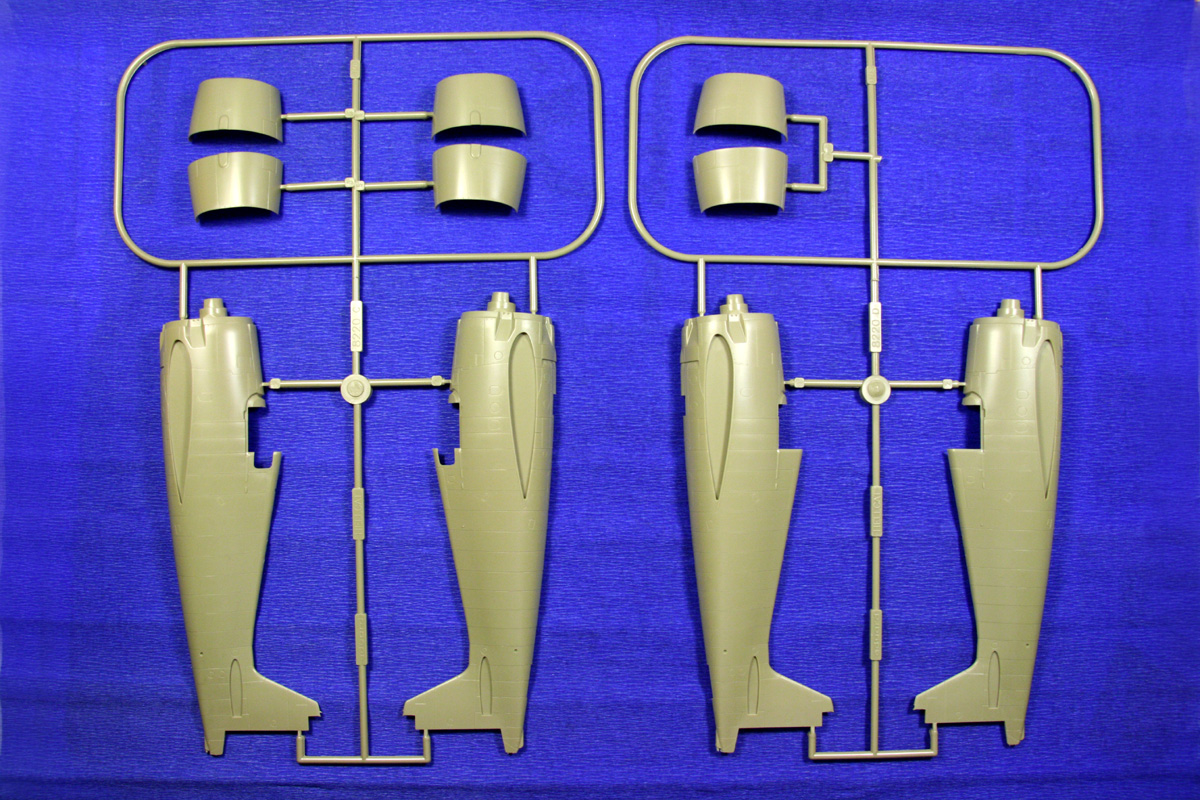
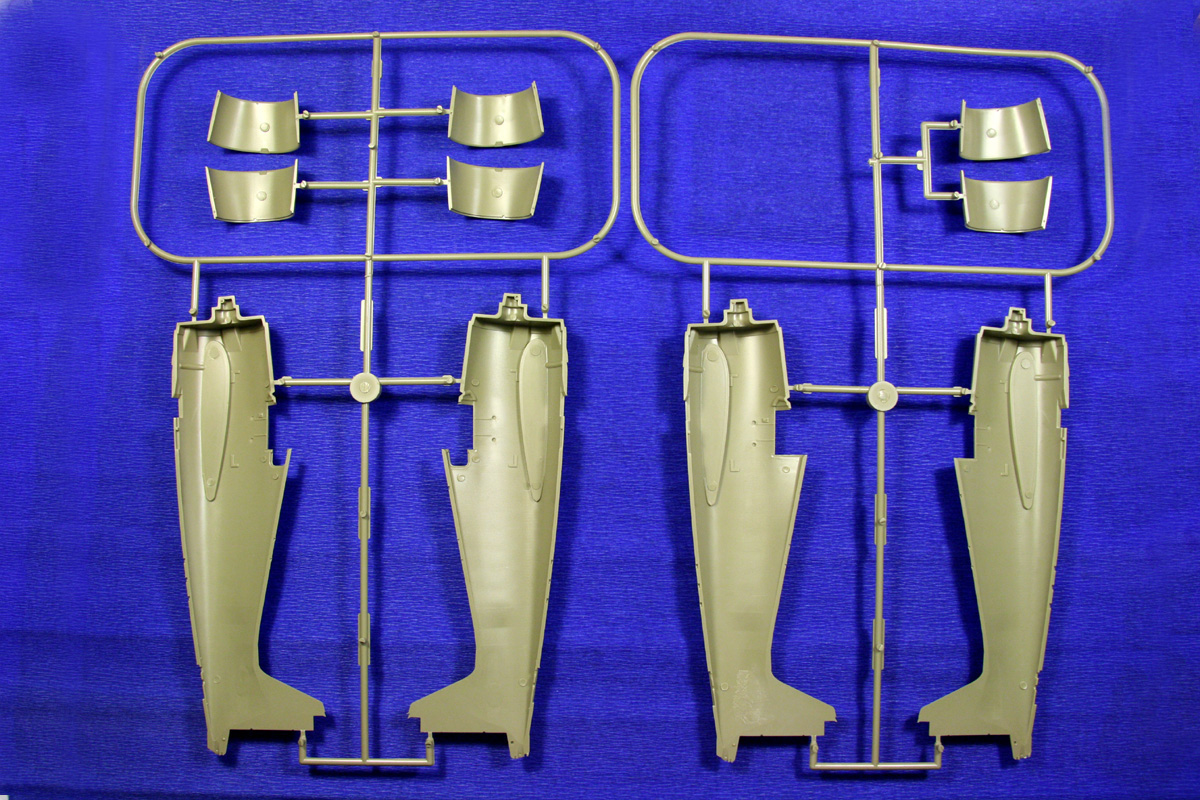
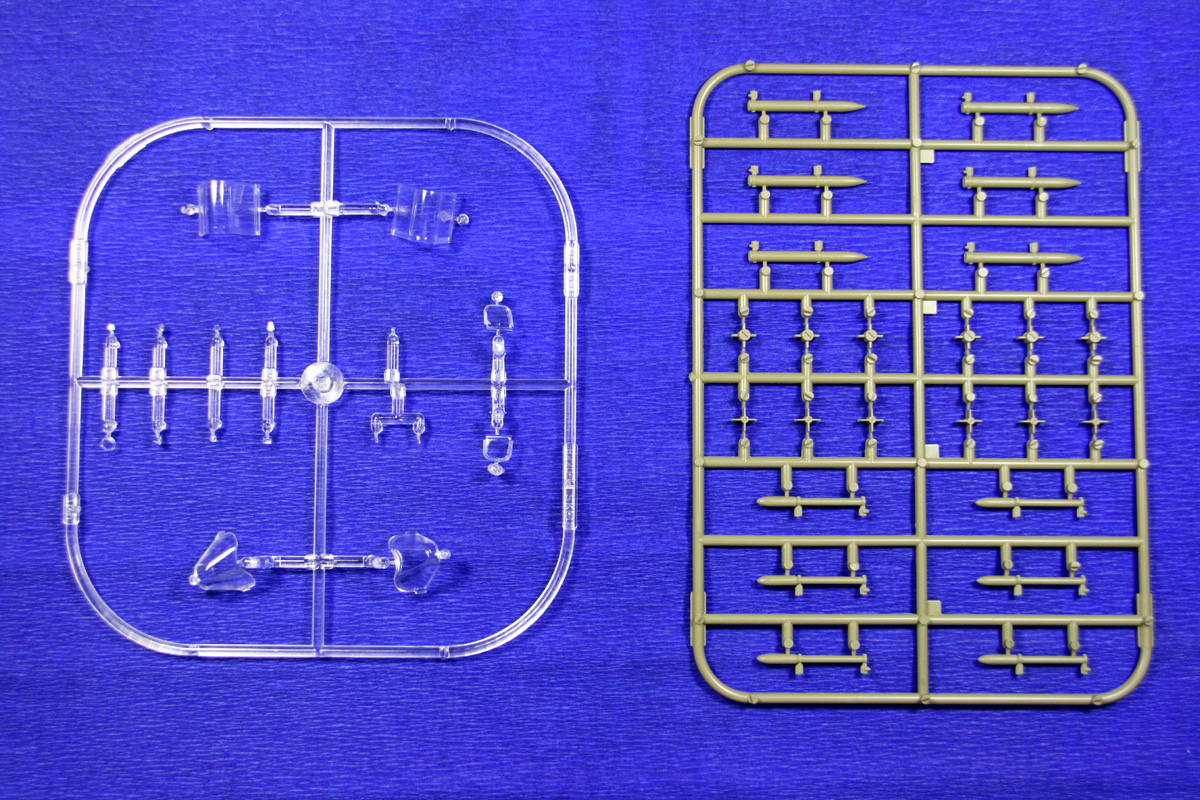
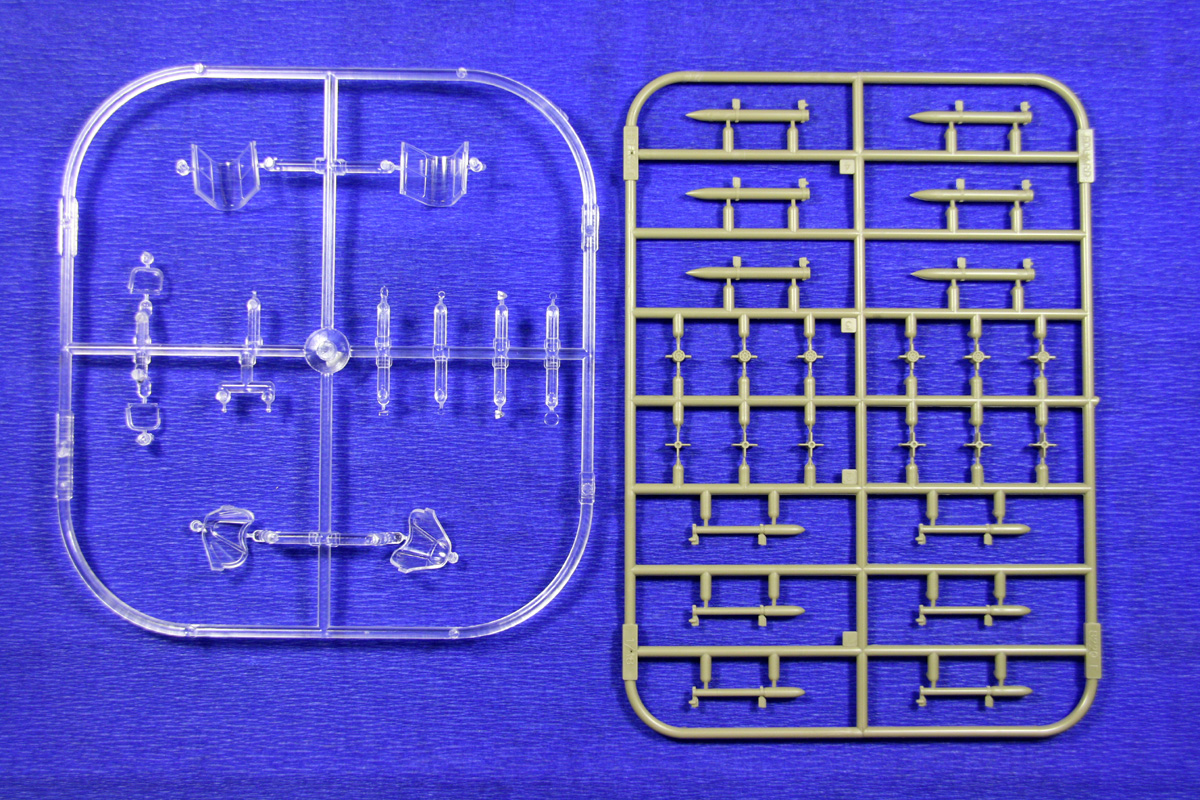
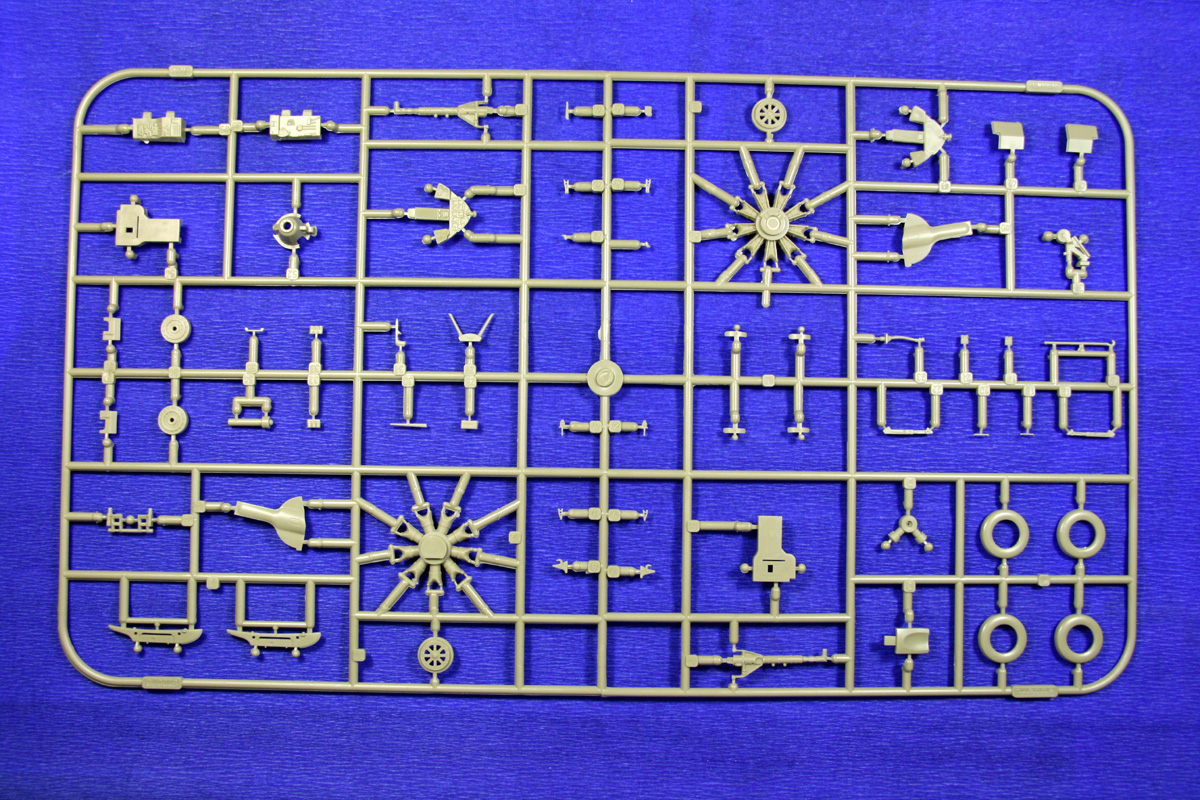
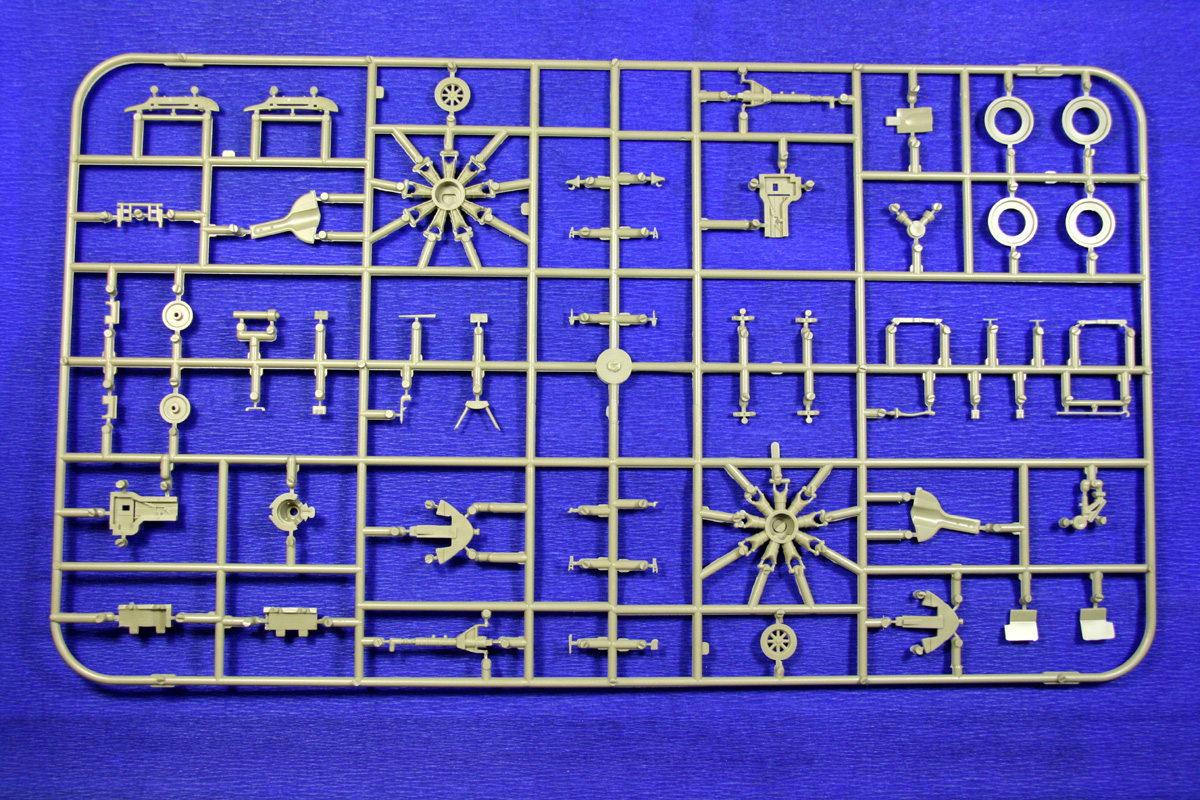
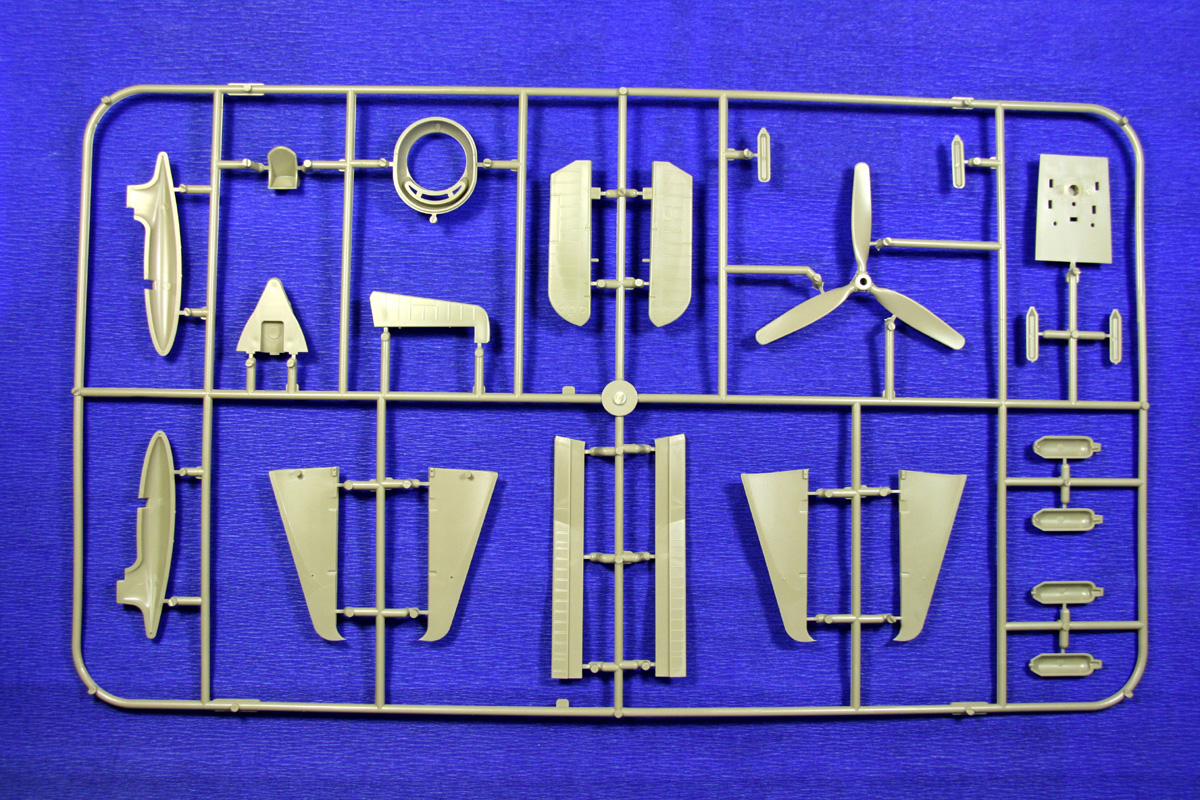
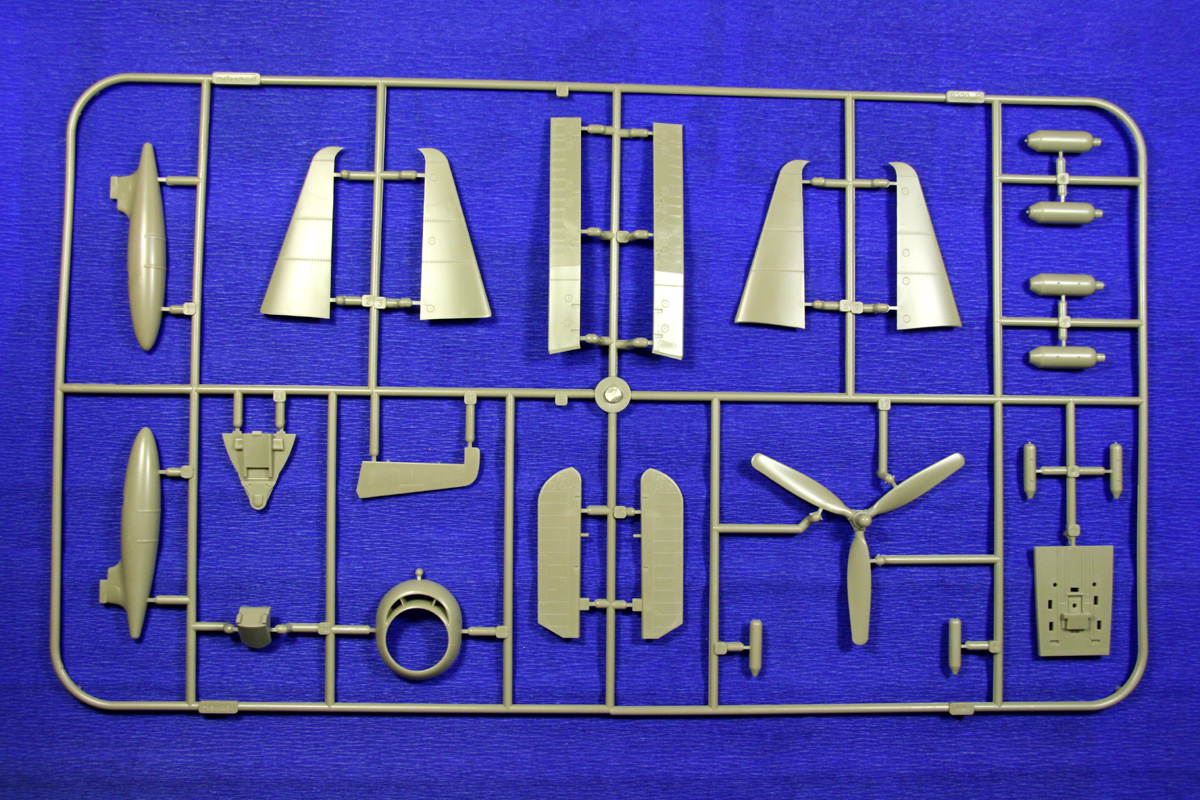
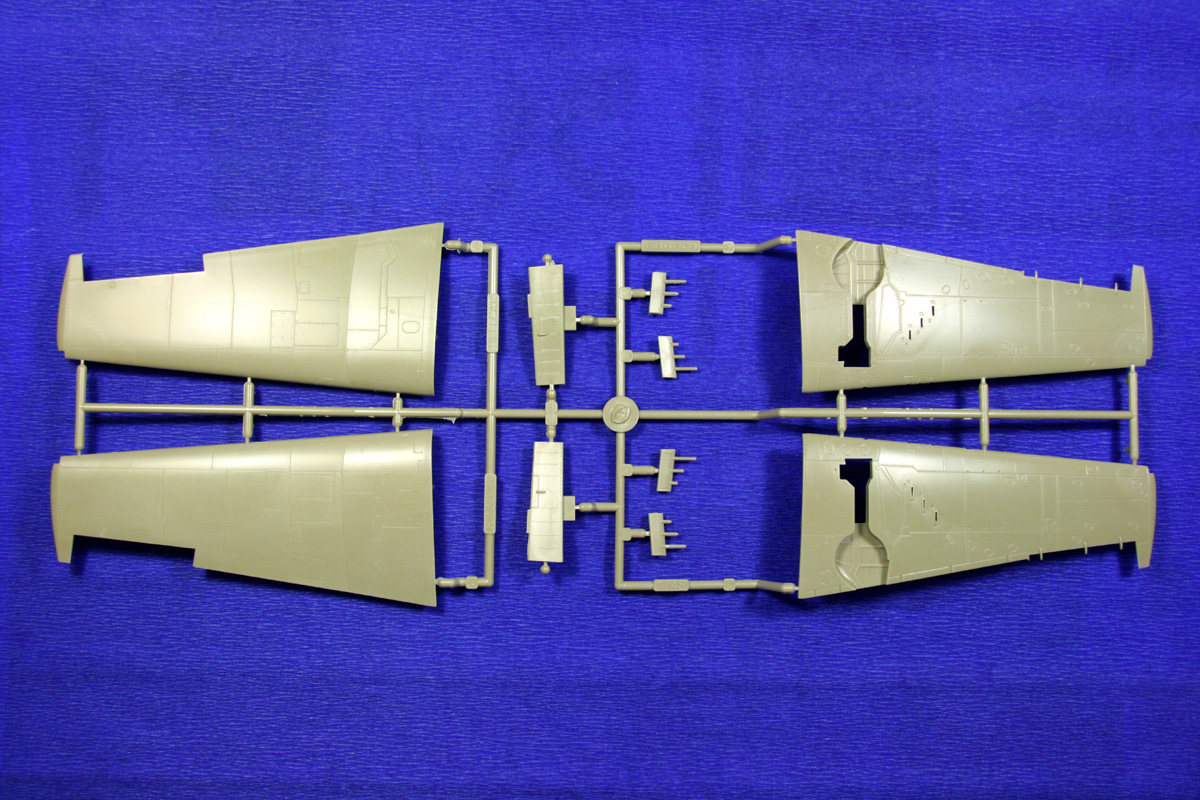
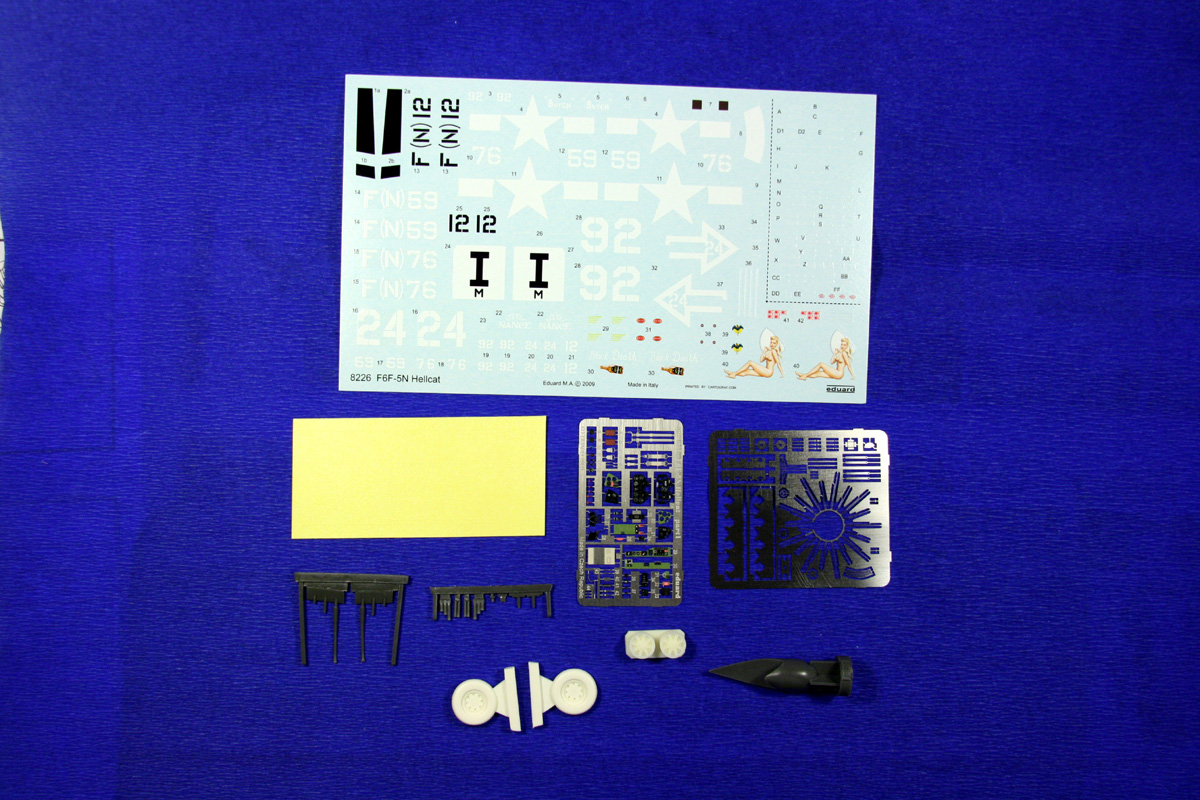
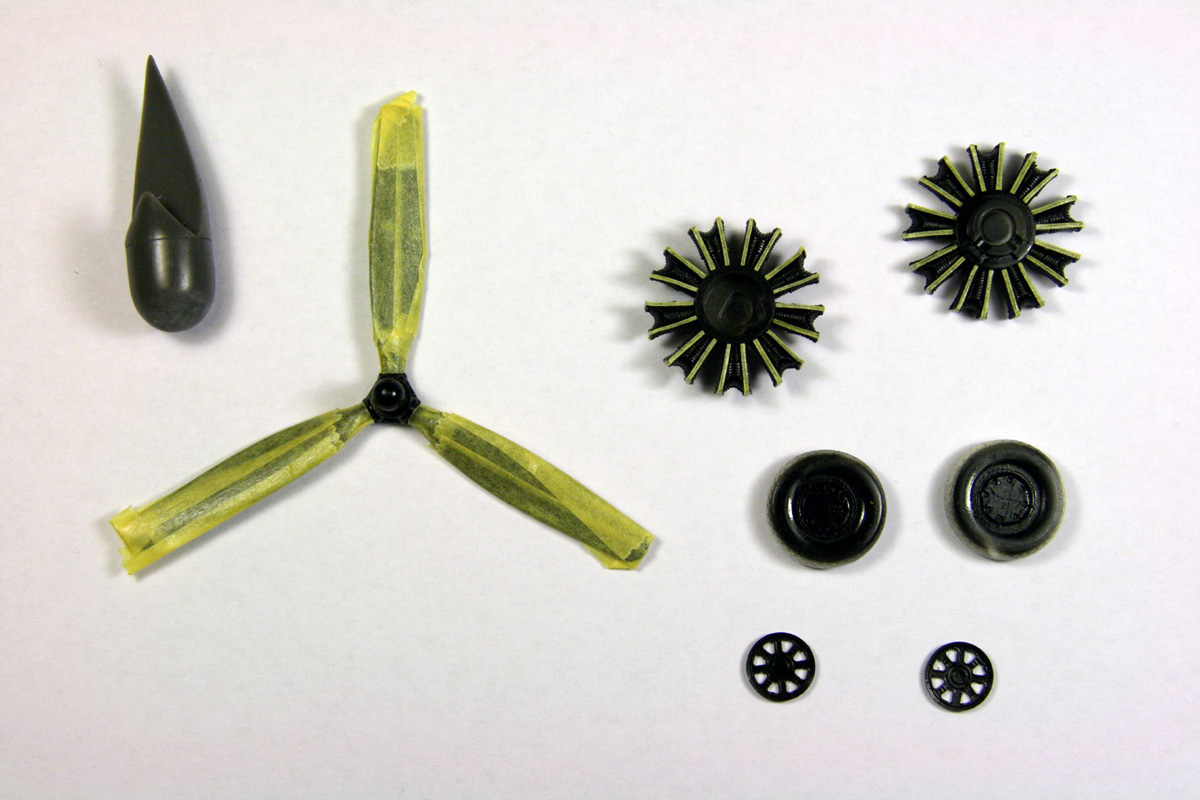
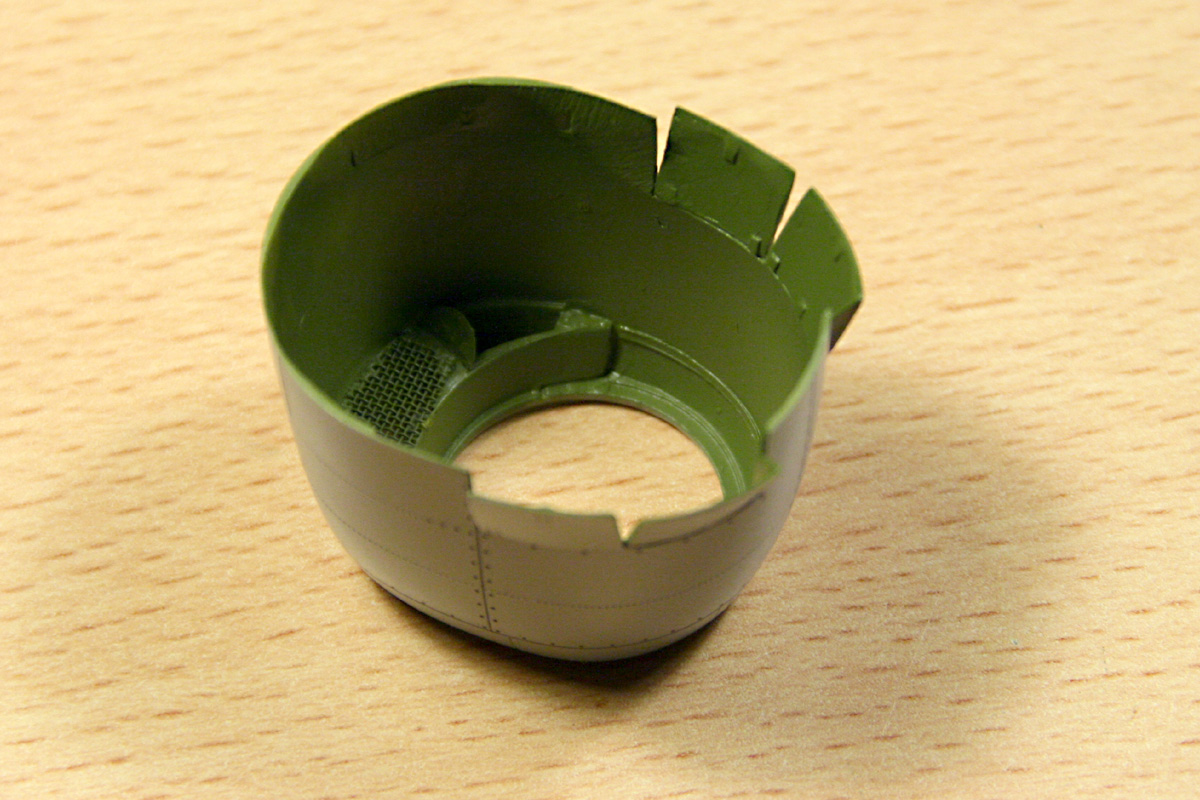
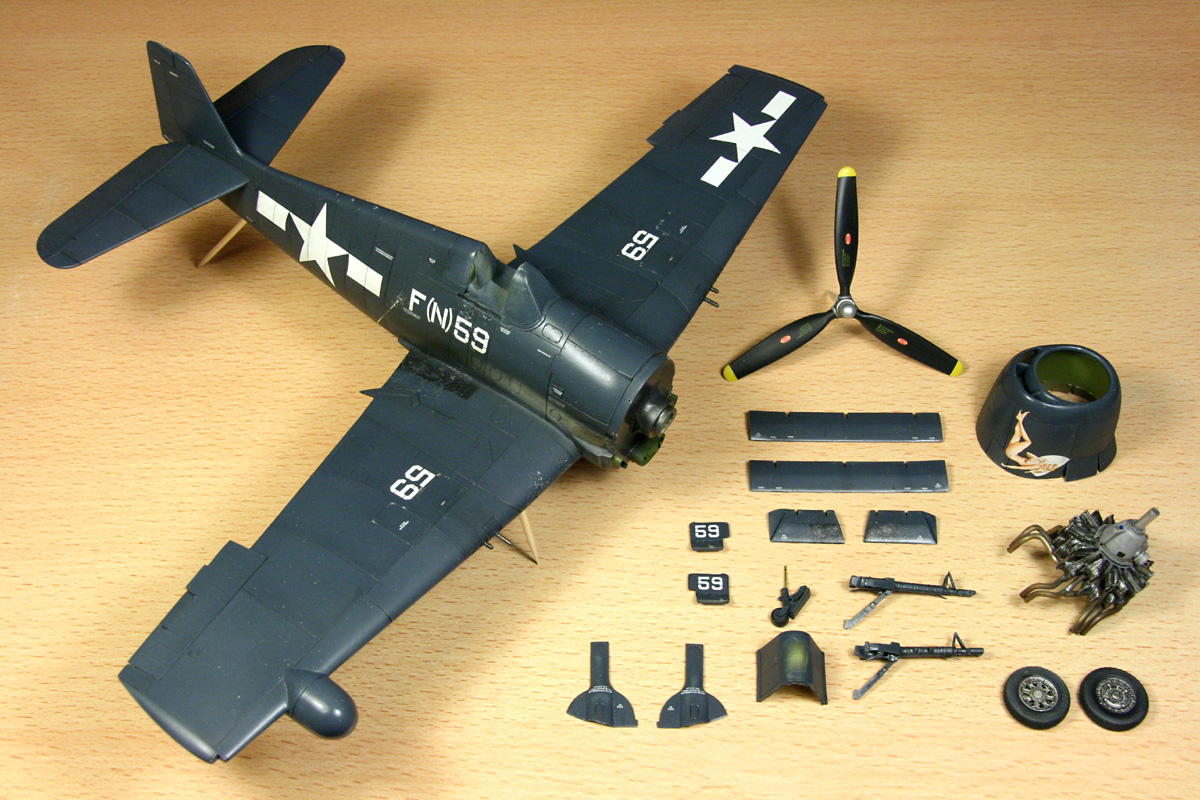
The kitThe kit is Eduard's ProfiPACK offering. It's a big box, full of plastic: six large styrene sprues, one clear one, two PE frets, five resin groups, masks, and an excellent decal sheet for five variants. It's all you need (or nearly). There are two fuselages included, since one variant (the one with the pin-up) is still featuring the Type 3 extra window. The resin parts allow to improve wheels and add the radar. The exhausts, antennas and gun barrels are not really worth looking at. There are plenty of reviews concerning the accuracy of this kit on the web - The only thing I had some objections with, is the kit cowling. I was not really happy with the it, and added the "improved" Quickboost variant. Looking at the pictures, the Quickboost looks too open, though, while the Eduard variant seems somewhat too tight. The truth is probably somewhere in between. The open cooling flaps and thinner walls drove me finally to the Quickboost part.The quality of the kit is excellent: surface is smooth, panel lines crisp, transparent parts clear. The kit hat a little too much mold offset for my taste. The careful engineering, with many positioning pins, tabs, contact areas, and makes the kit approachable for beginners, but complicates matters a lot if you want to have something off-the-beaten-track (but more about that later...) But what really got me to build this model, was the cool pinup variant :-) |
|
 |
|---|---|---|
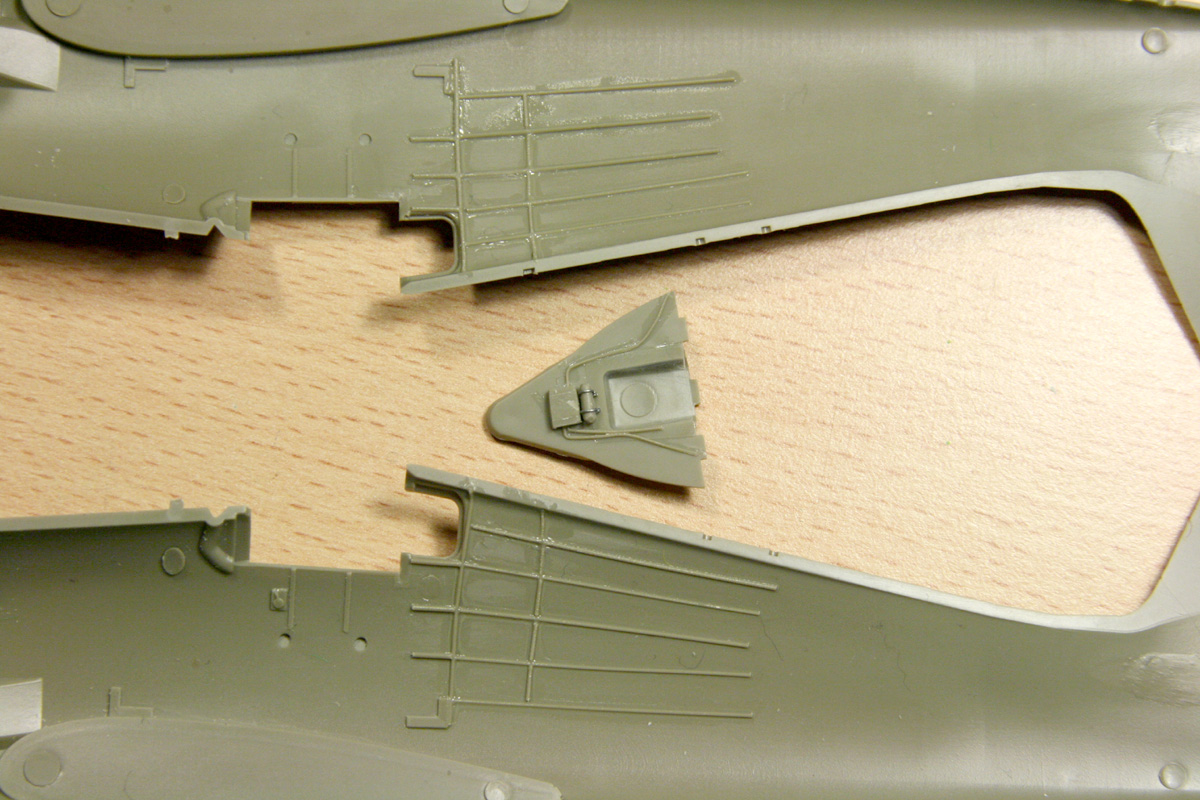
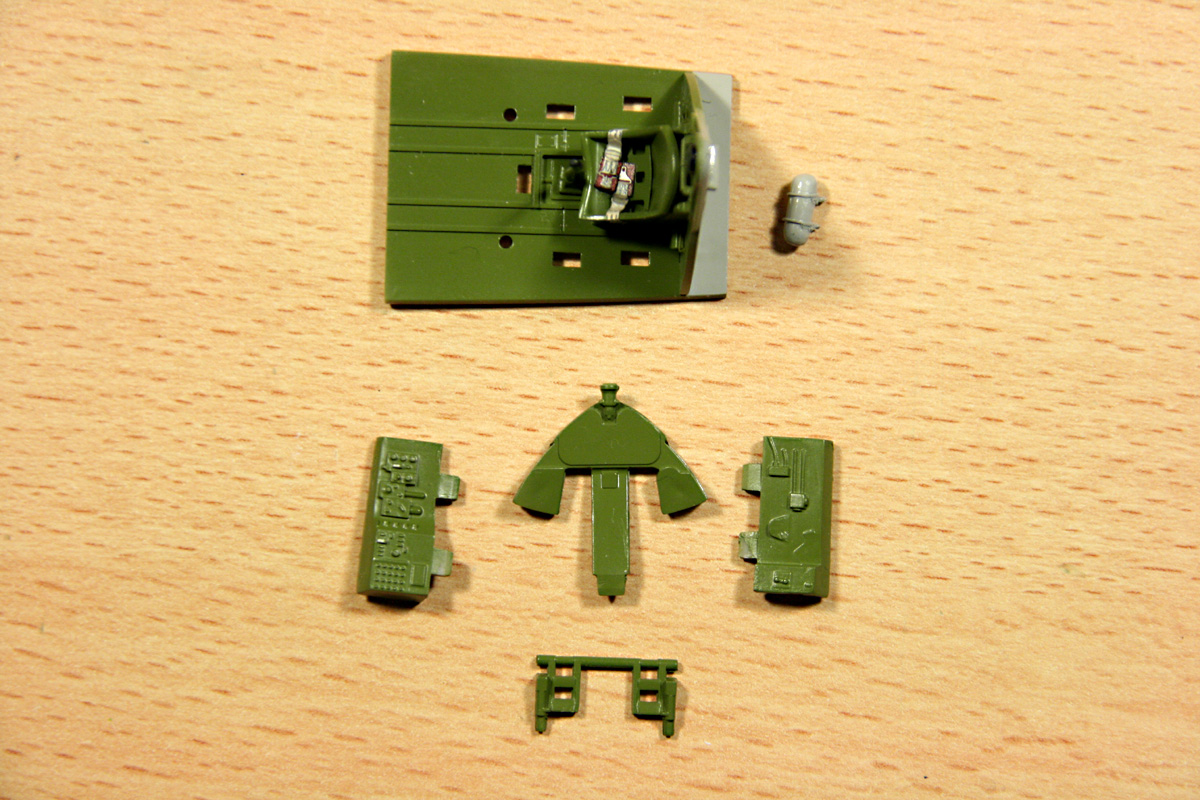
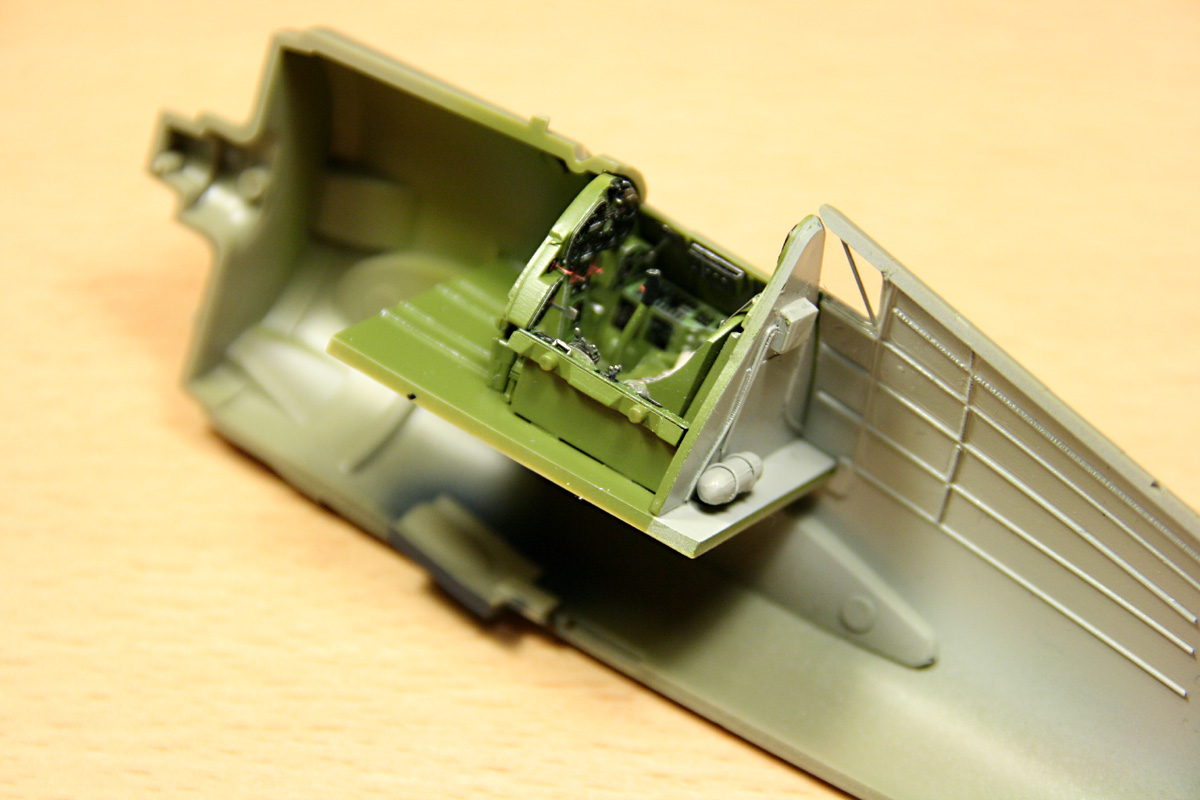
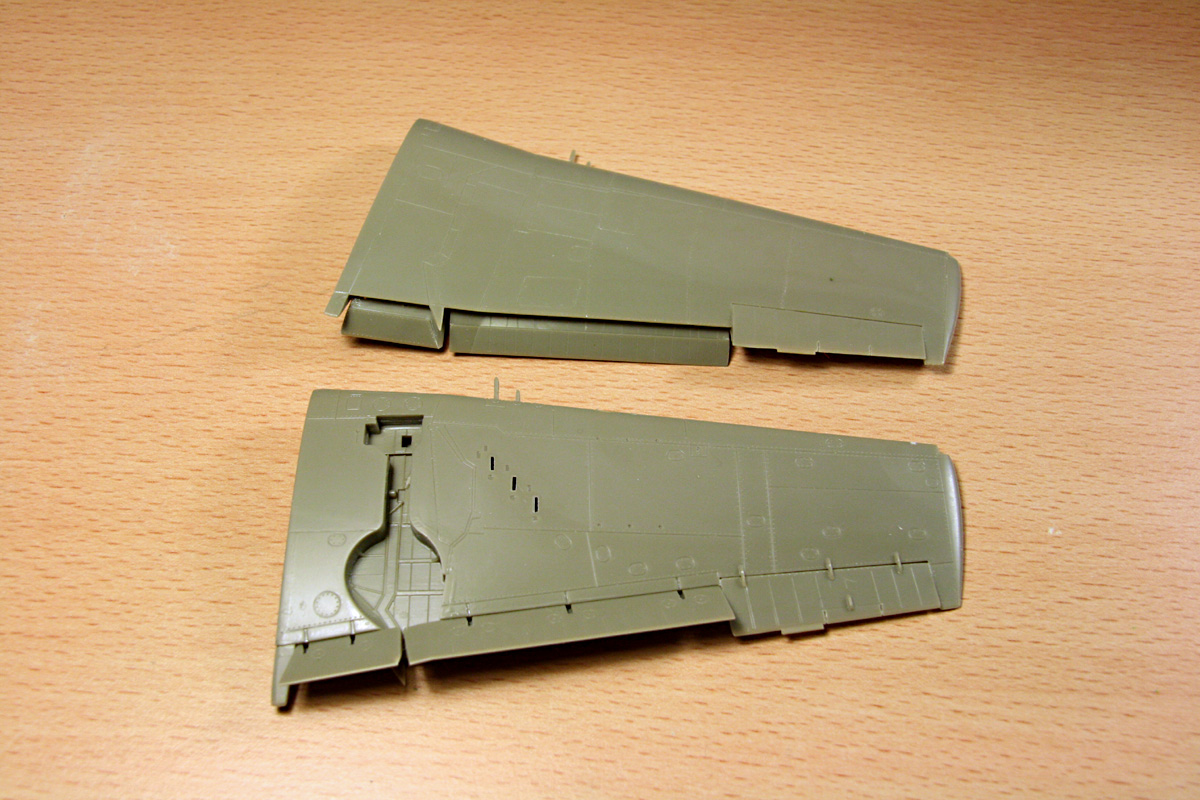
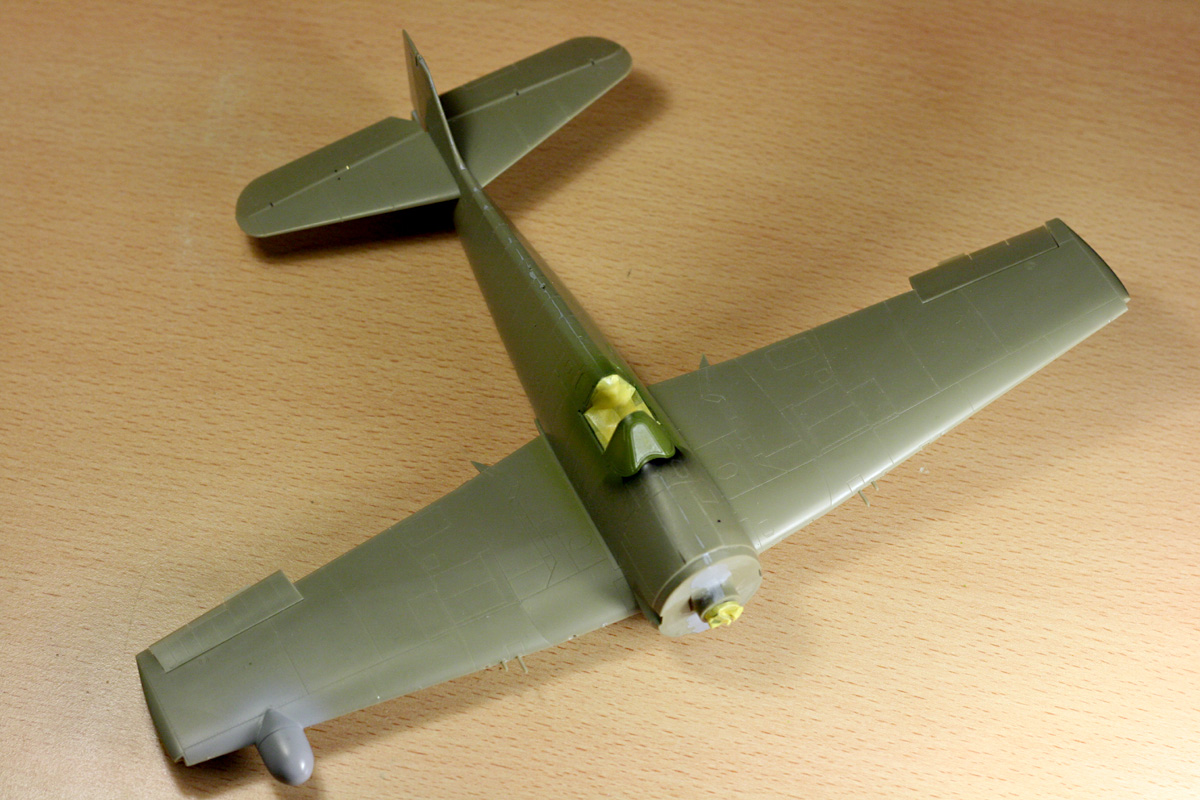
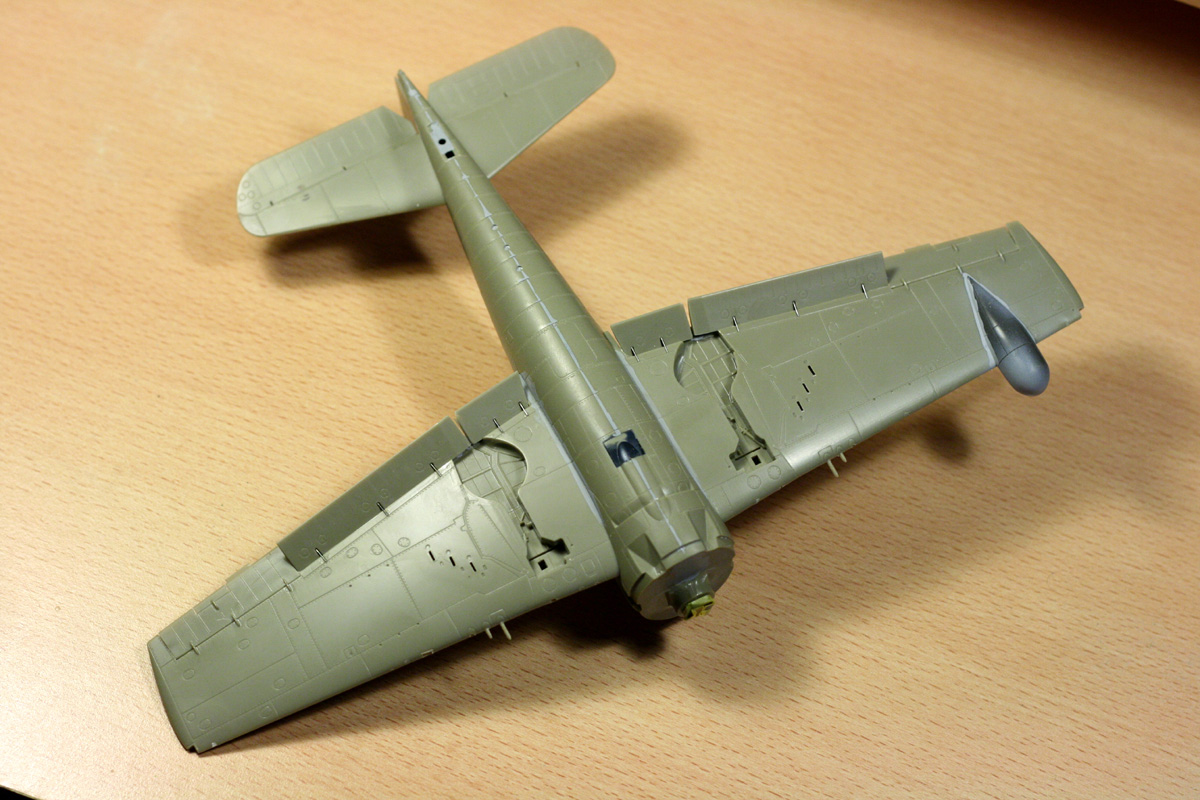
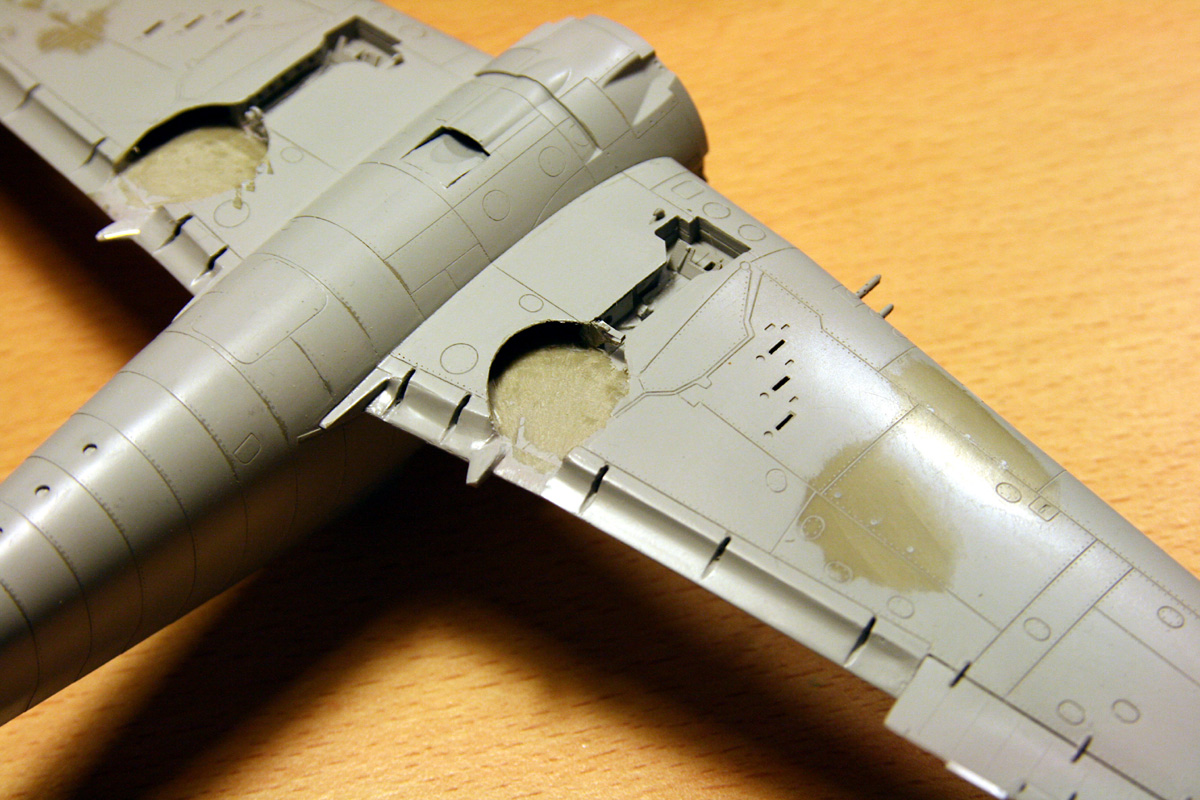
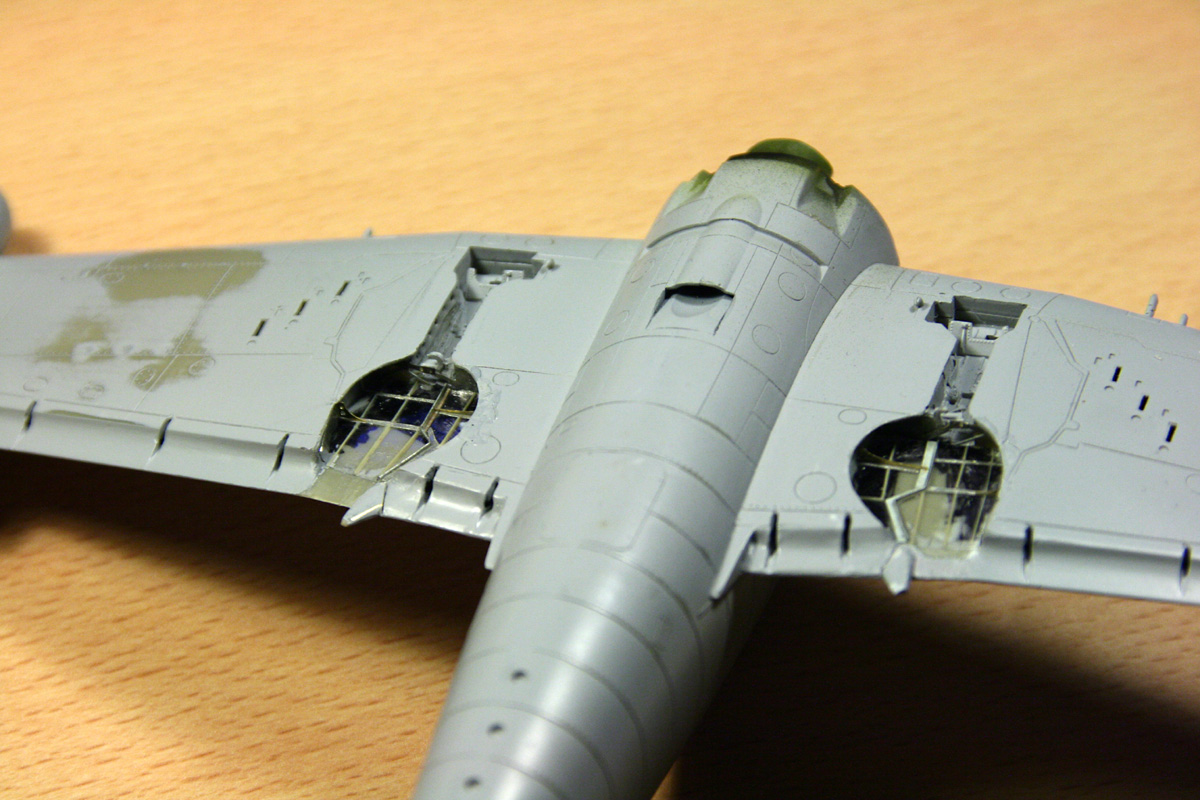
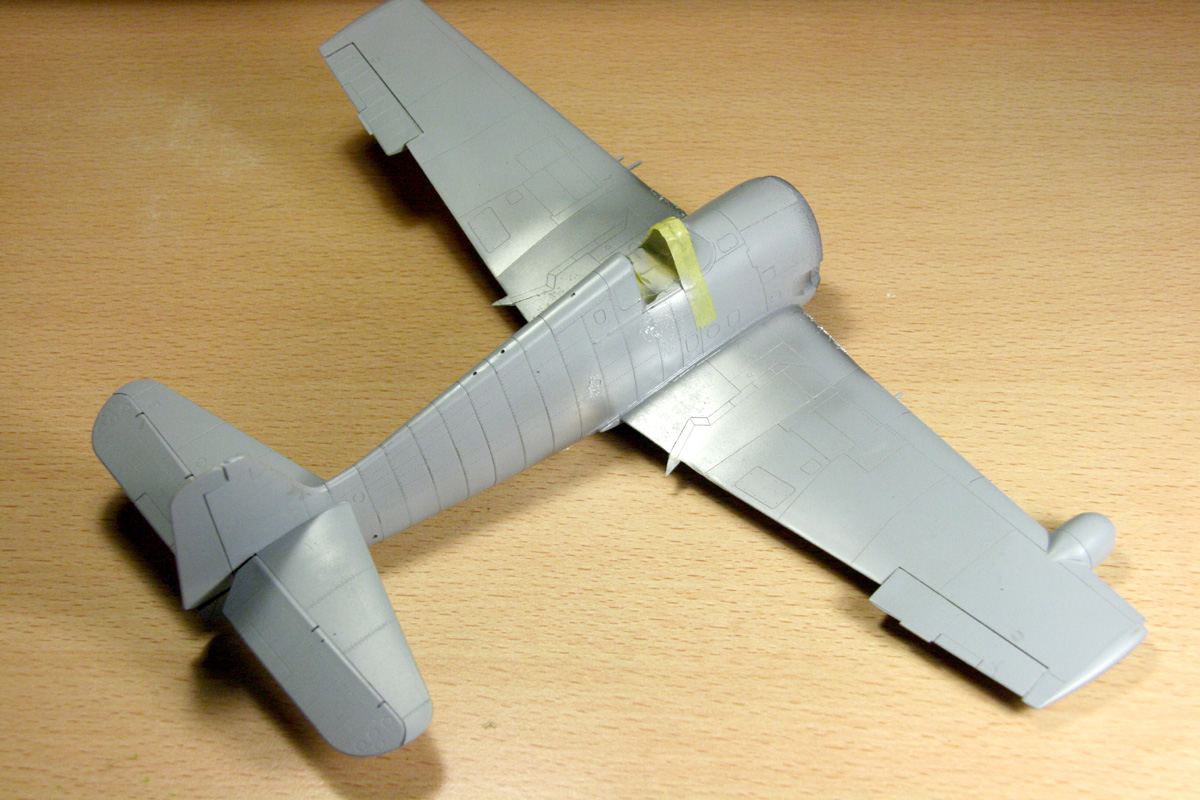
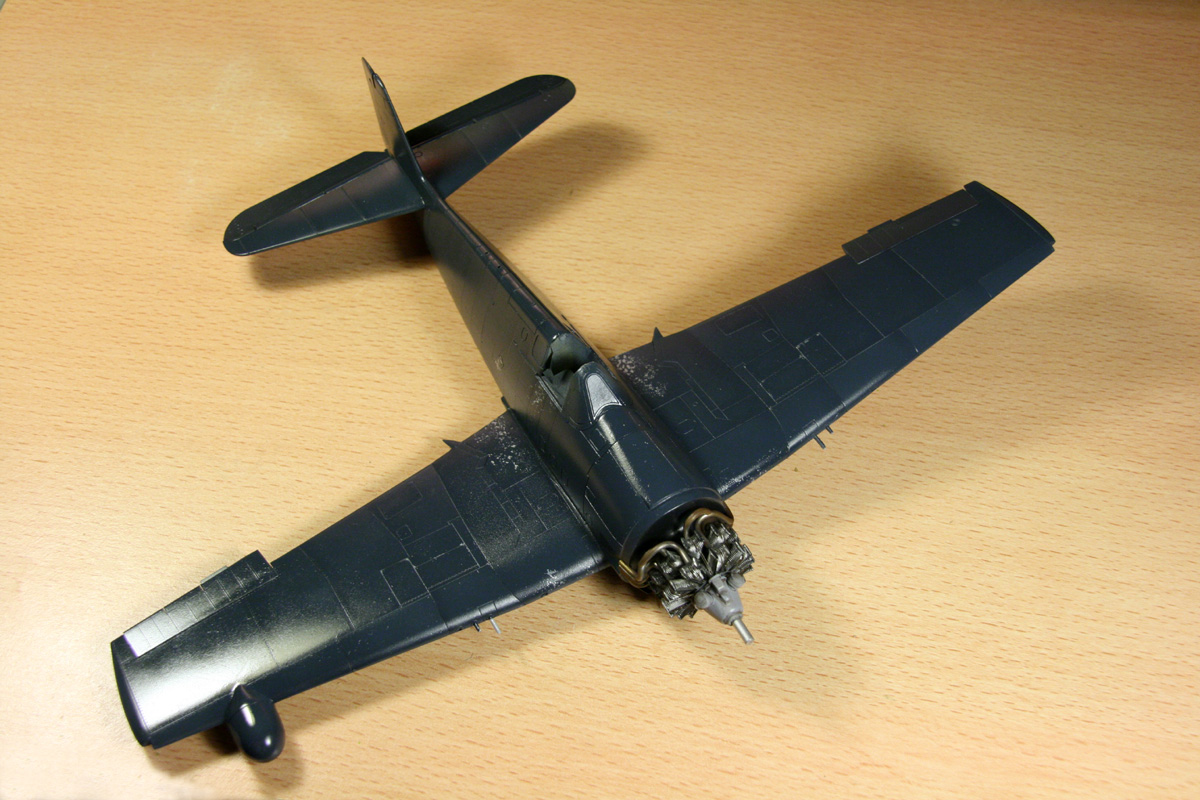
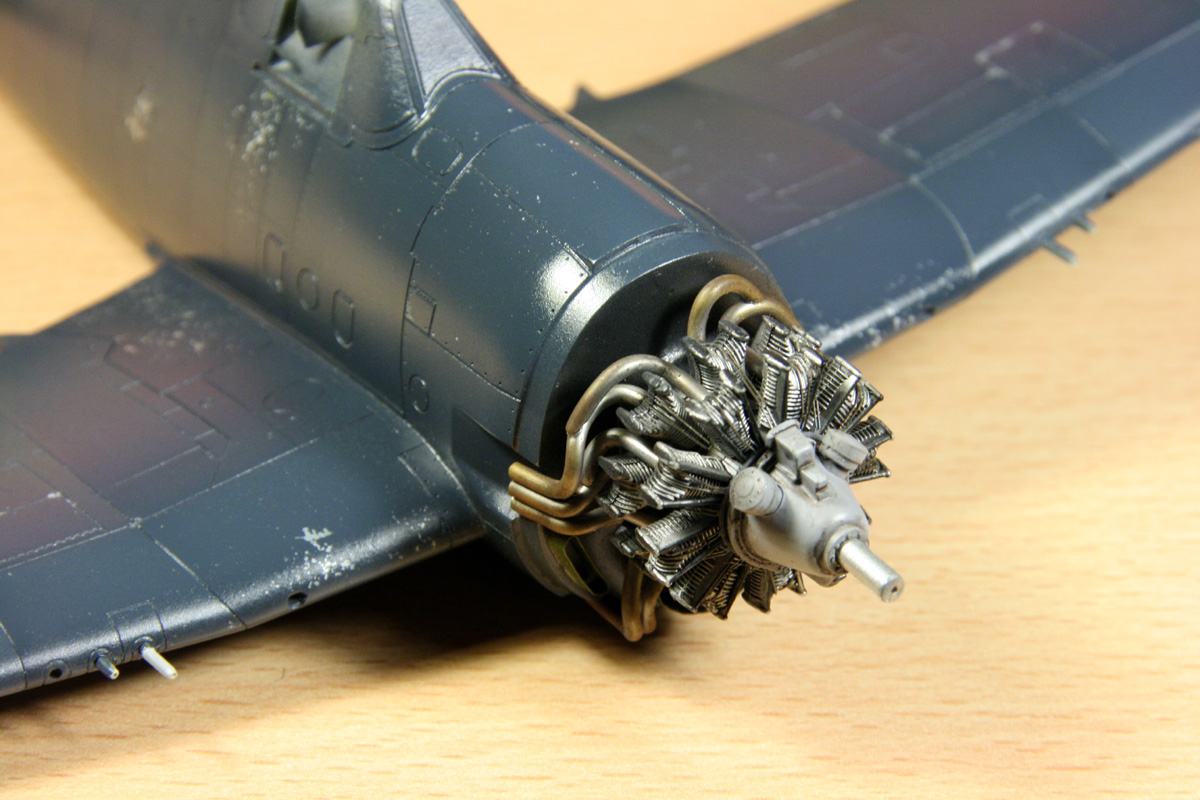
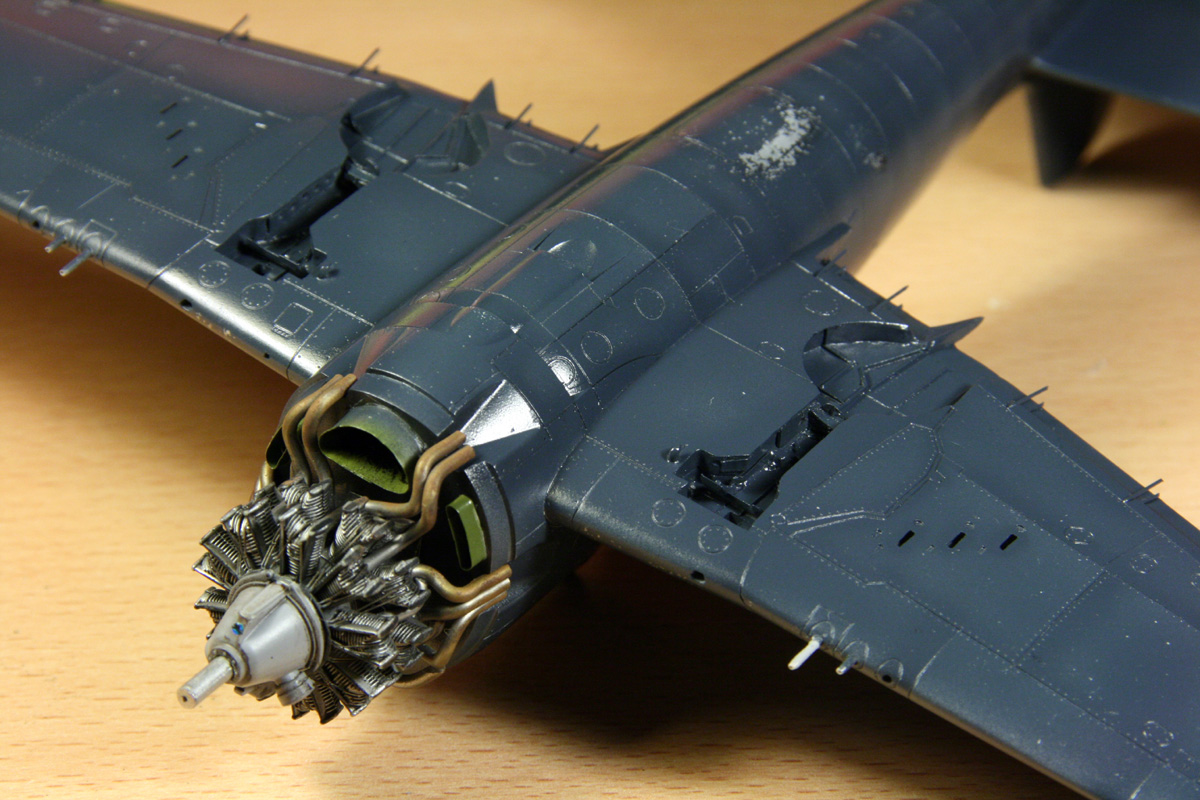
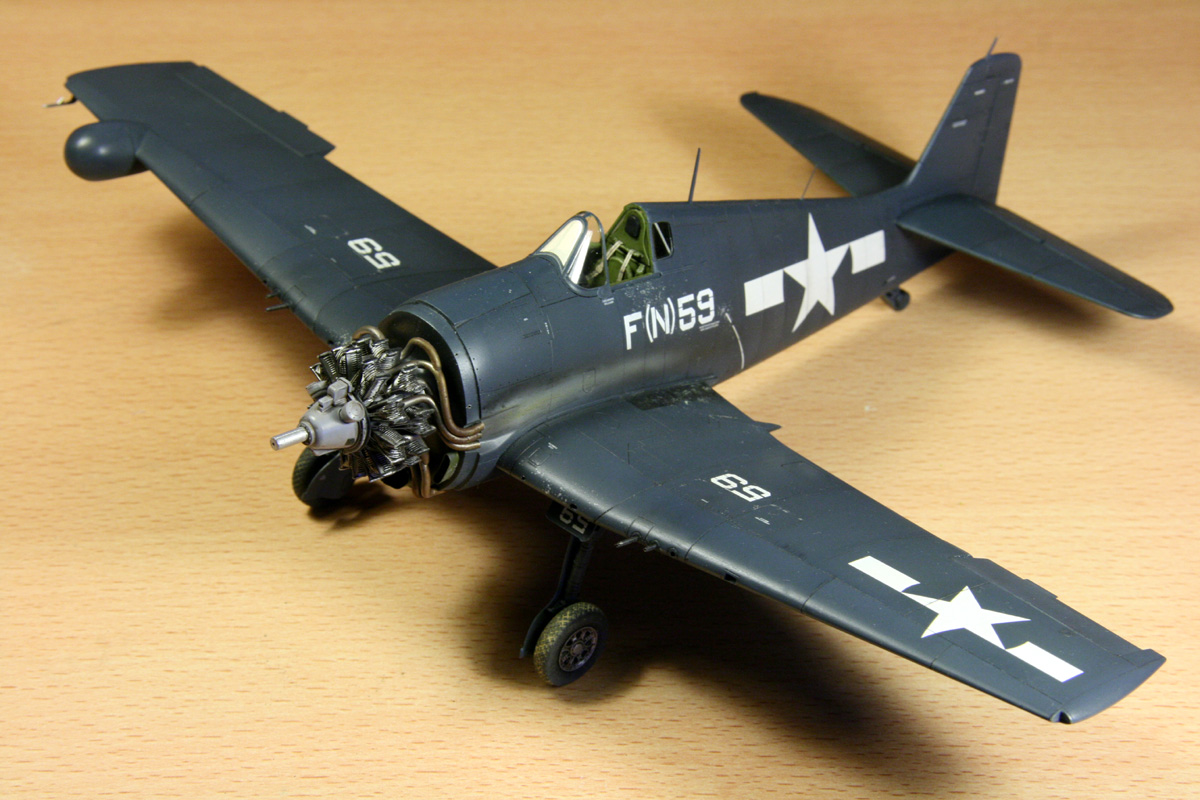
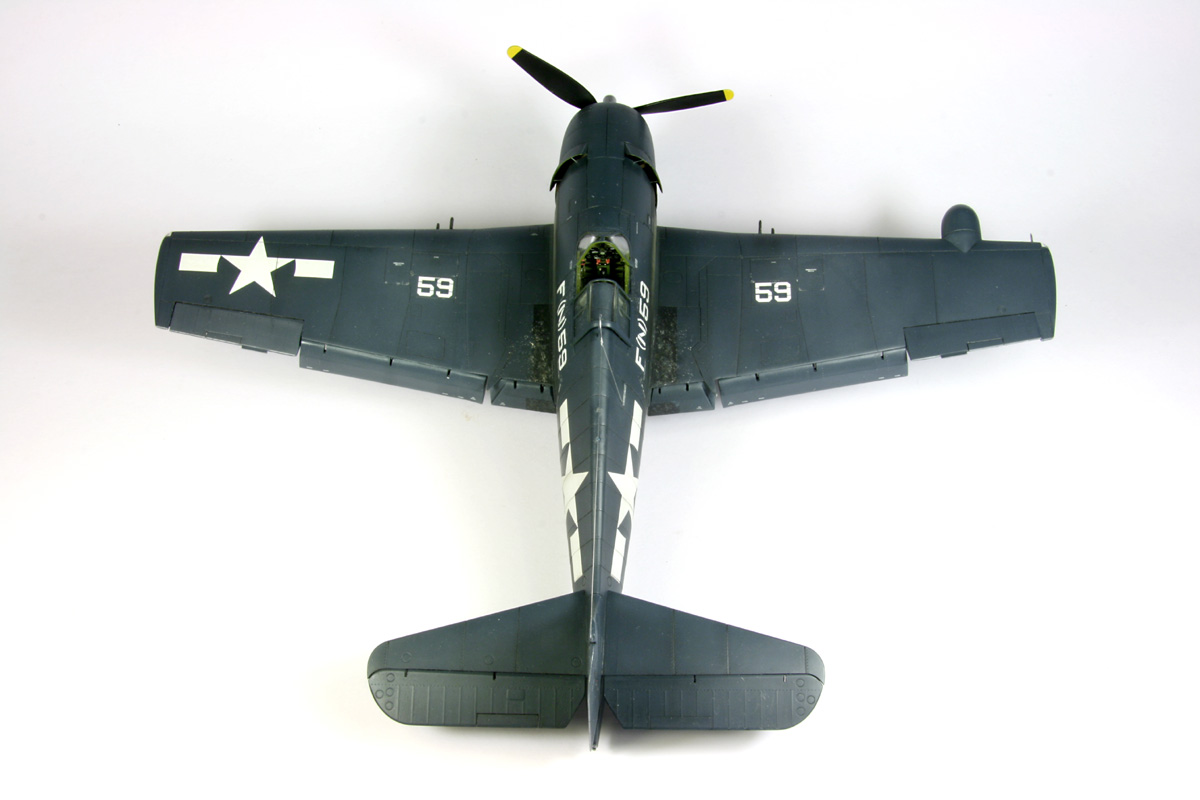
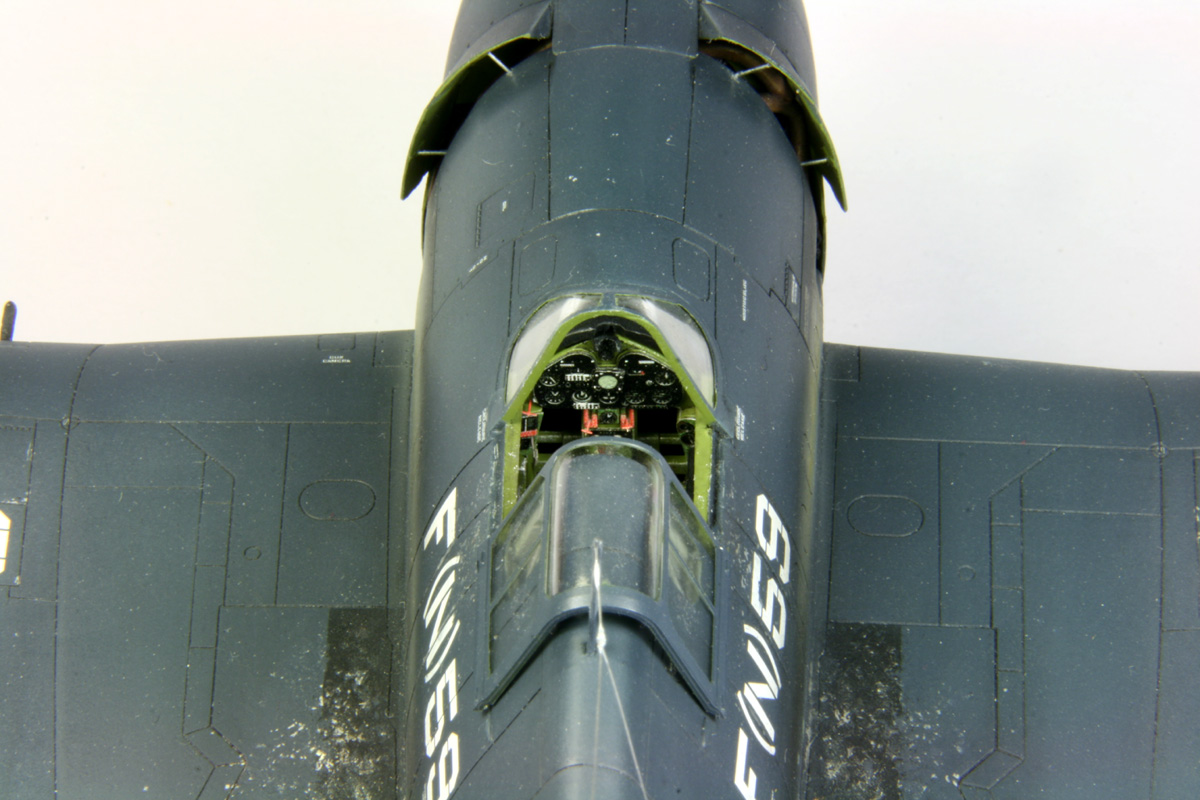
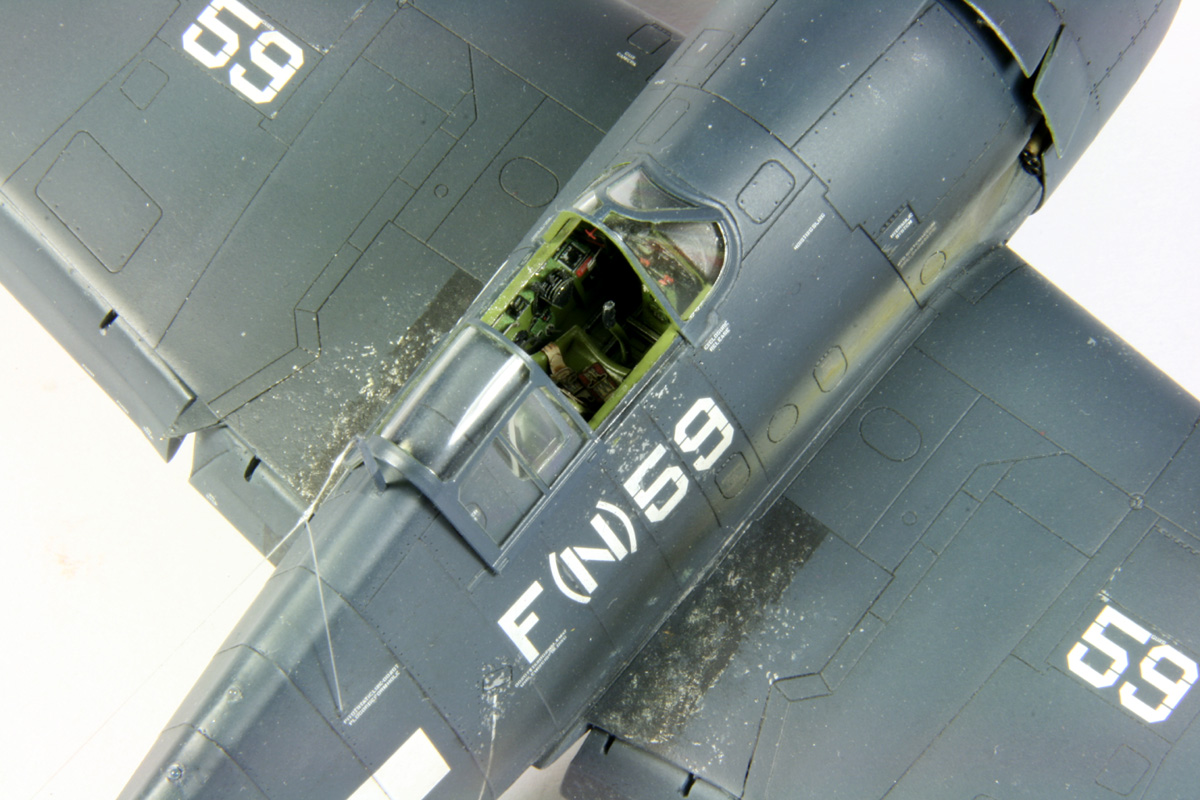
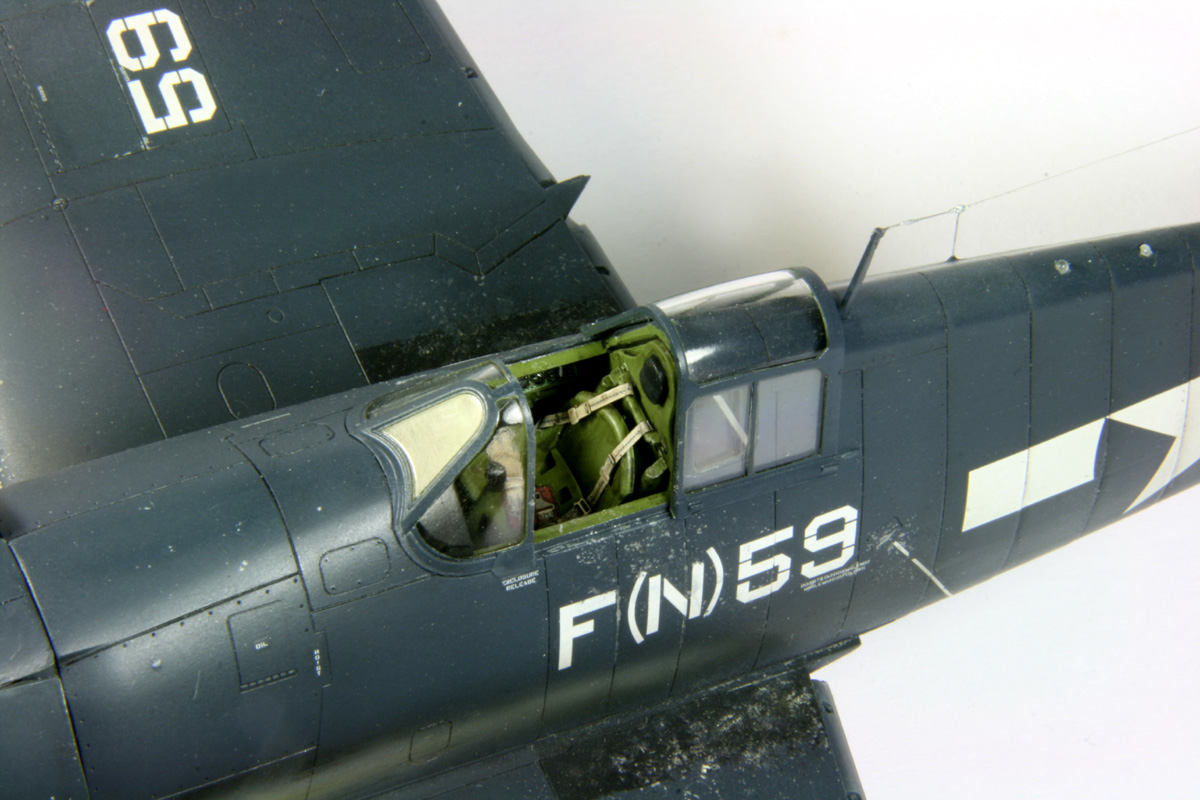
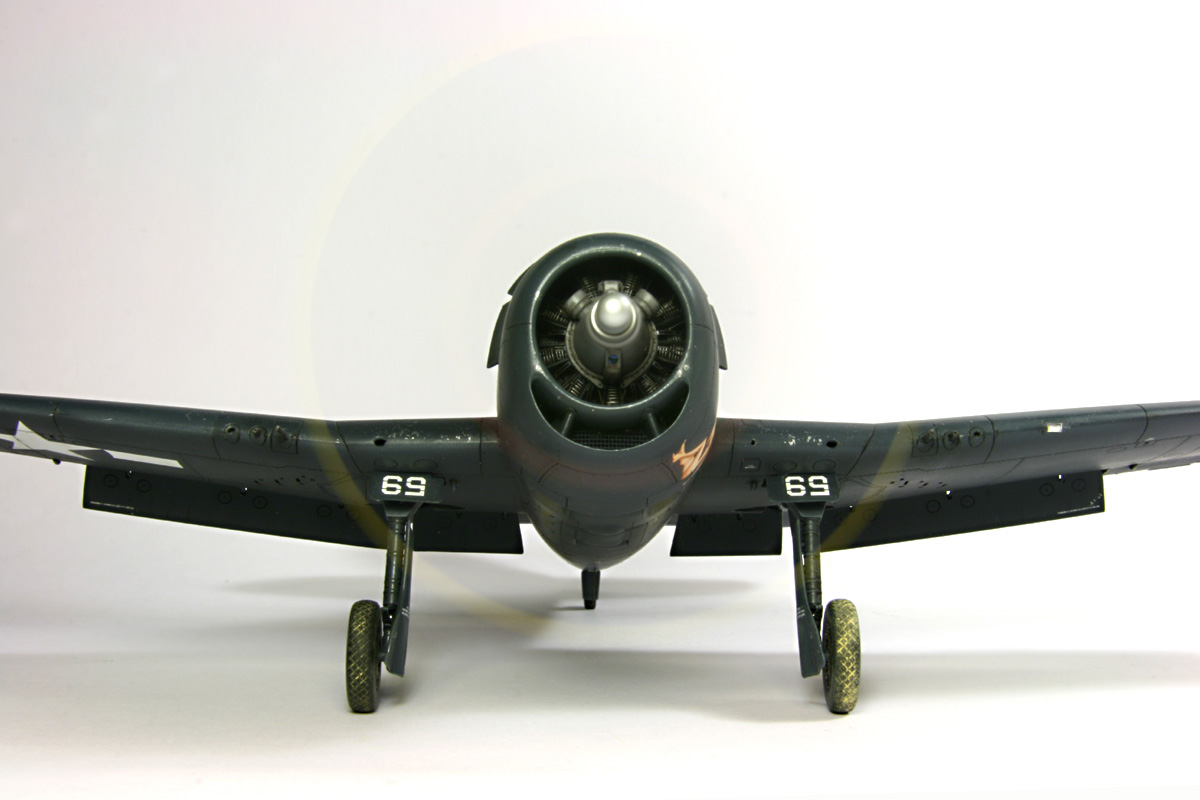
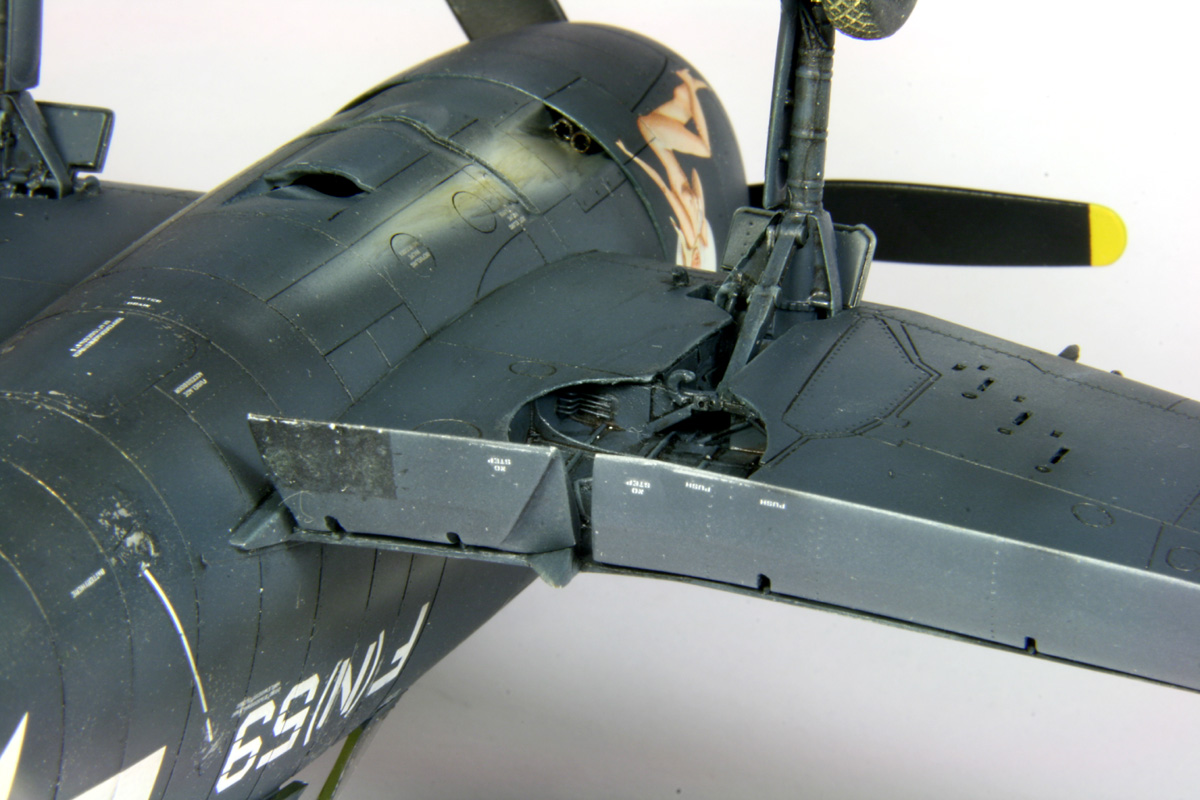
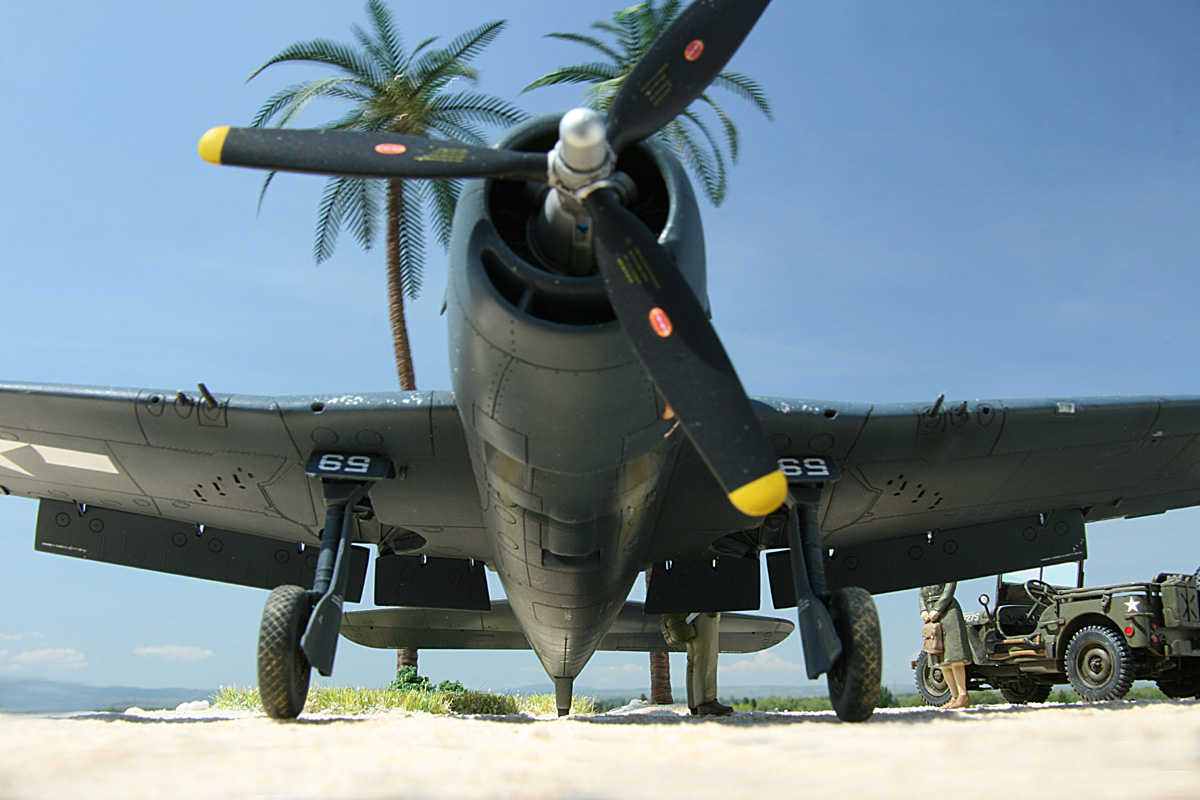
AssemblyThe model started as a no-brainer: cockpit was finished in one weekend, the fuselage - after some minor detailing behind the cockpit - closed, wings slapped on... I wanted to have the rudders deflected, so I had to remove the mounting tabs, and sand off the leading edges of the moving rudder parts into a rounded shape. Then something bit me, to drop the landing flaps. Still everything easy, till the first reality check: the flaps were actually fowler type. I've found a video on the web, which really nicely shows how they first protrude all the way to the rear end of the fixed part of the wing, and then turn downwards.I broke out the flaps, but here's Eduard: the wings are not prepared for the flaps in open positions, since their rear is just left open, and has to be closed. I used some putty, but since sanding in this area was difficult, on top came some metal foil. The flaps have to be filled and profiled, as the kit parts have a recess towards the wing. Additionally, a protruding triangular part has to be sawed out of the flap and glued to the wing. I reinforced the structure with metal bits. Another surprise were the wheel wells: since a large British vendor messed up my order for aftermarket replacements, I just decided to build the model as is. Unfortunately, the kit is so far off the real geometry, that I just couldn't keep it at that. I decided to beef it up on the model, which proved to be a tough go. In the first step, I just planned to add some undercut on the sides of the well, but that didn't look good. In the end It was the dentist's micro-milling cutter, a pile of chips and everything from scratch: the walls were done from metal foil, the ribs from plastic sheet, the structure from stretched sprue. After four weeks works and a lot of cursing, the wheel wells looked all right in the end. The kit engine is quite good, and needs nearly no improvement. In conjunction with the open cooling flaps of the Quickboost cowling, is needs some attention, though: the kit exhausts are puny, and would look funny in the gaping holes behind the cowling. Also the light - shining through - looks rather unreal. I added the complete 18-in-10 exhaust system from lead wire, which was drilled out at the end. The engine now looked like medusa's head, but gives the otherwise uniform kit a special something for the "second glance". The tail wheel well got some attention, but other than this, the remaining assembly was easy going. |
   |
 |
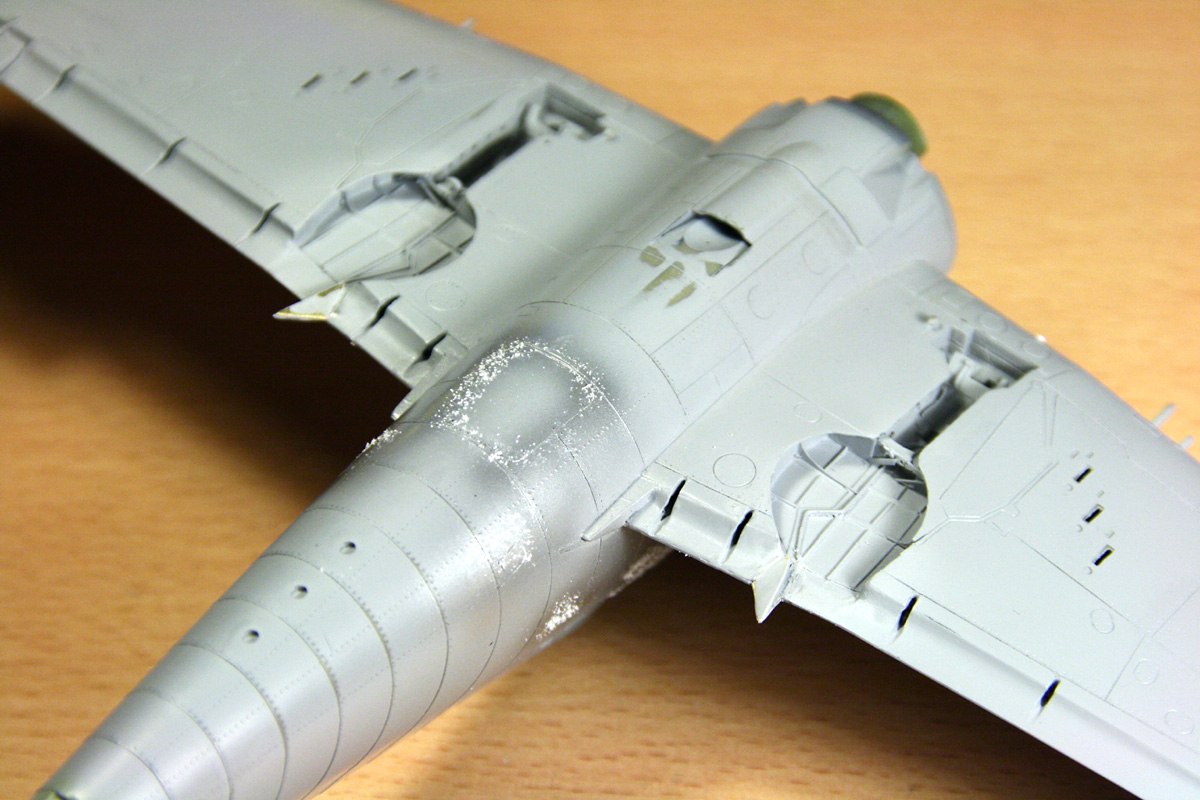
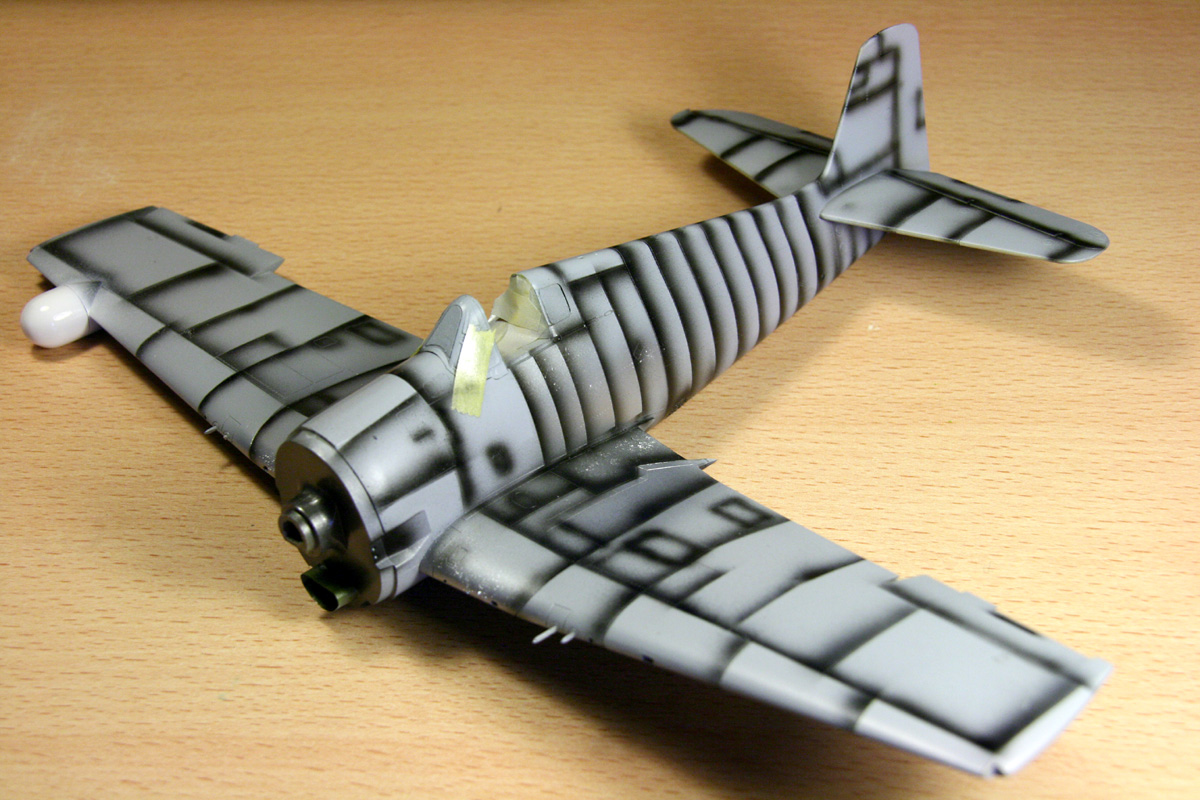
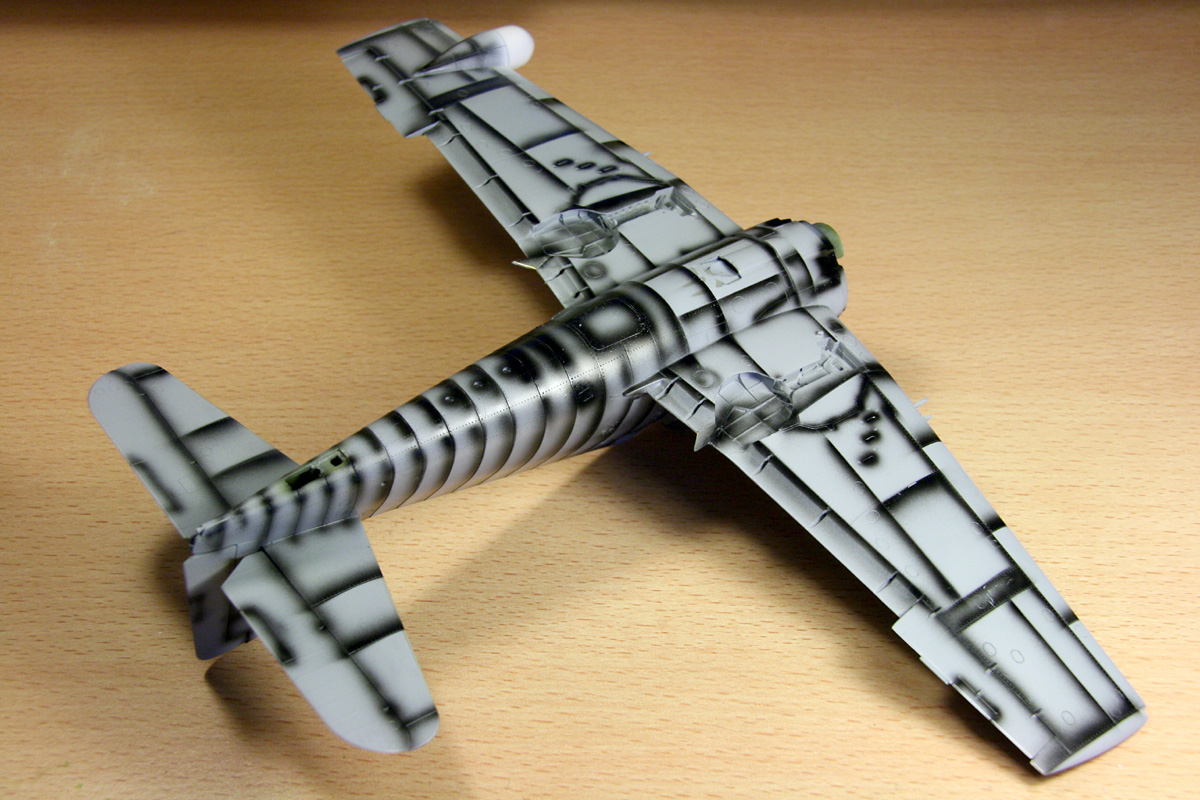
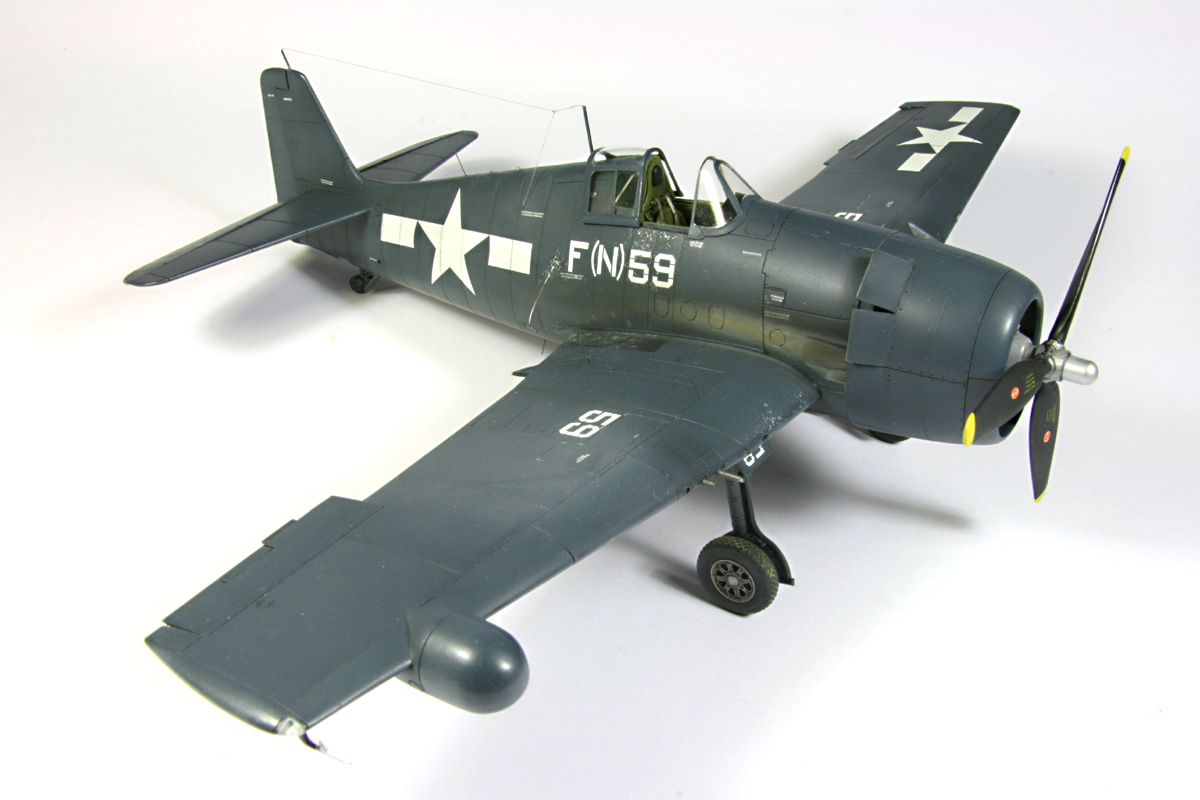
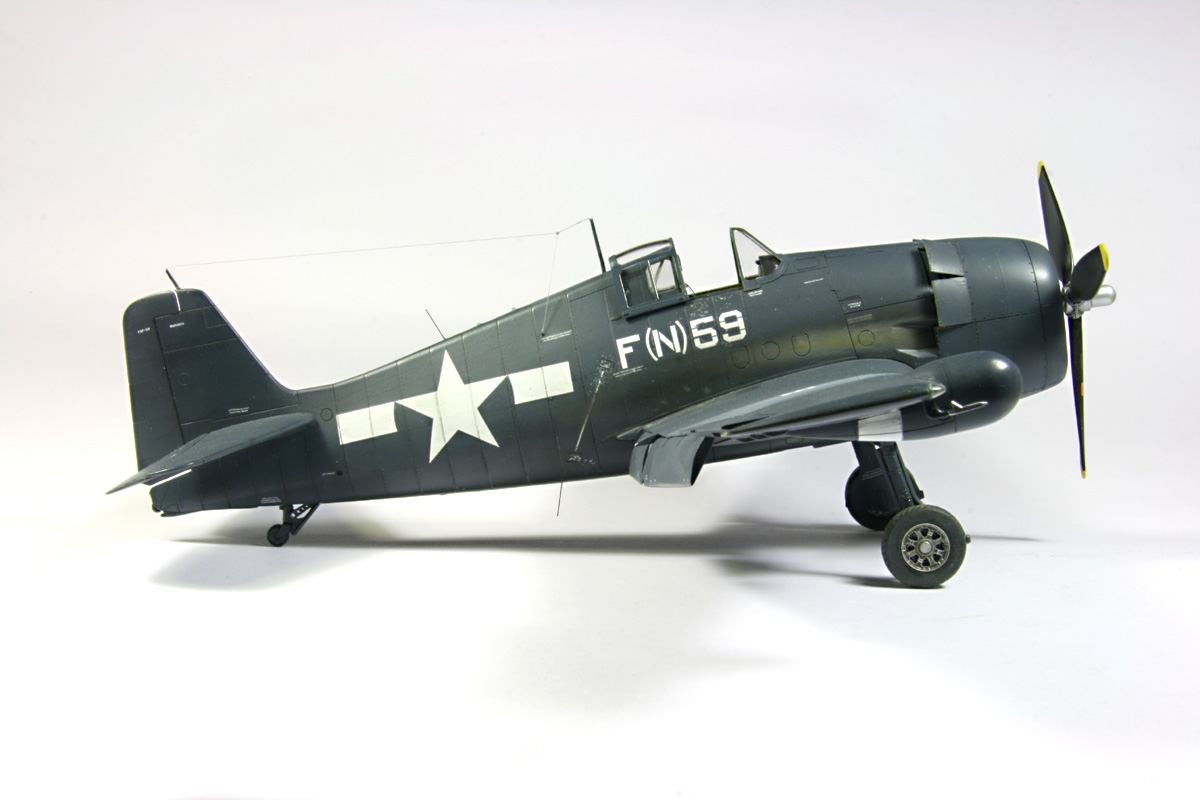
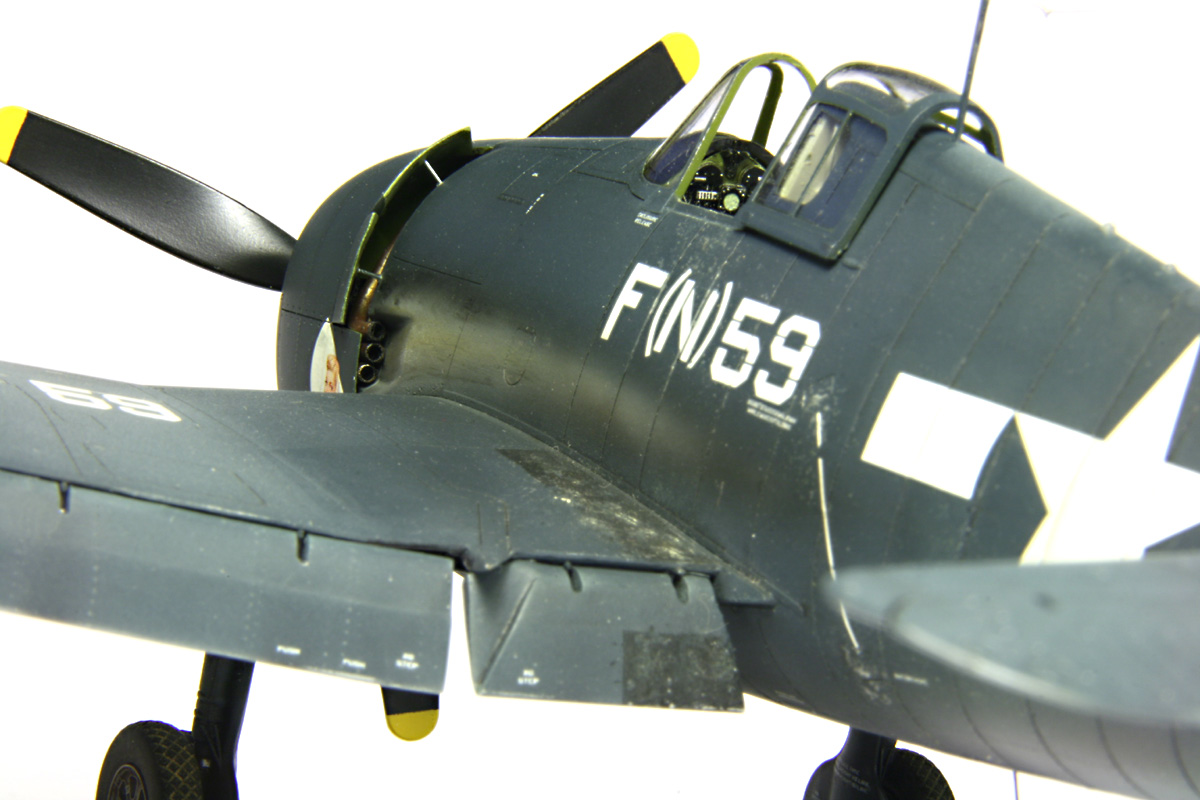
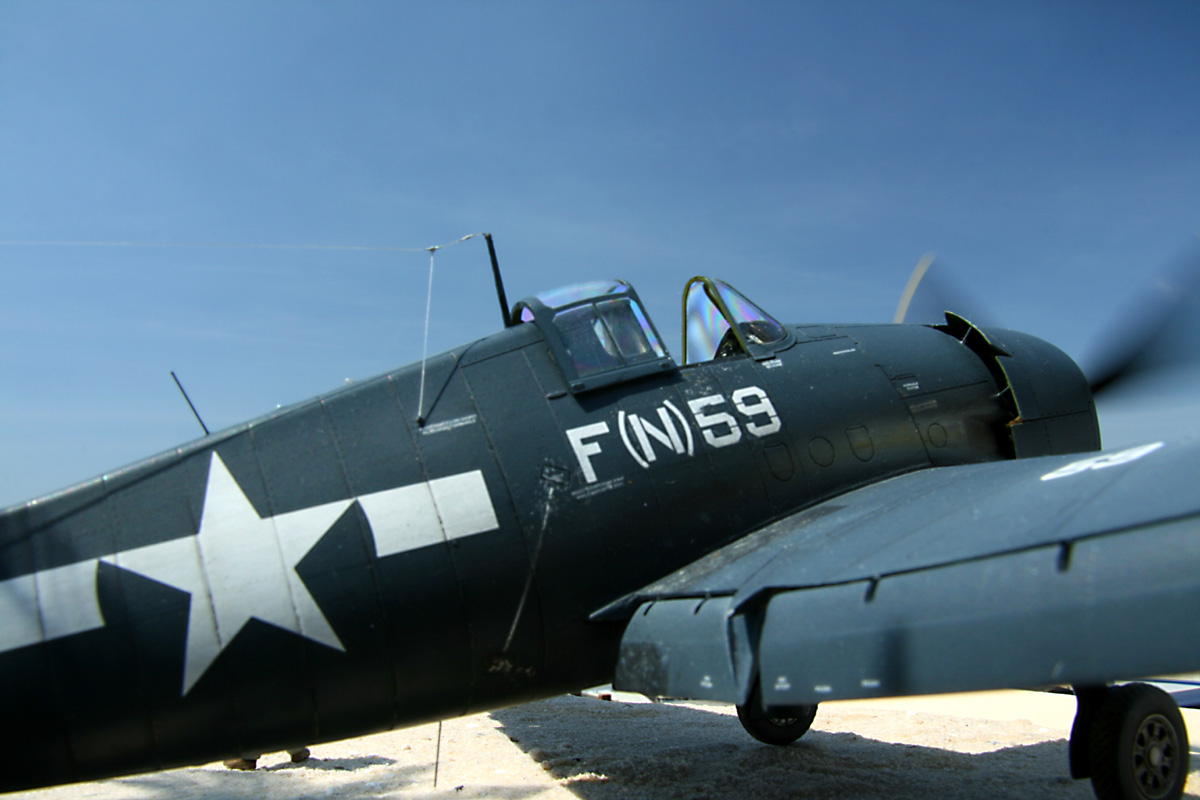
PaintingThe original was painted in a somewhat monotonous way, so the challenge was, to bring out some features on the model, which would make the uniform dark Navy blue more interesting.The initial coating was as usual Mr. Surfacer, with some sanding afterwards. I didn't want to use silver pencil, so some Alclad 2 was applied in strategic spots, where chipping would occur. Then the question was, how to prevent the top coat from adhesion, to create chipping. The Gunze acrylics, which were to be used, hold really well, so a separating layer was needed. Originally I was considering salt, but I never got around with this technique, so something else would be handy: I came up with washing detergent. It has different grain, and adheres well to the surface. I first airbrushed the concerned spots with some water, then applied the washing detergent powder with a brush. The pre-shading was applied in such a way, that the panel line was masked on one side, and the dark was therefore only on one side of the panel line. On top came a thin cover of Navy blue (Gunze H54), and then a layer of Future. It was then time to carefully wash off the detergent. As it came out, the detergent worked too good. The chipping was really severe, too much for US aircraft, but this method would serve nicely for weathered Japanese camo. The excessive chipping was sprayed over again, and re-sealed with future. The decals went on nicely, but were too thick for my taste. I used a setting fluid, but still the edges were clearly visible. The usual weathering was applied with thinned artist oils, but this time also with some brighter ones. On top came some pastels, and everything was sealed with the Xtracolor flat seal. I sanded off the flat, to sink in the decals, but this approach proved problematic: due to the yellowish hue of the Xtracolor, the surfaces around the decals were somewhat discolored. That required additional careful sanding around the decals. All in all, it would be best, to use only layers of Future (or other acrylic clear) for the sanding, and seal off with flat afterwards. |
|
 |
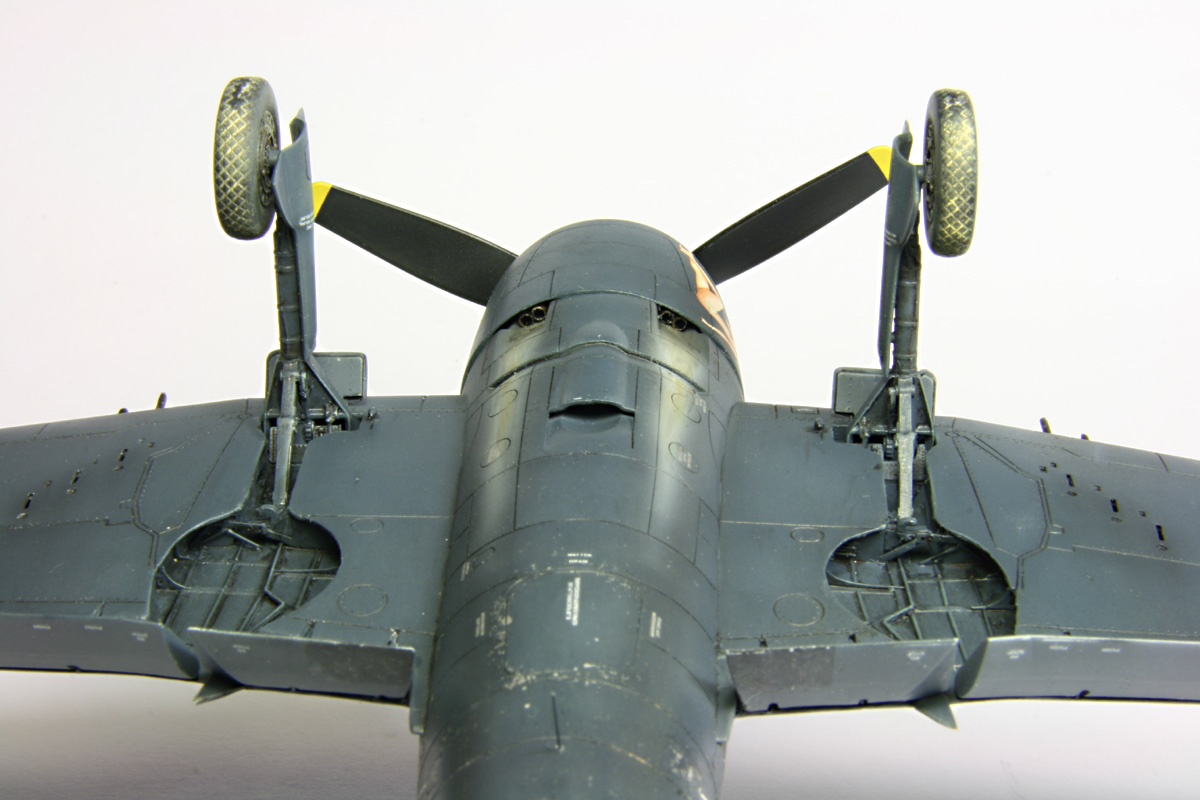
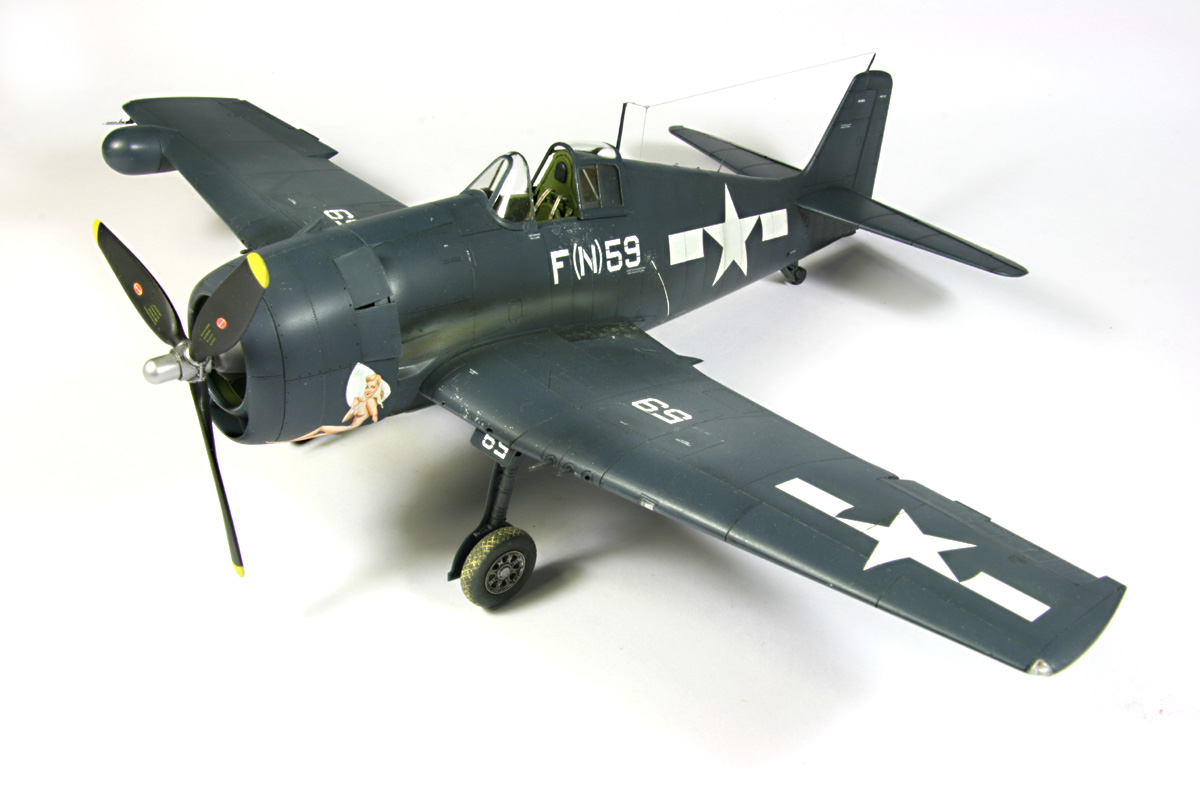
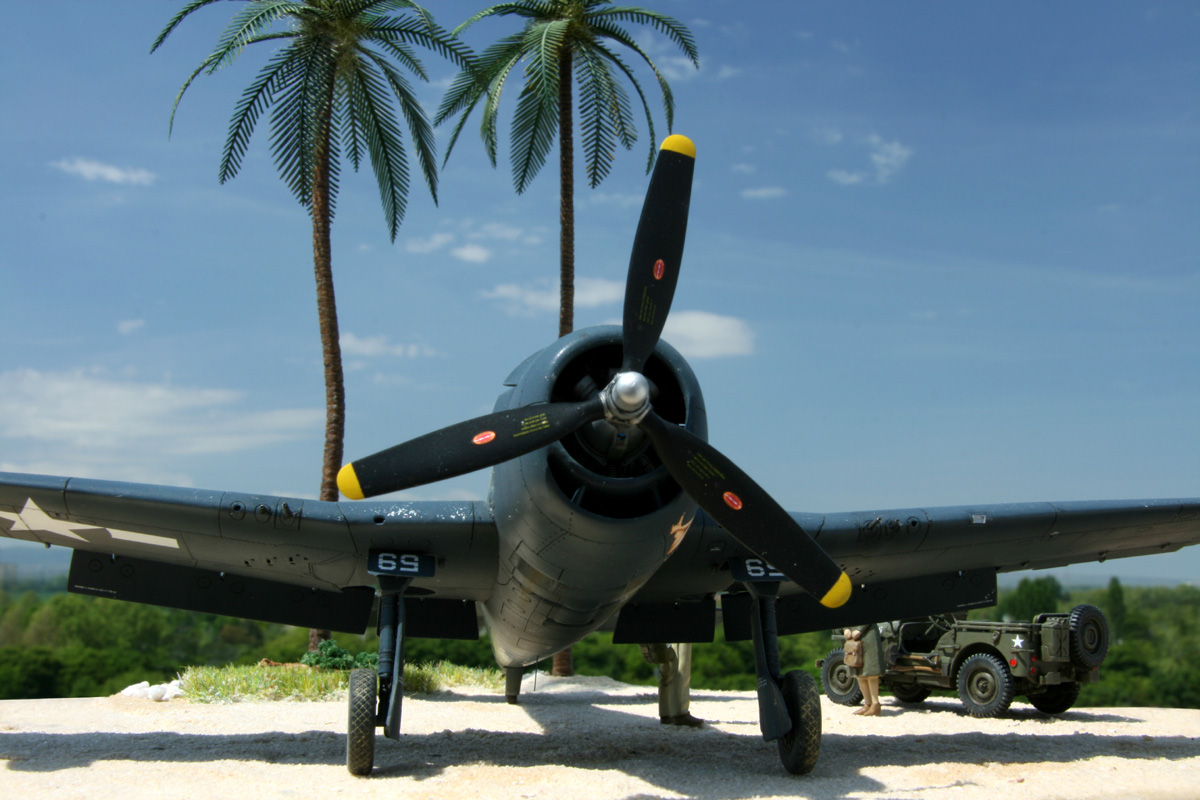
Finishing touchesAs usual, the Hellcat got a prop bearing made from a syringe, which allows for really easy movement of the rotor. The antenna was made from nylon thread this time, because the stretched sprue on the Buffalo broke too often. The antenna posts were also made from squeezed syringe.The wheels got extra dirt, since it was supposed to stand on a sand diorama. The flaps were assembled using U-shaped guitar wire pieces as supporting hinges. One of the distinctive features of this aircraft were the clearly visible exhaust traces on the dark painting. I applied them starting with Tamiya smoke, in broad stripes along the fuselage. Then, very fine white was used to paint the area inside. The very inside of the trace was carefully sprayed with Tamiya buff. On top, I used pastel chalks and dry-brush with artist oil paints, to bring some structure into the burnt area. It was then sealed off with Future, mixed with Tamiya flat base. |
|

 |
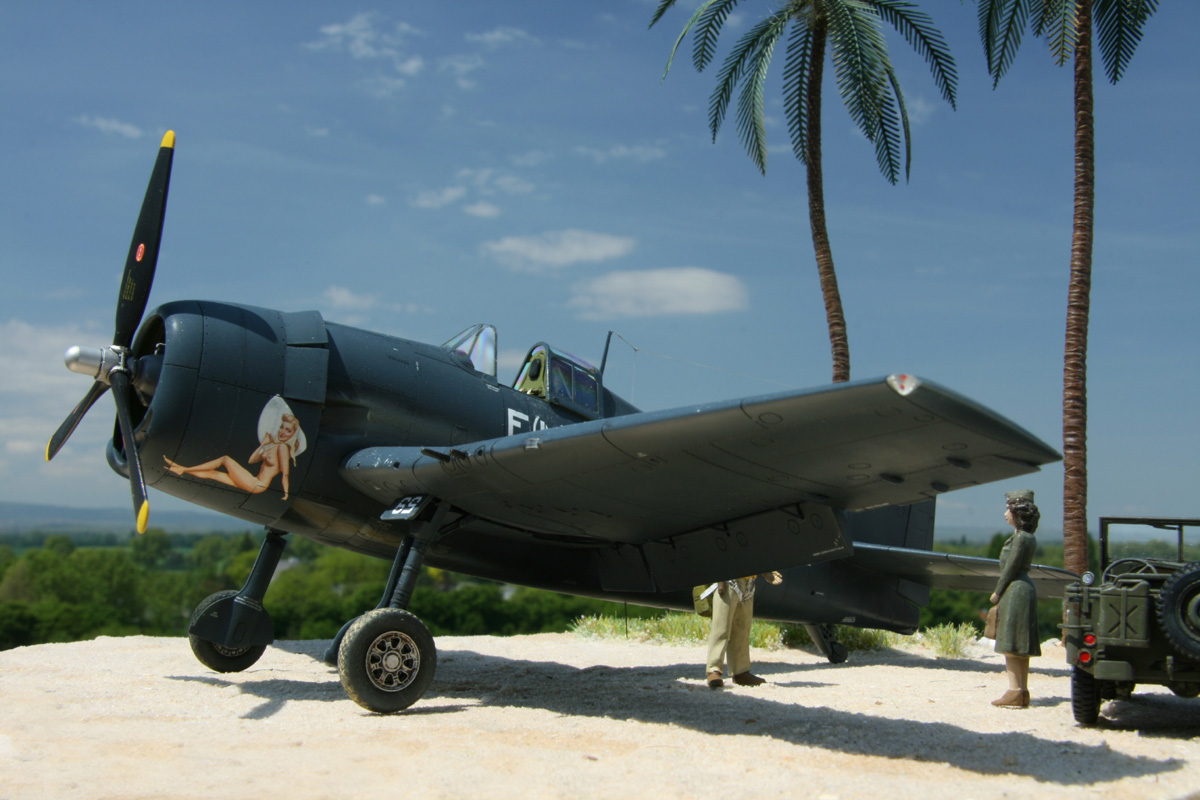
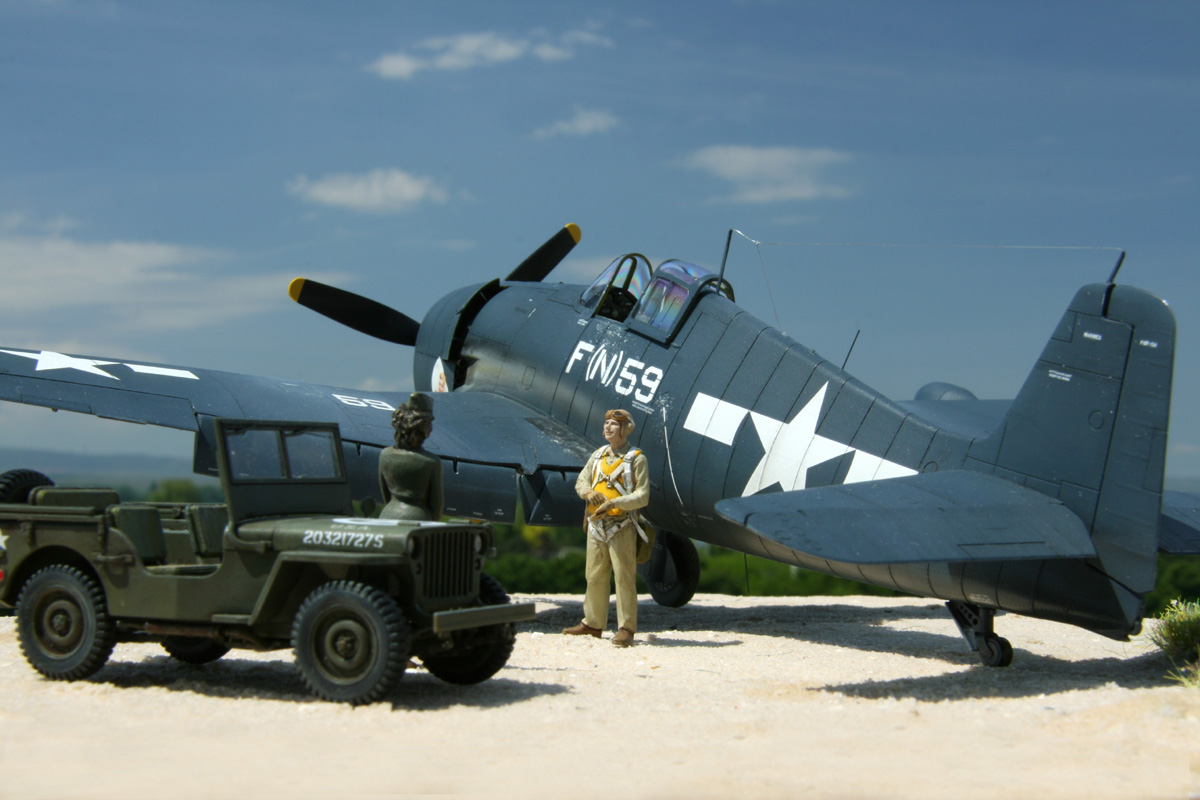
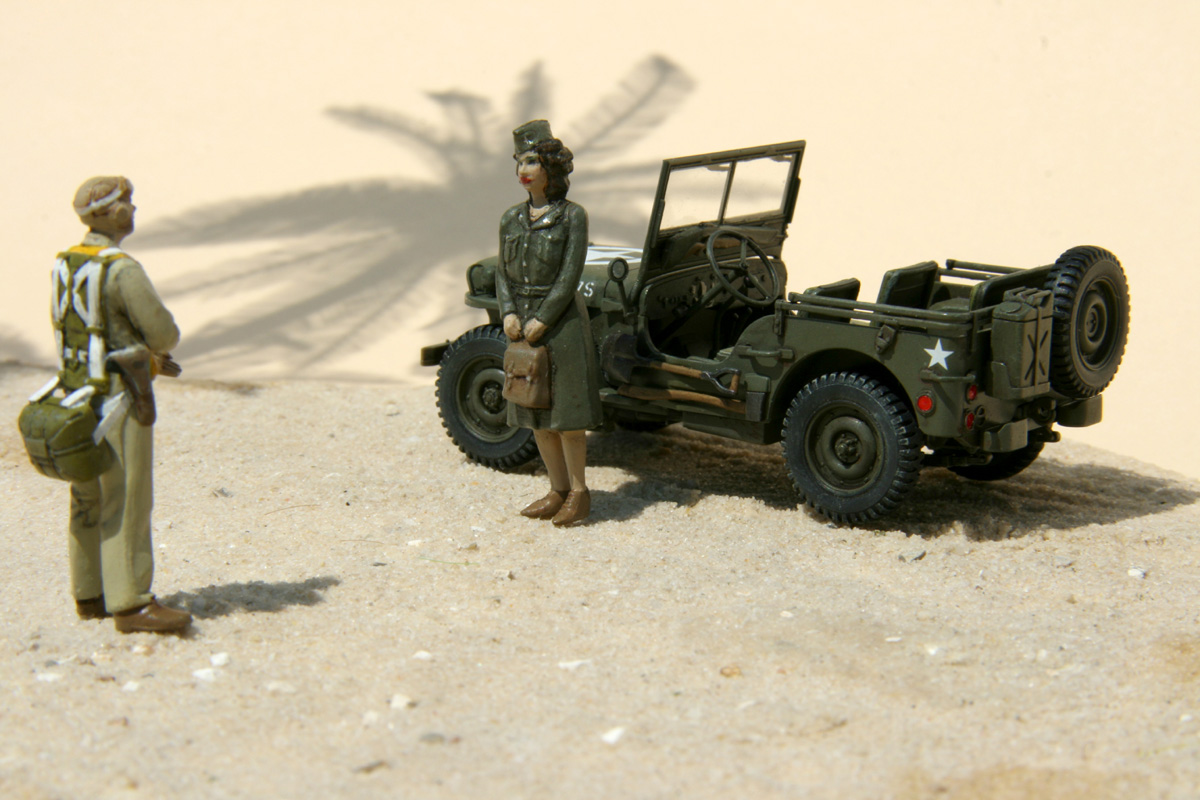
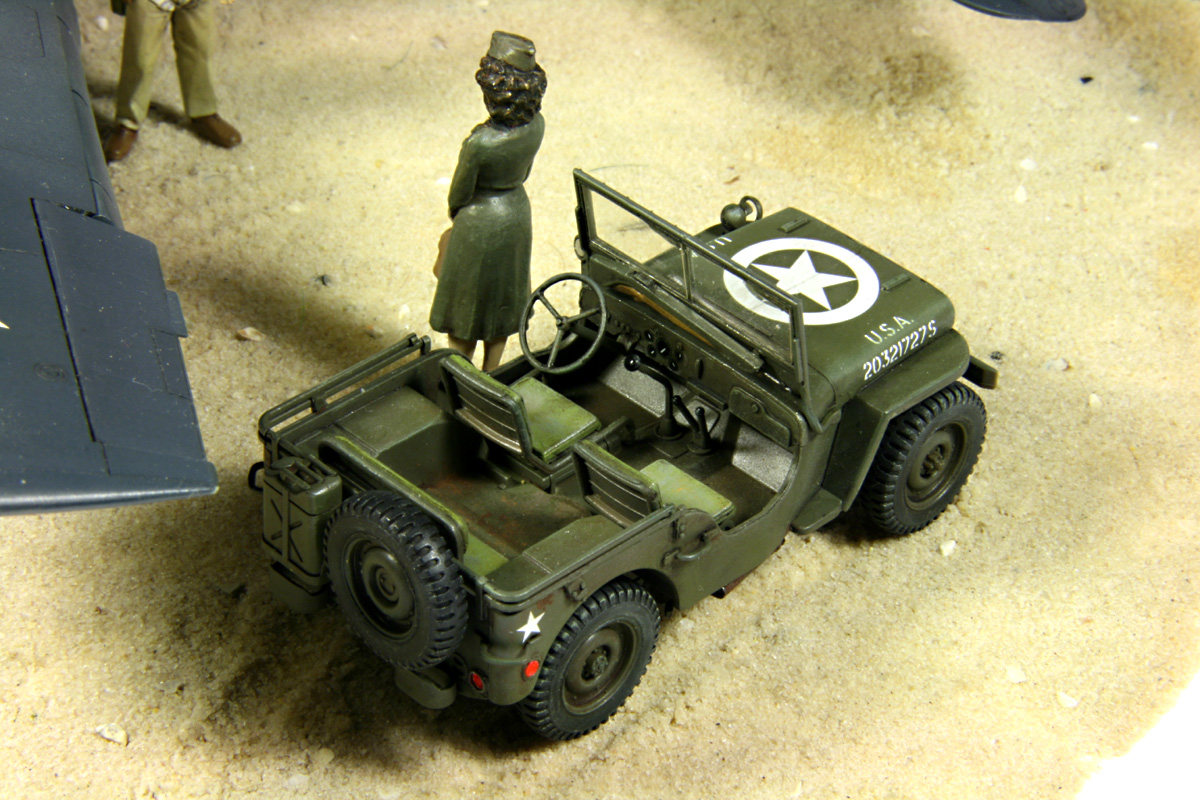
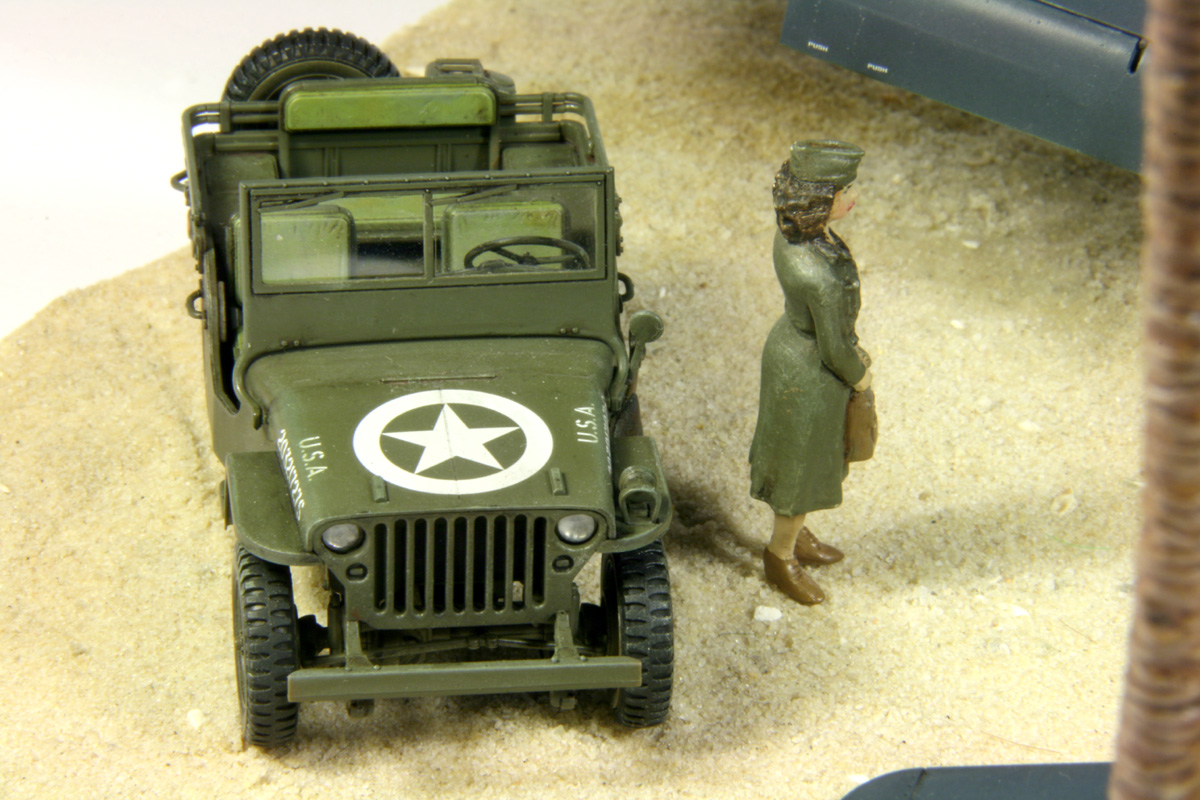
DioramaTo round off the set, I added a pilot figure from Tamiya's Navy Pilot's box. This figure is of amazing quality, and really enriches any diorama. To put some contrast, I added a nurse (from a Preiser set), and a Tamiya quarter ton truck.The truck was a nice distraction, built really easily, and proved a great testing ground for Tamiya's weathering master sets. I made the base from a plastic plate, with sand glued on by white glue. I used a wheel from the spares box to put imprints into the sand, as long as it was still wet. The effect is really nice, and the diorama could stand even a little more of that. The palms are from Preiser. They are old tech, and a little tricky to build - the kit would recommend to butt-glue the branches to the trunk. I didn't like the idea, so I drilled all the branch ends, and added wire pins. The palm trunk also got holes, so the tree had some stability in the end. the center on the palm was wrapped with cotton wool. I used the Tamiya weathering master with the palms, to give them at least some realistic appeal. |

|


 |
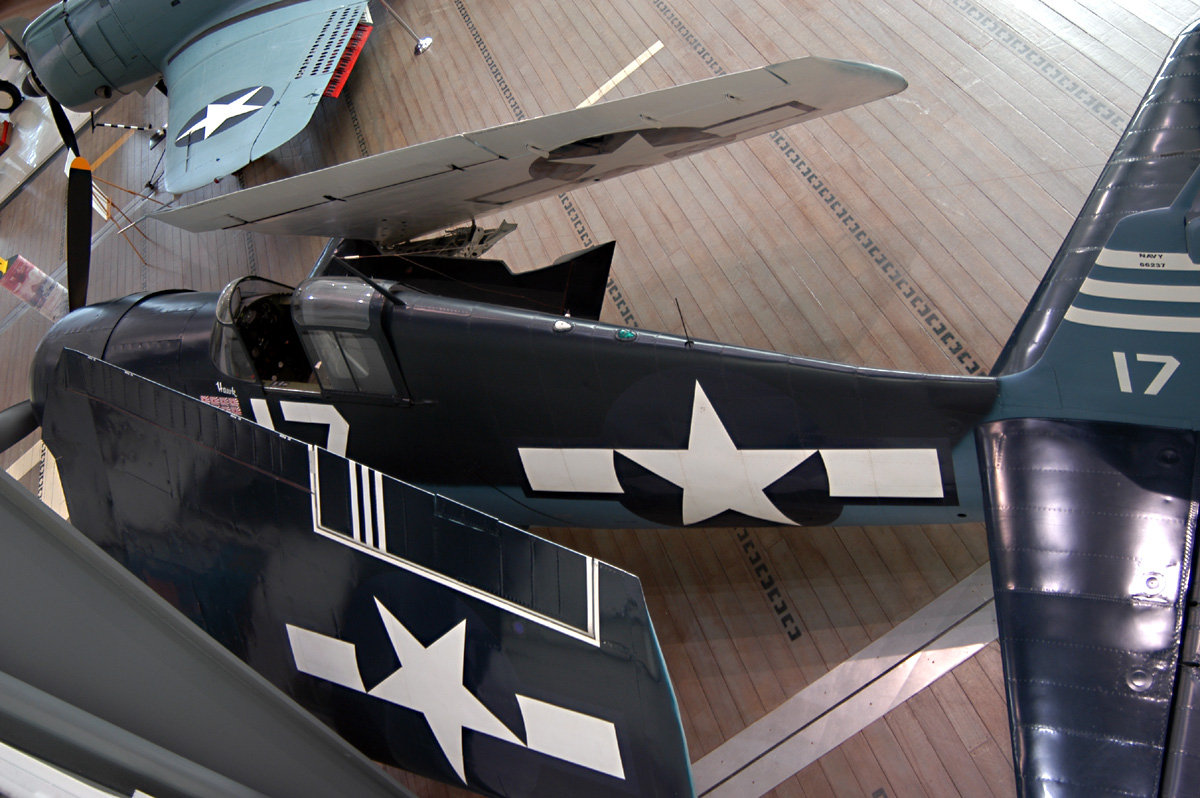
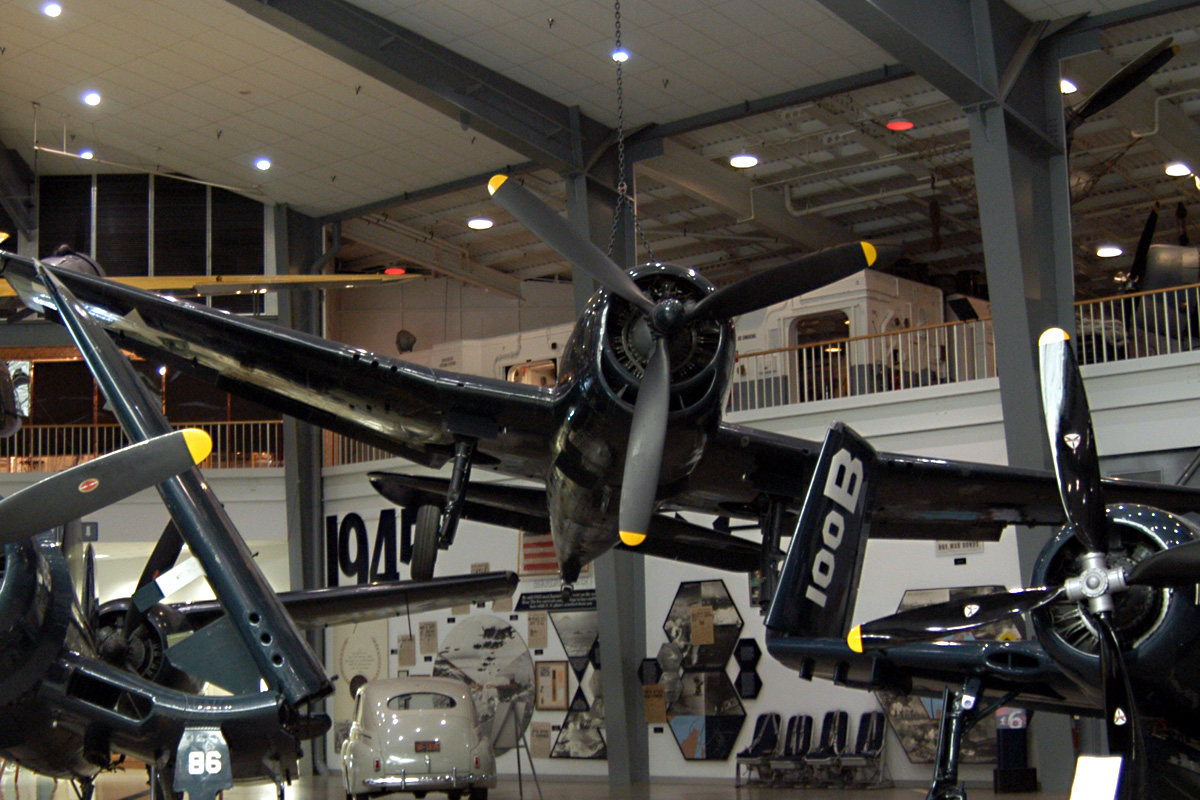
| Below are some reference pictures from the Pensacola Naval Aviation Museum |

 |
|
SummaryThis was the fastest build ever. The complete diorama was finished in only eight weeks, and would be even faster, if it wasn't for the mishap with the wheel wells and the flaps. In the end, it was a rather pleasant one, and the diorama really brings a tropical feel with it - where the nurse would ask the pilot, if he'd spend the night with the other lady - the one with the wings... ;-) | ||
Frankenthal,
June 2010