Mirage Hobby 1:48
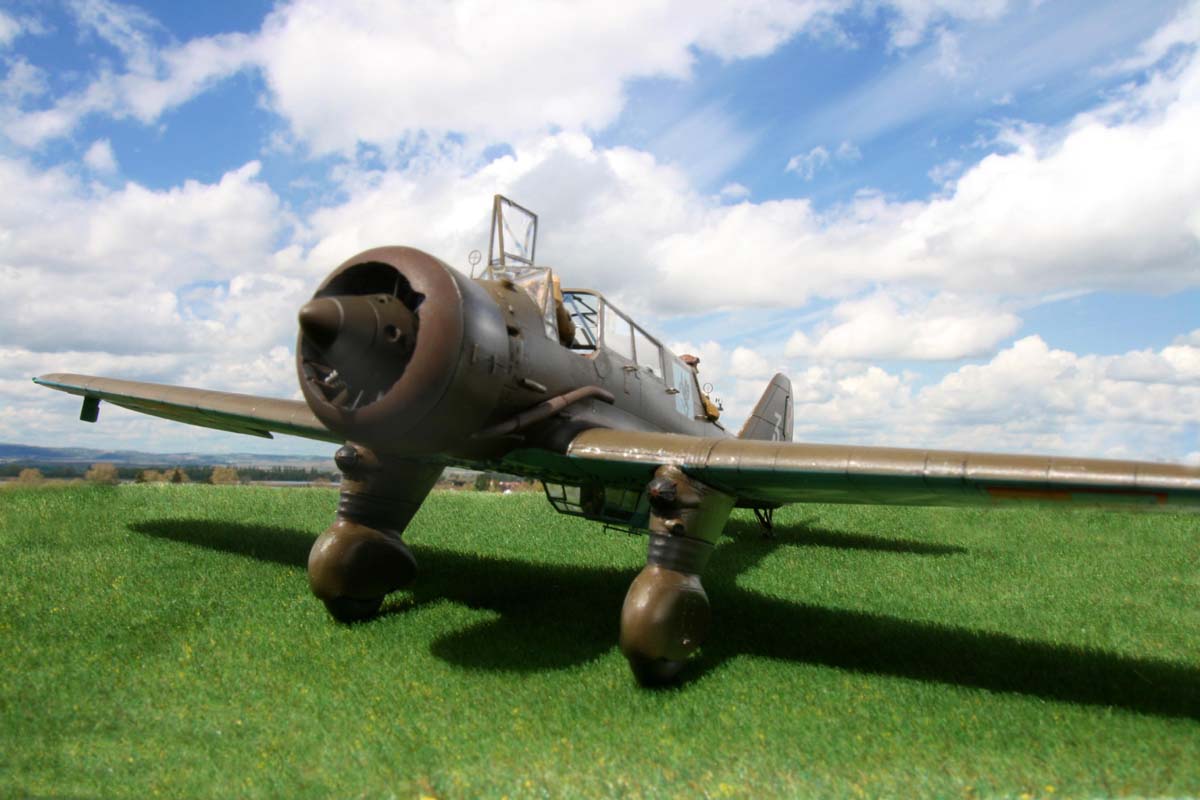
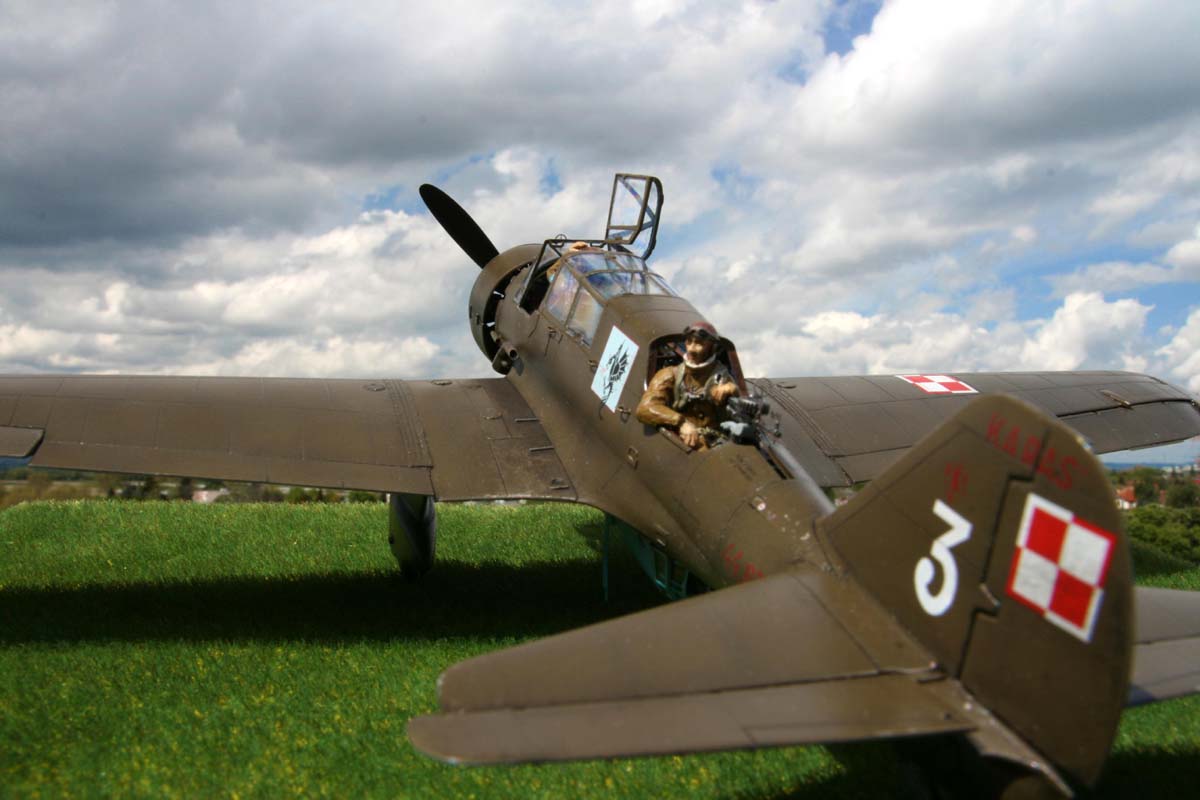
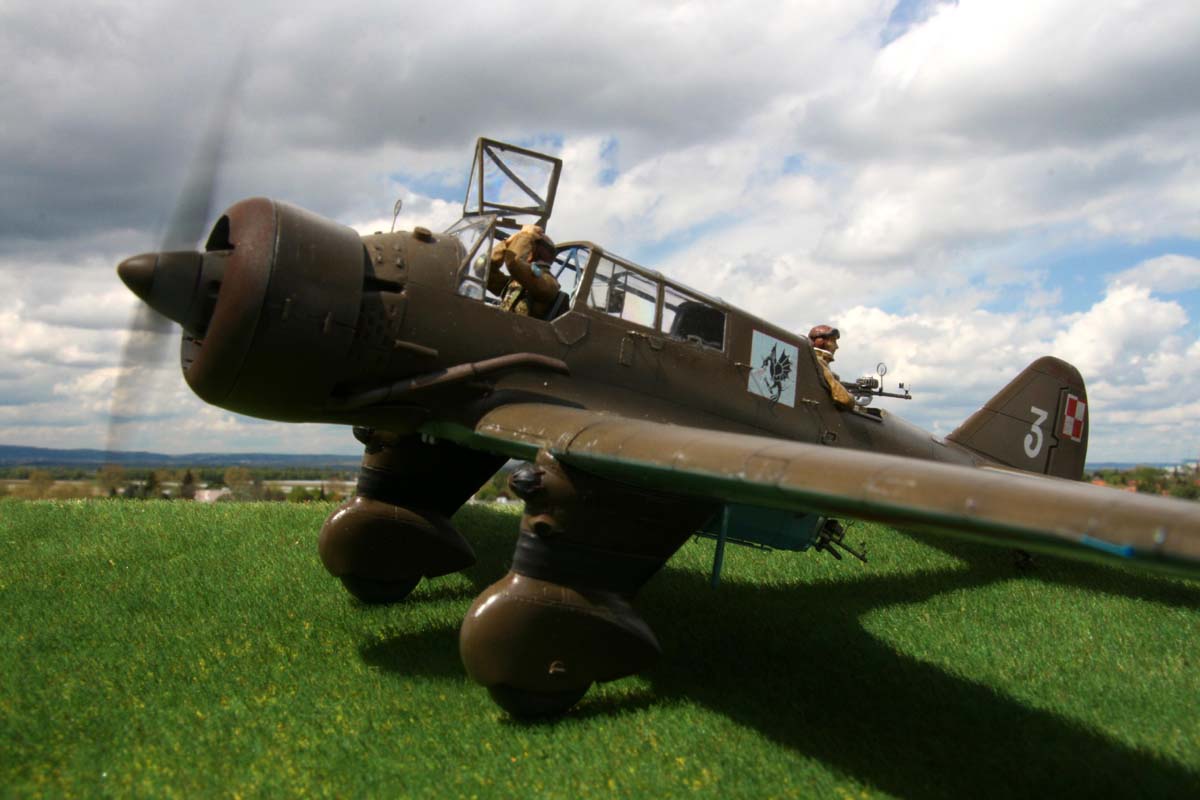
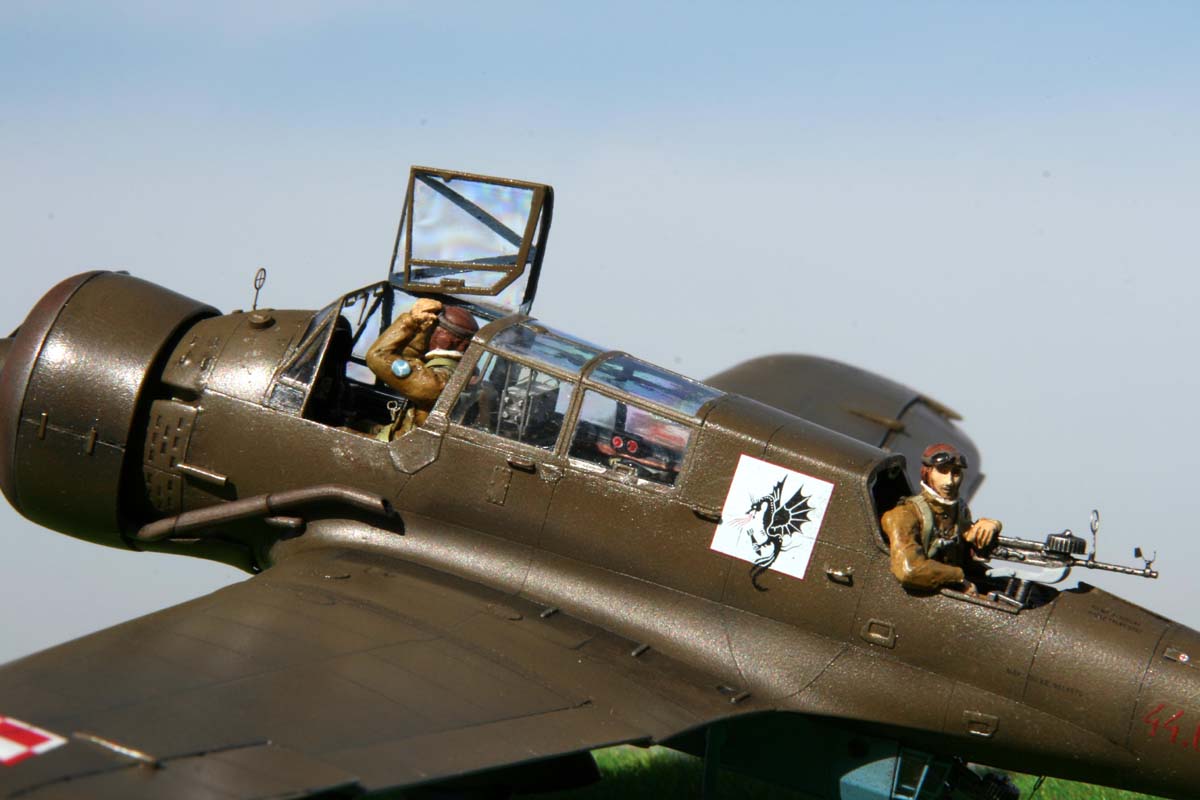
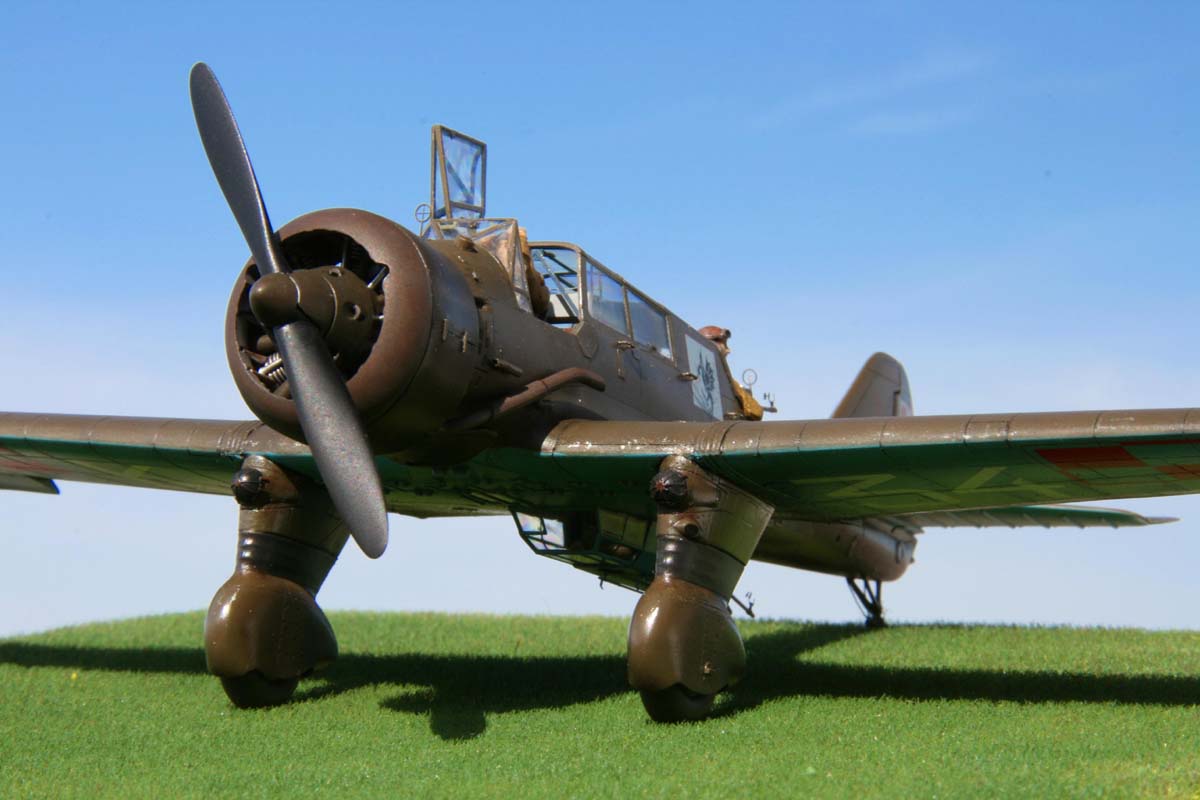
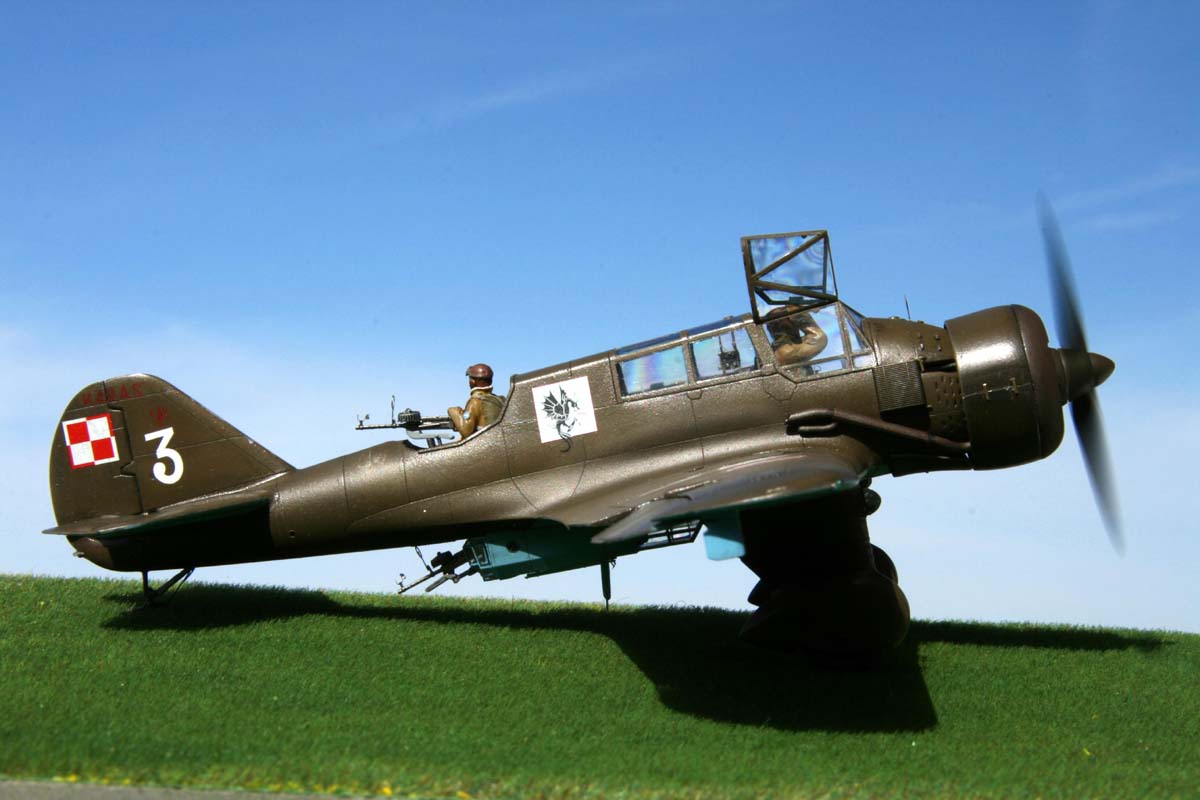
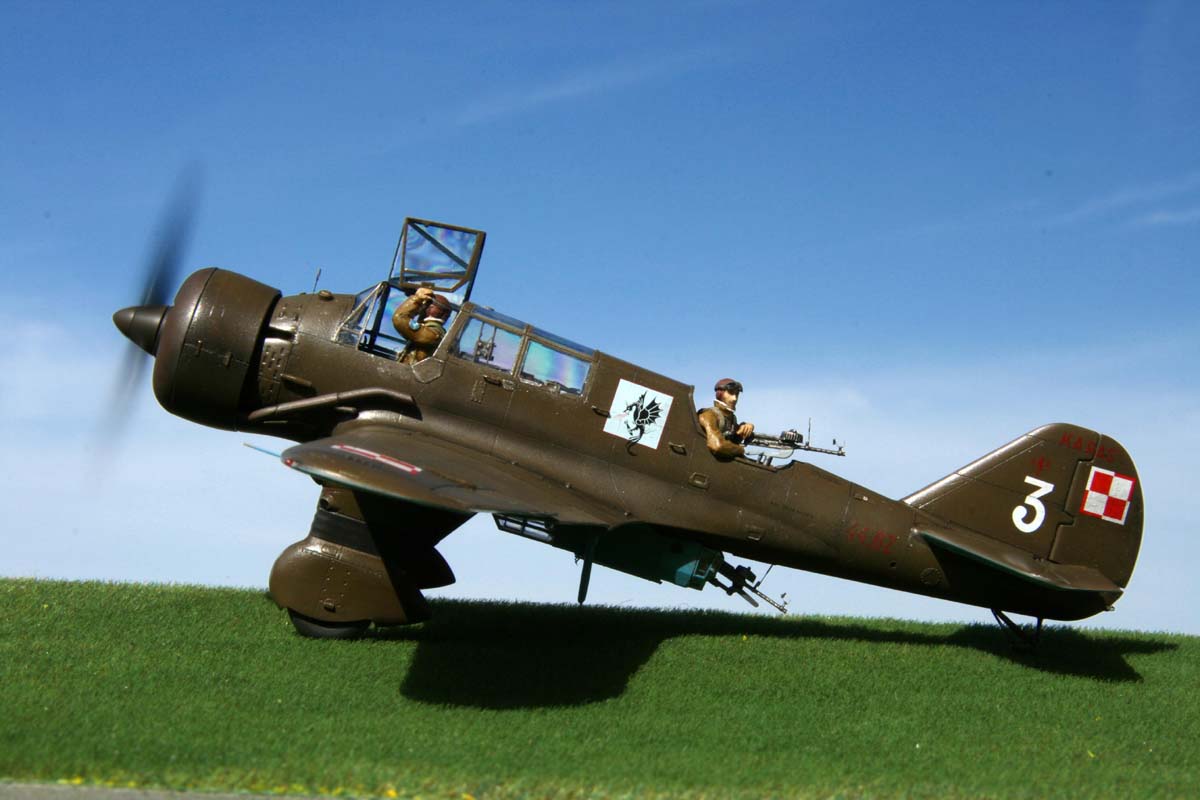
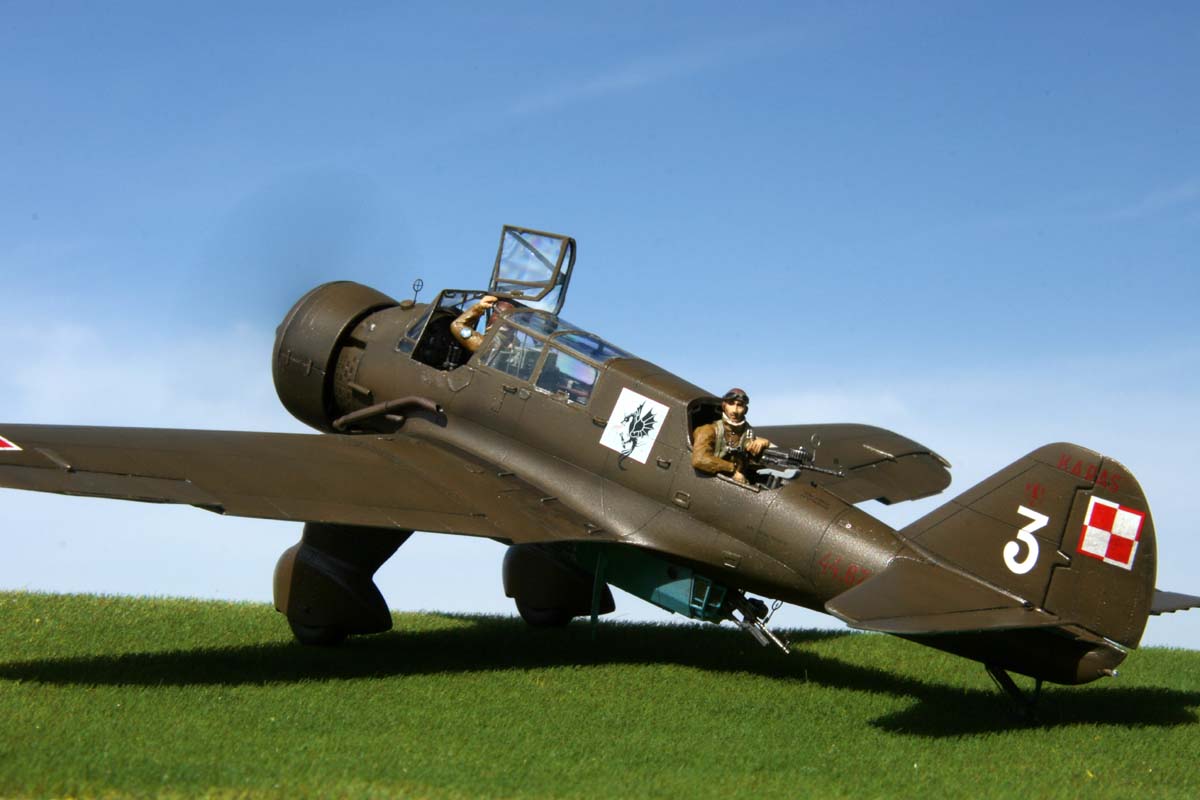
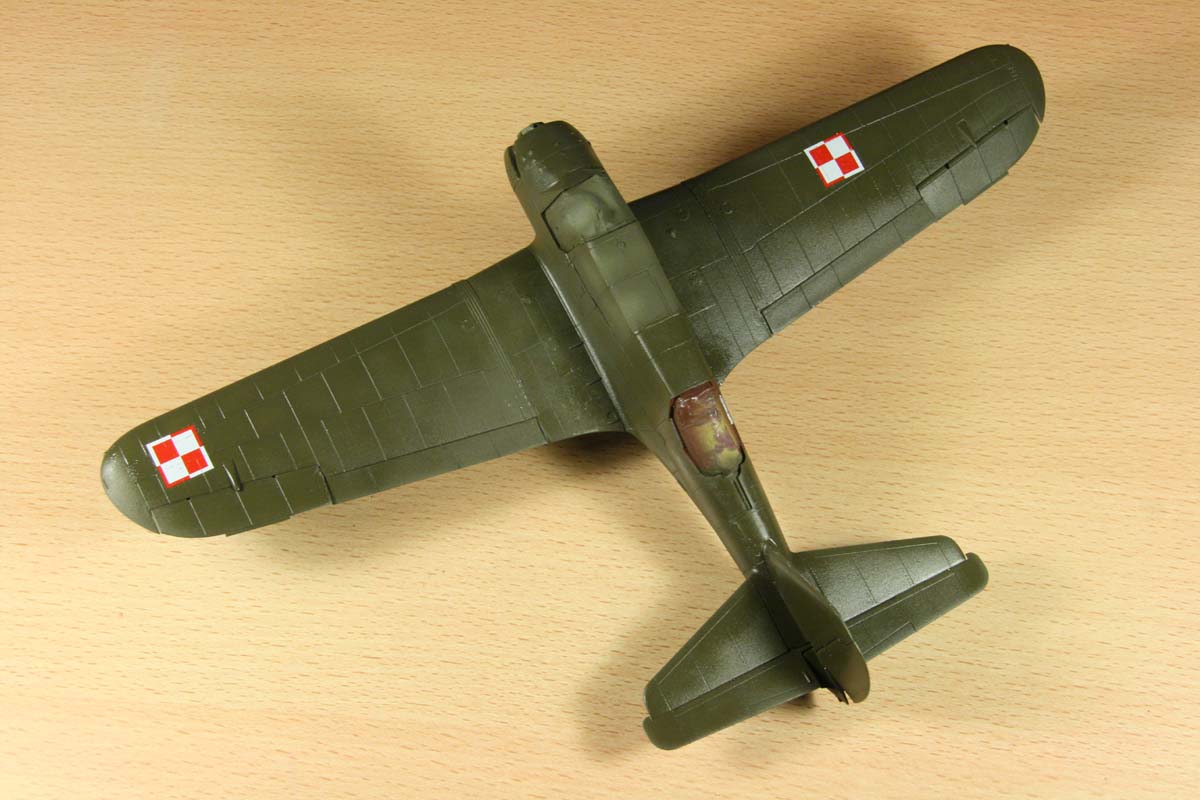
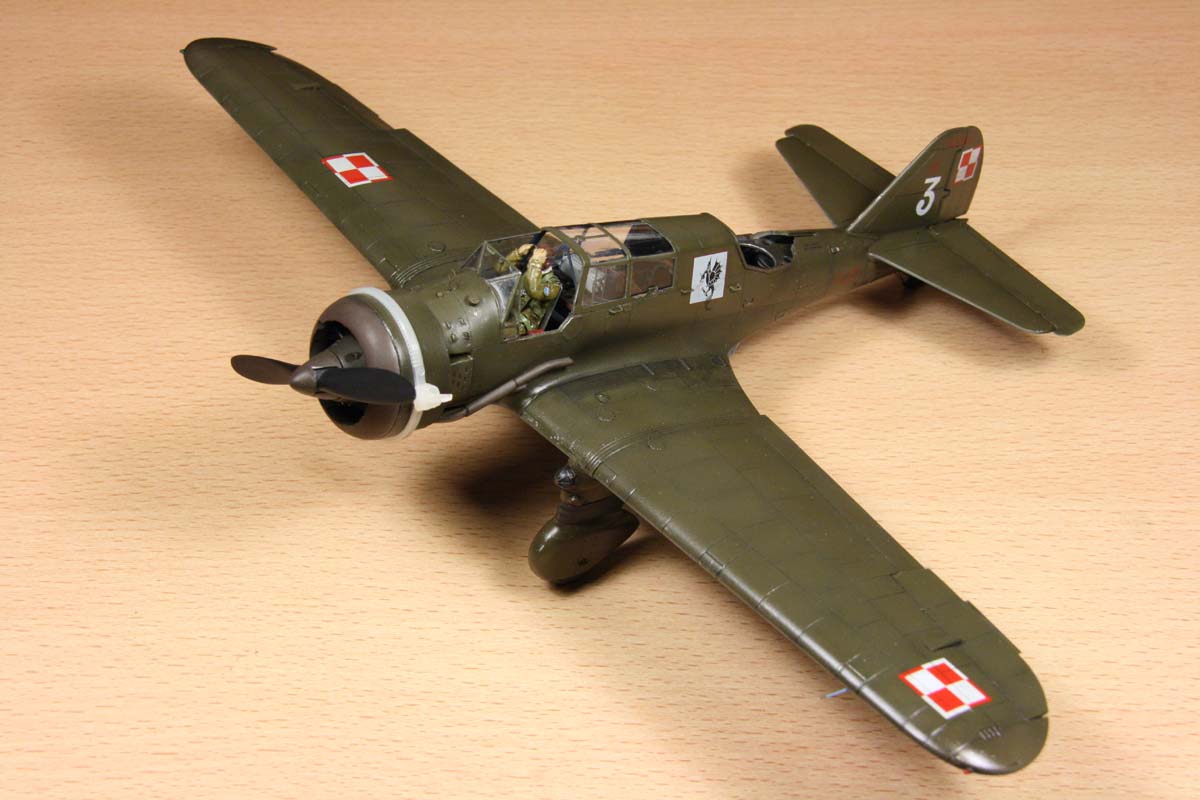
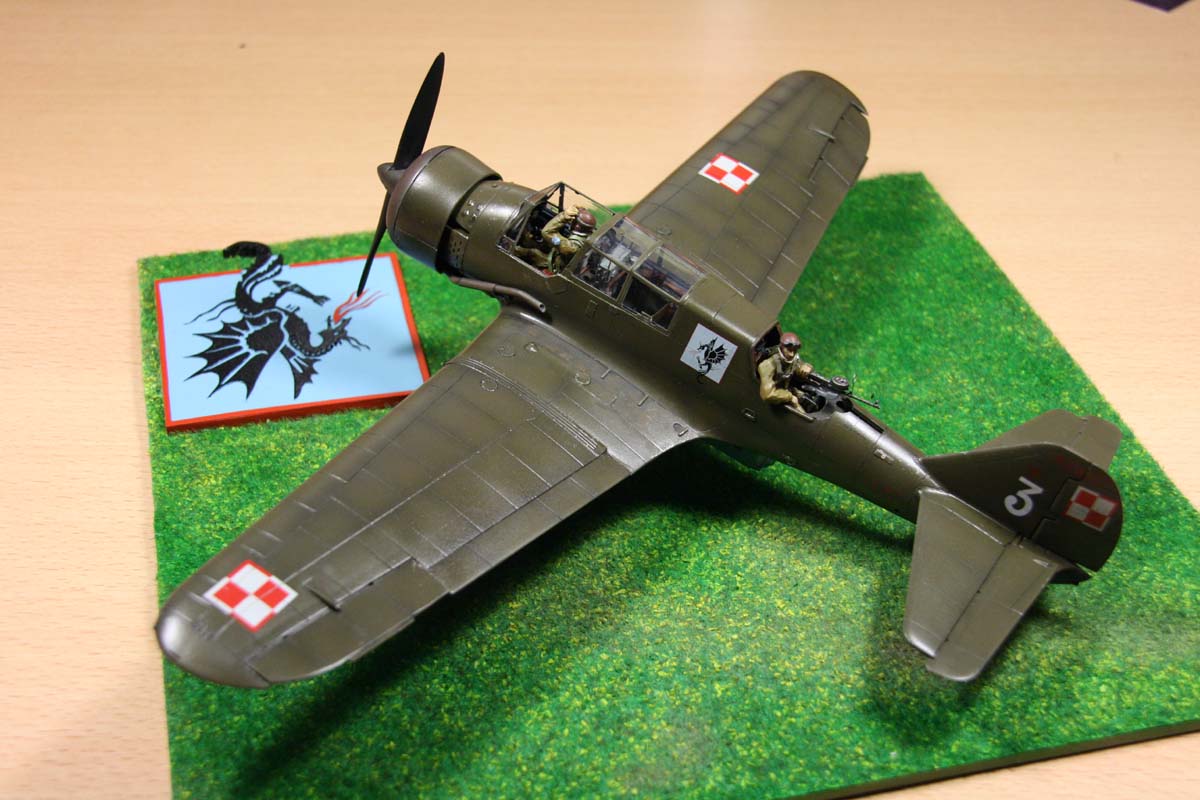
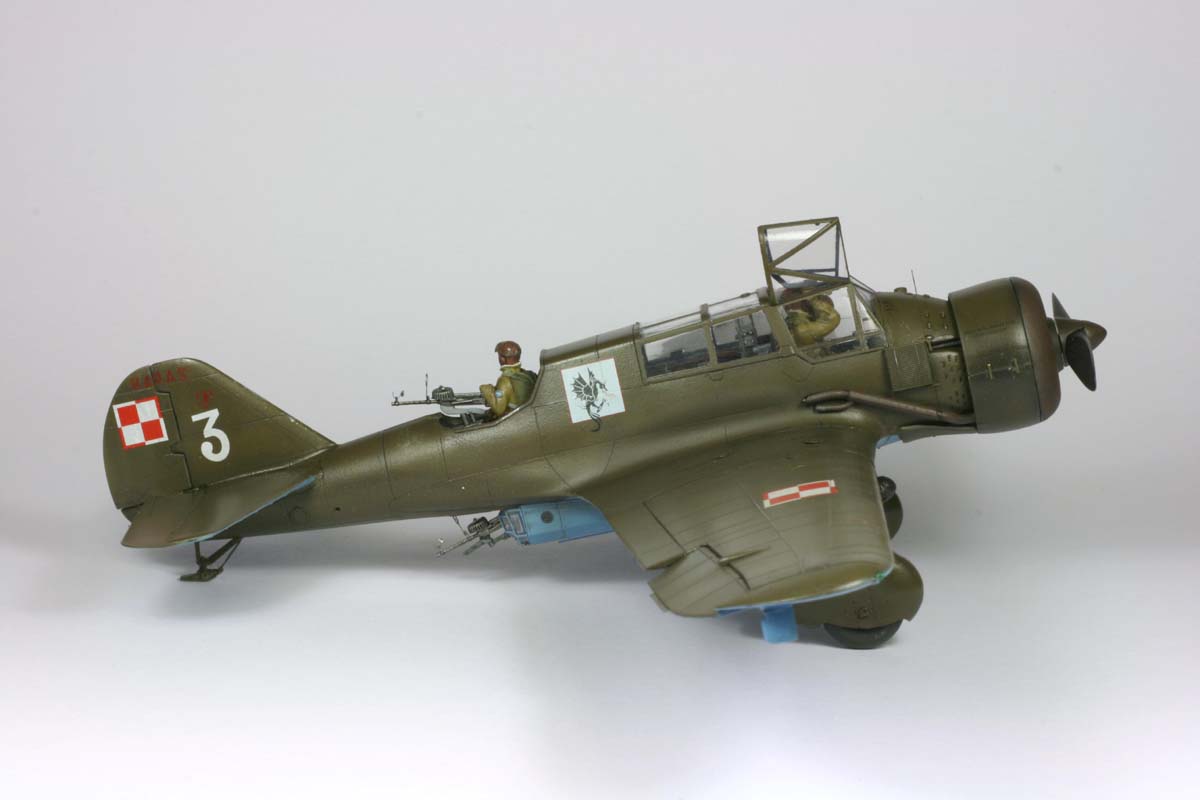
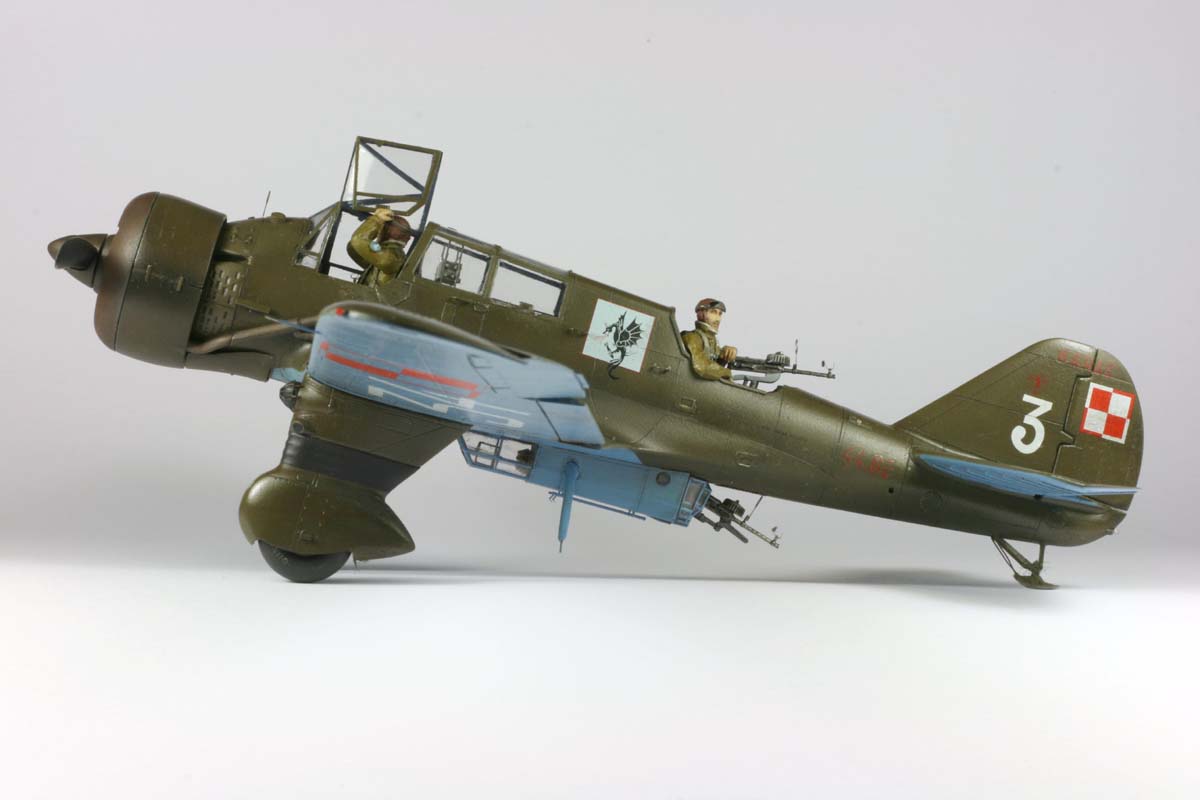
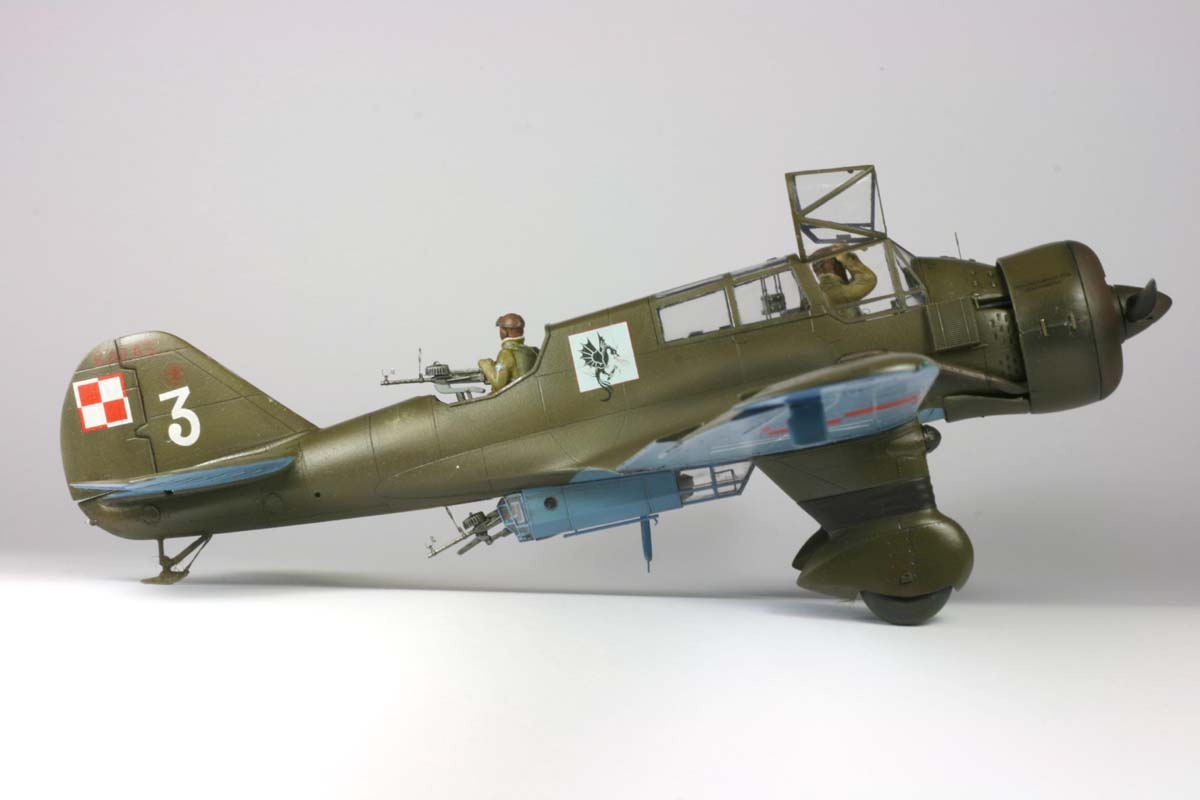
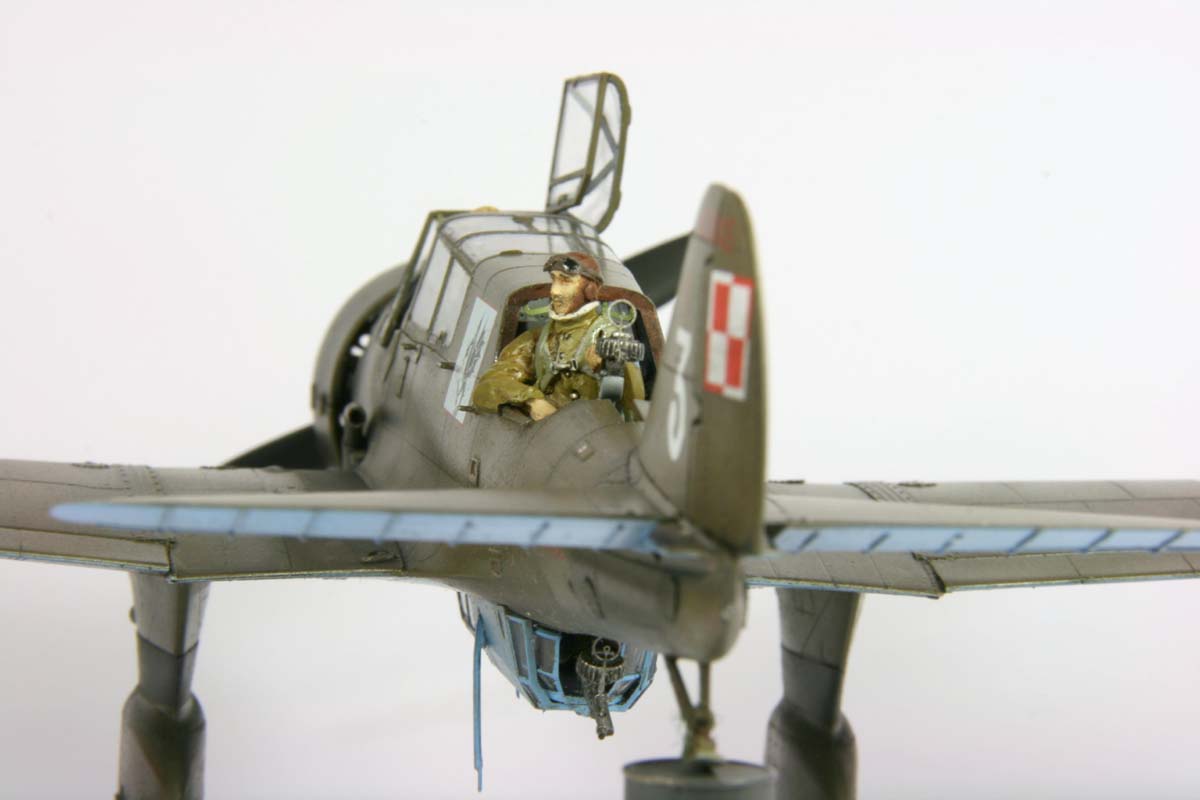
Few lines on the historical backgroundWhen in 1918 Poland reemerged on the map after many years of partition, times were rough. The territorial changes induced by the Versailles treaty were not welcome everywhere, violent border disputes with powerful neighbors like Russia and Prussia were the result. On the other hand Poland issued quite robust demands against it's weaker neighbors, not actually improving the stability in the region.When in 1920 the Polish-Russian war finally happened (by accident, as they say), Poland faced a large Bolshevik Army, and the strange situation of being denied arms deliveries from British and French Allies due to protests of their union workers sympathizing with the communists. Poland, being the last "white" (or anti-communist) block in central Europe was more or less left on its own. By a miracle, the battle at the Vistula turned the tide, and that time Poland actually managed to defeat the Soviet Union. This experience left a bitter taste, and a sense of self-dependence which lingers up until today. The more proximate effect was a focus on militarization and technological development, which led to a remarkable peak at the early thirties. Polish designs displayed at shows like Le Bourget during early thirties acquired many respectful glances, and many orders from south-eastern Europe, too. Performance airplanes allowed to win international aviation challenges like the 1934 "Challenge". The military industry was working at a good pace, churning out a considerable range of equipment for the armed forces, of which most was introduced in early to mid thirties. Yet when in 1939 Germany struck, their gear - some five to ten years younger - was a technological leap ahead of the Polish military forces. History of this aircraft's designIn 1932 a specification was issued for a reconnaissance plane with bombing capability, which was then later to become the PZL P23 Karas. The PZL in Warszawa picked up the task, and under the lead of chief engineer Stanislaw Prauss a design of a single-engine, full metal, three man crew, fixed gear airplane, with internal bomb load was conceived.The first prototype was issued in 1934, which had the draw-back of poor visibility due to a large engine cowling in front of the pilot, and heavy buffeting on the tail. Since this alignment was not very satisfactory, modification for the following prototypes were introduced by (just to mention the key ones) lowering the engine axis, changing the wing root geometry, adding automatic wing slats, and - last but not least - moving the bomb load outside. This version - featuring the 590 HP Pegasus IIM2 engine - went into production as Karas A. Since the license built engine did not fully satisfy, the series was modified into the Karas B after some 40 units. The new version featured the 710HP Pegasus VIII engine and a number of additional modification, like the deletion of slats. The machines were intro- duced into the units until 1938. Overall some 300 Karas were built in different versions - most of them for the Polish Air Force - and some 50 of them were export version were sold to Bulgaria. Operational useThe tactical concept for this plane was derived from a WWI tactical consideration of a "line" aircraft, which would patrol the static front line, and engage enemy forces with bombs upon detection. The dynamic "Blitzkrieg" made this approach obsolete.When reading this plane's operational record, it appears to be a flying lighter: many planes went in flames due to light arms fire. The crux of the matter was a change in the overall strategy of the war. Since there was no fixed front line, a static target to be attacked from safe altitude, the plane had to be used in ground attack missions similar to later IL-2, to which it was absolutely not provisioned (similar to the P11c, too, and later the Me 262 on the other side). While providing vital intelligence from the recon-missions, the lack of armor and it proper fighter cover resulted in a night- marish combat score: 87% of the units used in military operations during the few weeks of the "Blitz" were lost. The particular planeThe featured airplane is a PZL P-23 B Karas, Number 3, Serial number 44.67, under-wing number K-34 of the 22 squadron (eskadra) flying initially out of Cracow (Kraków), and belonging during the September 1939 campaign to the bomber brigade. While I could not pin-point the actual fate of this plane, the squadron stats are as follows: of the 10 airplanes available on September 1st, five were shot down by September 11th, and five transferred to VI division, so there's a theoretical chance that this aircraft made it to Romania in one piece.I'd determined the Model to be showing the aircraft on September 3rd, 1939 as it was standing on the auxiliary airstrip Kamien (next to to Bialobrzeg), ready for take-off on a bombing mission to attack a group of German armored vehicles and transports in the region of Radomsko – Plawno – Gidle. (For this purpose it's actually currently still missin the bombs, which will be re-furbished, as soon as the accessory equipment kit will be available from Mirage Hobby). |
 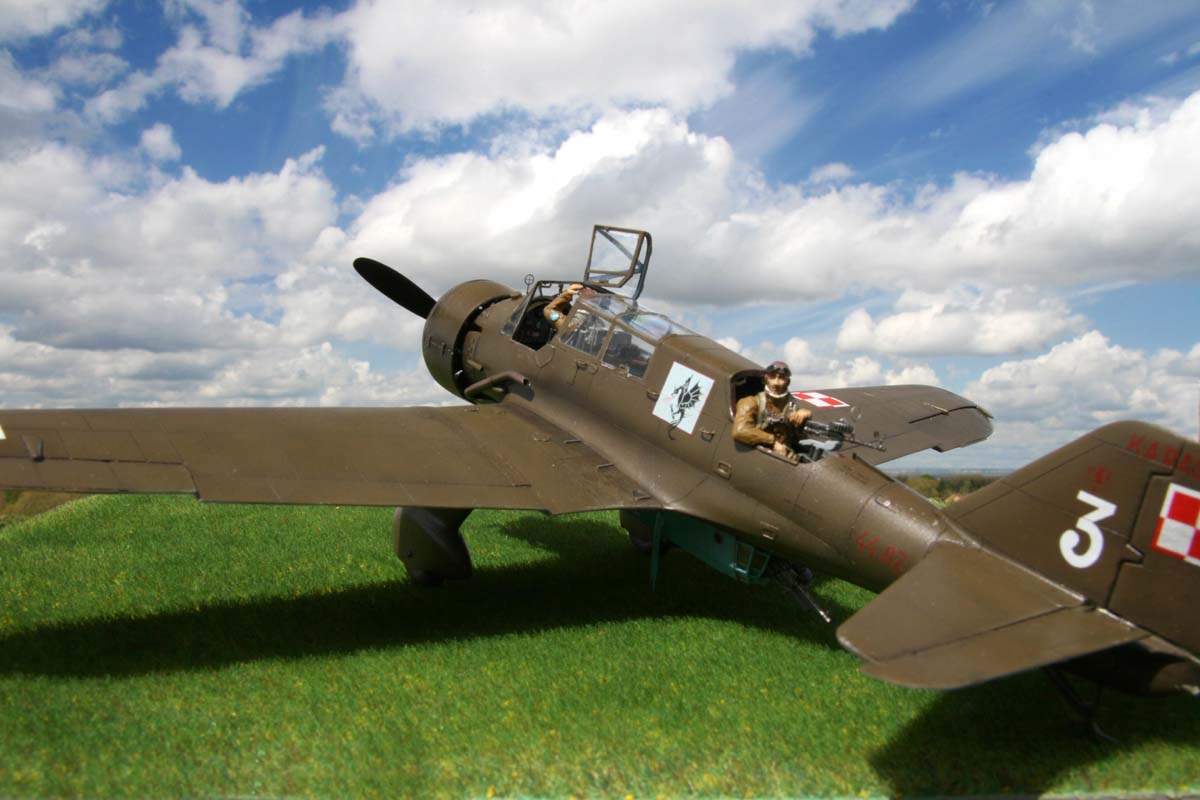  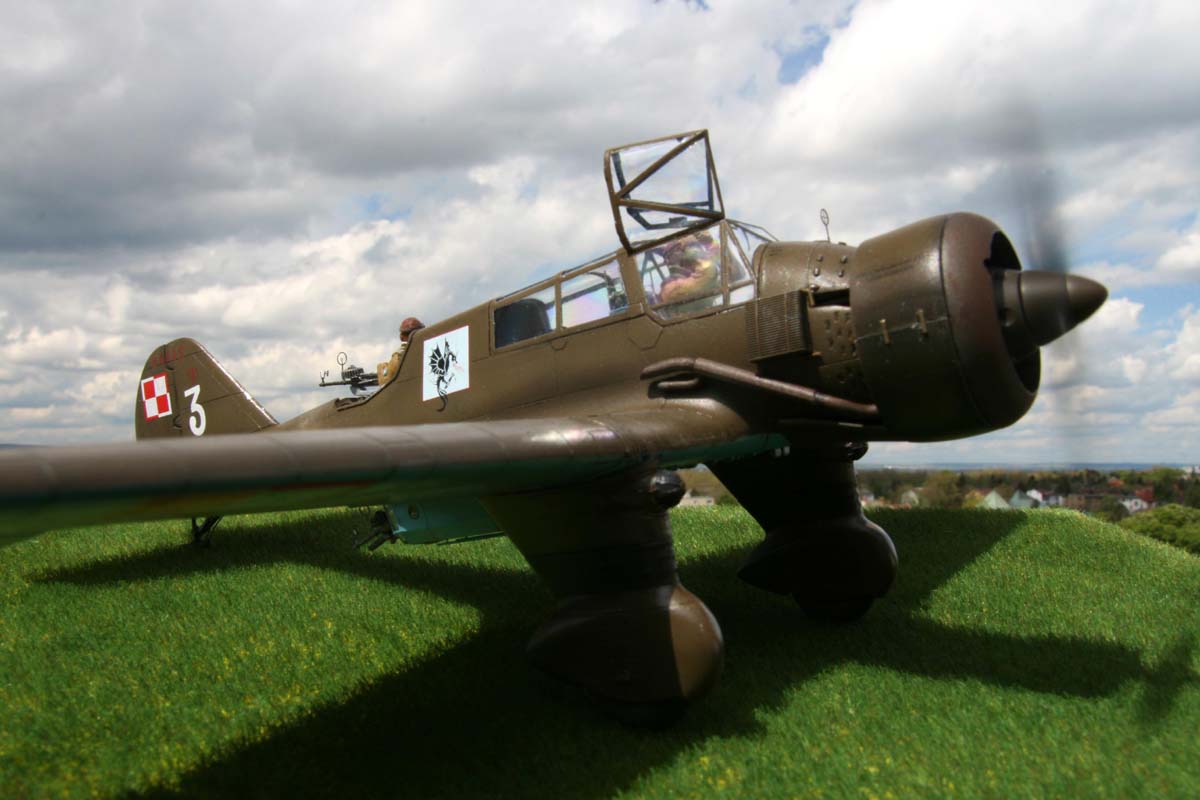    |
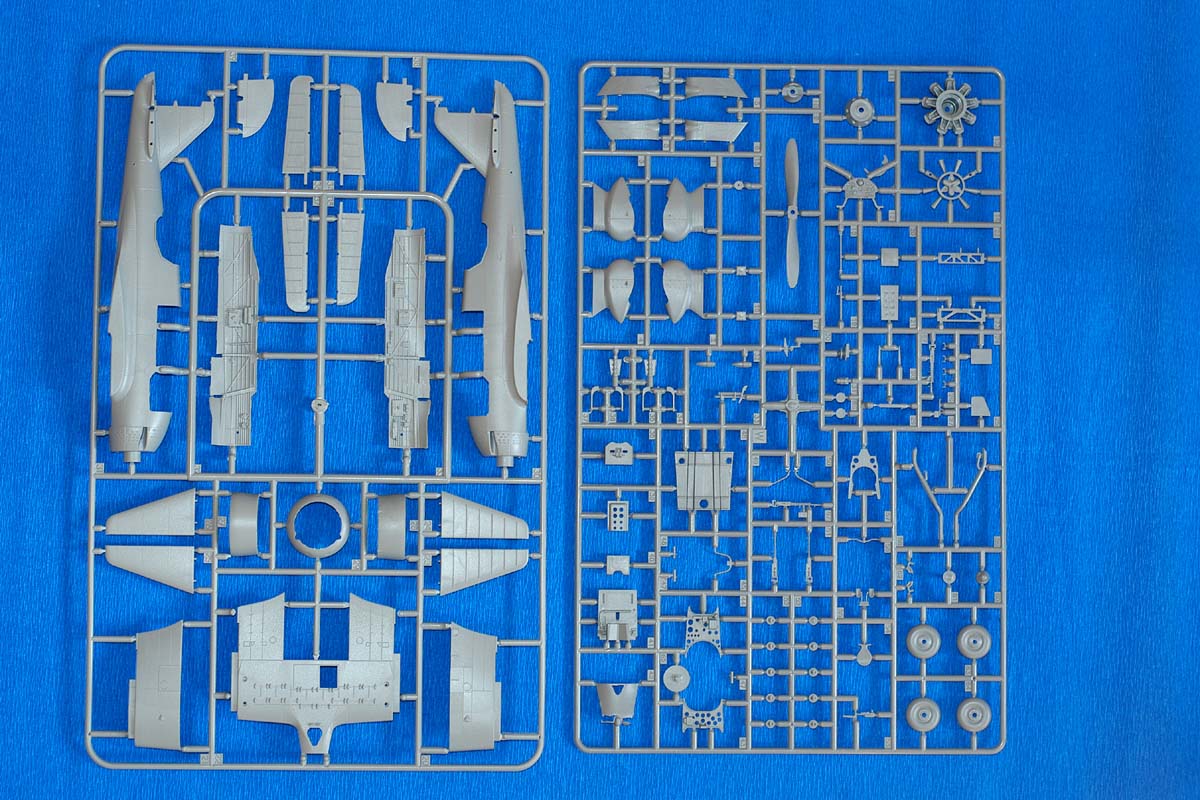
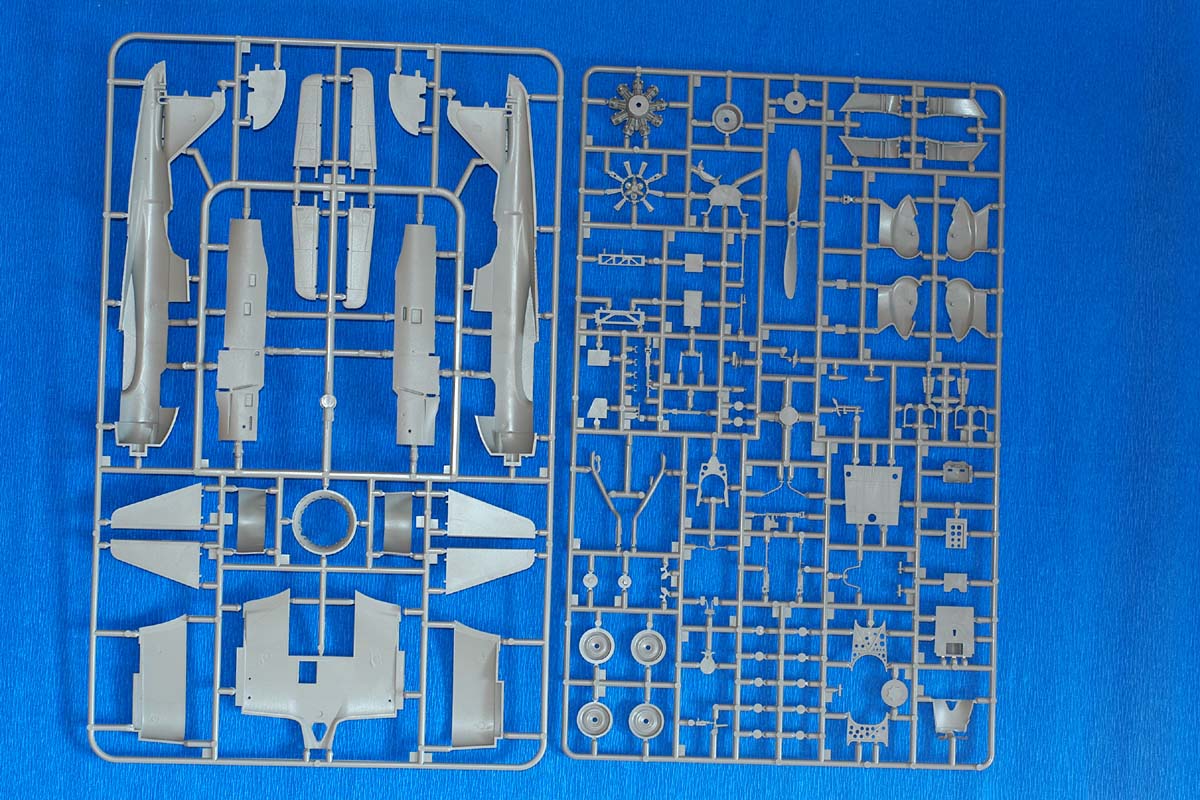
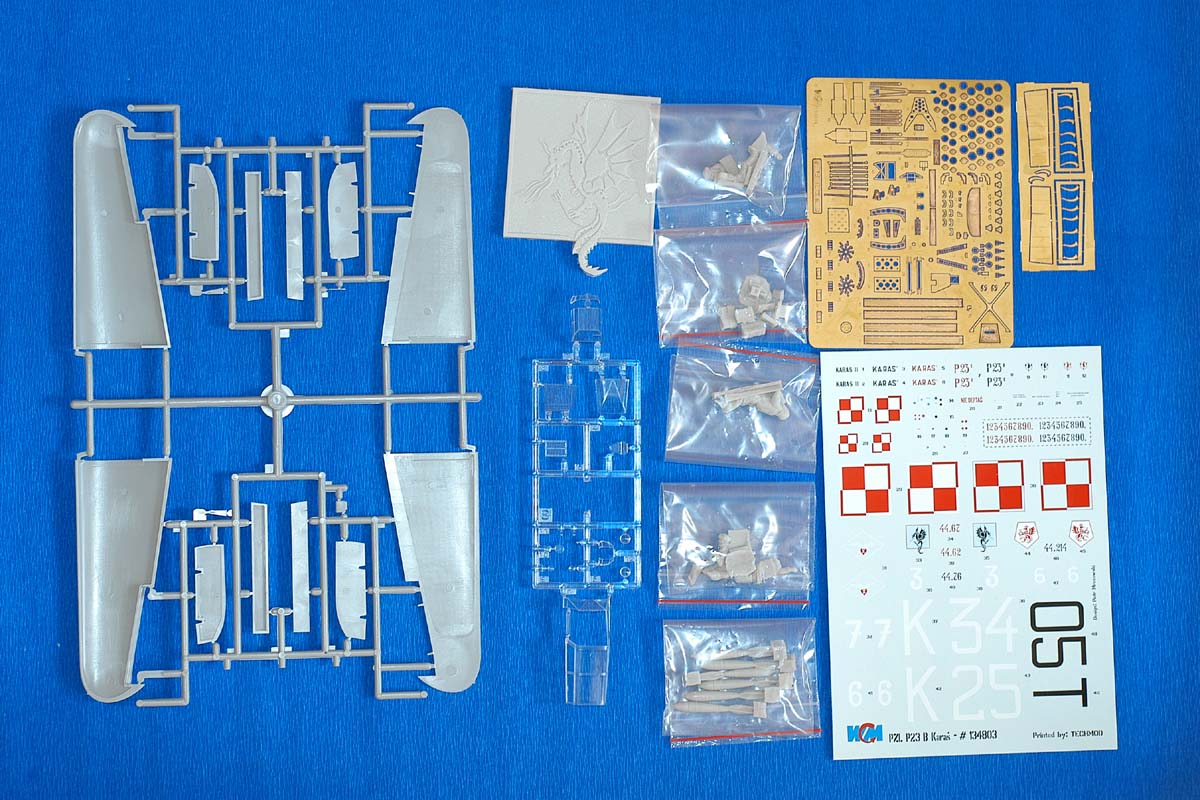
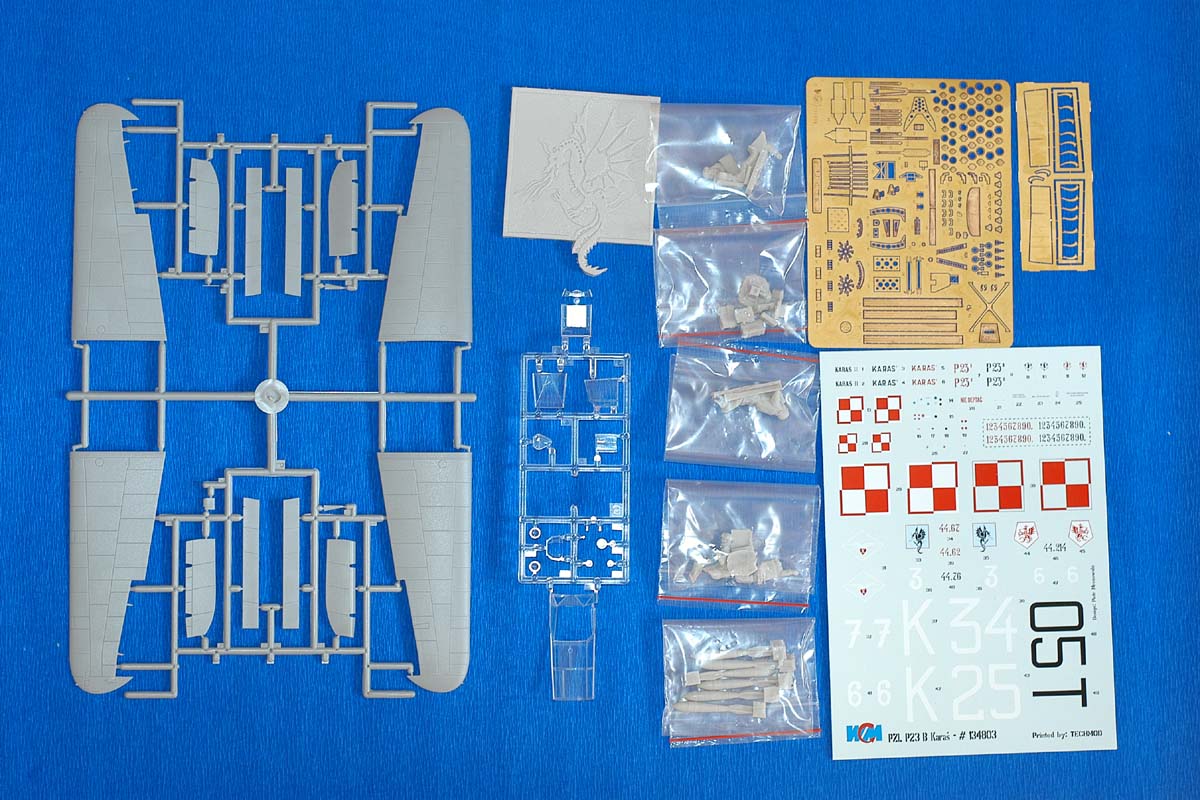
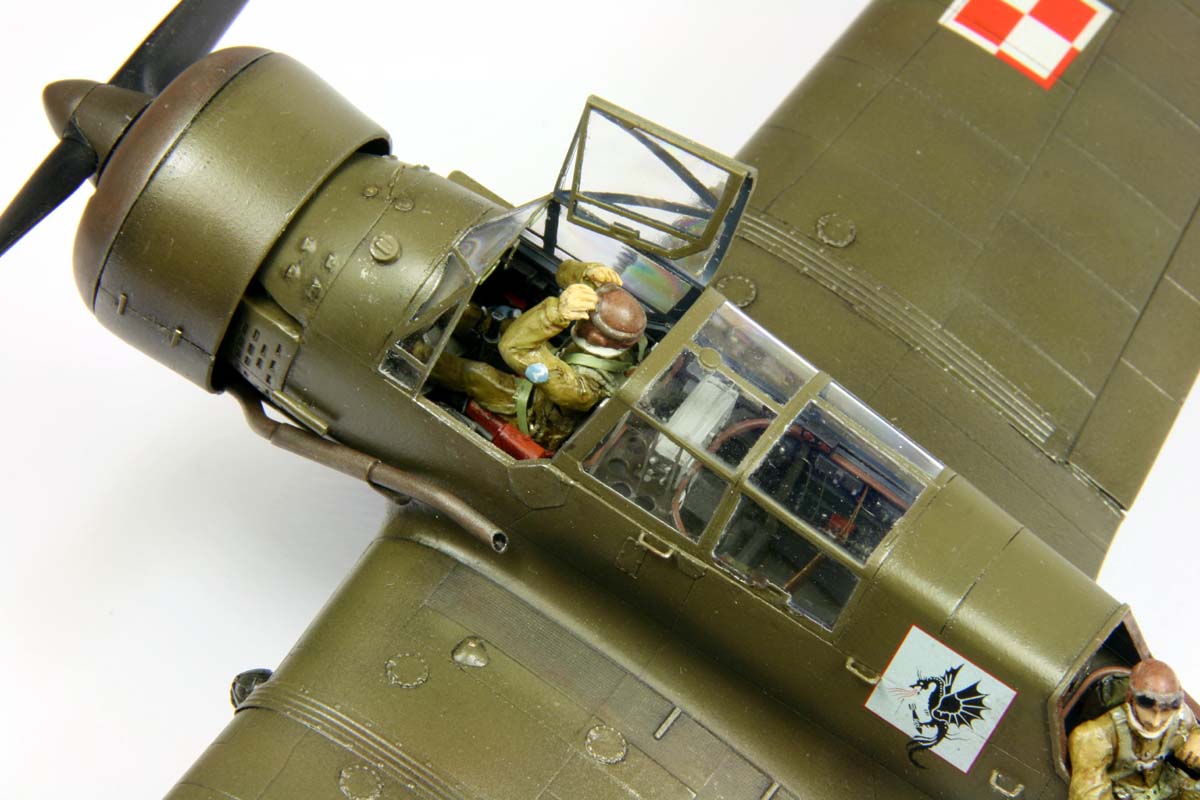
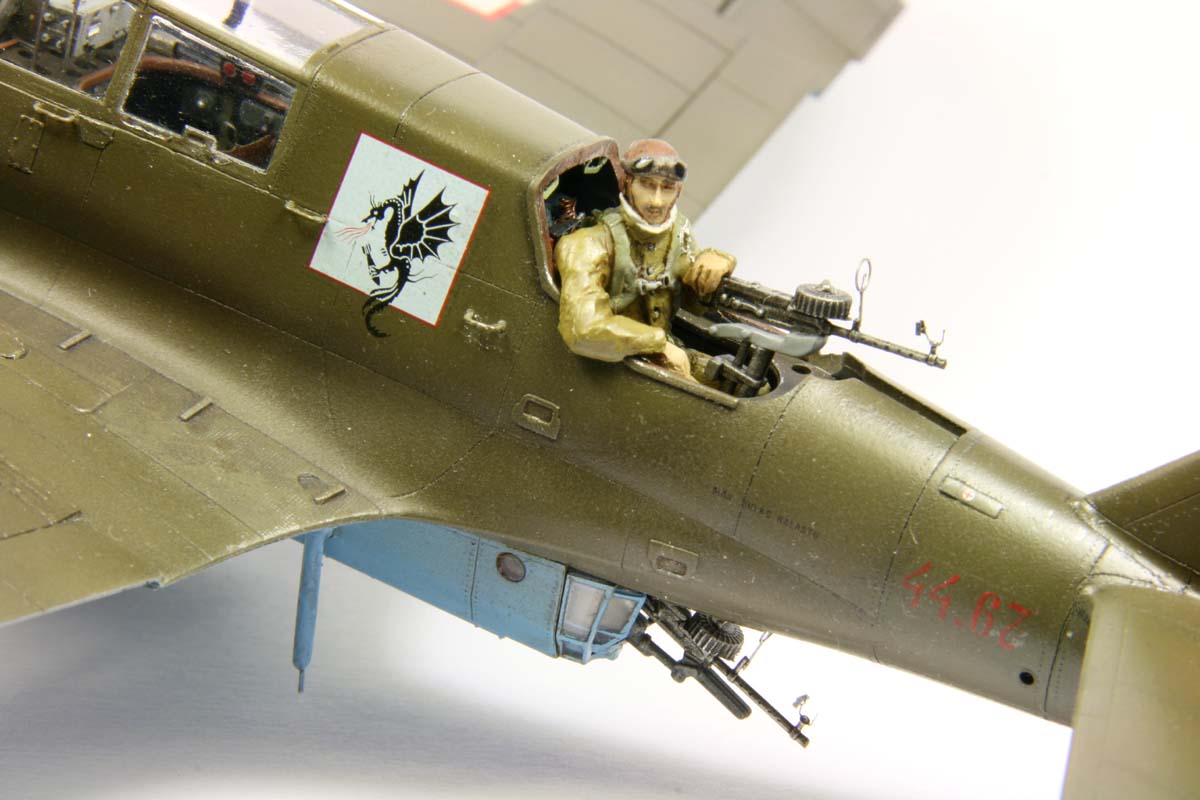
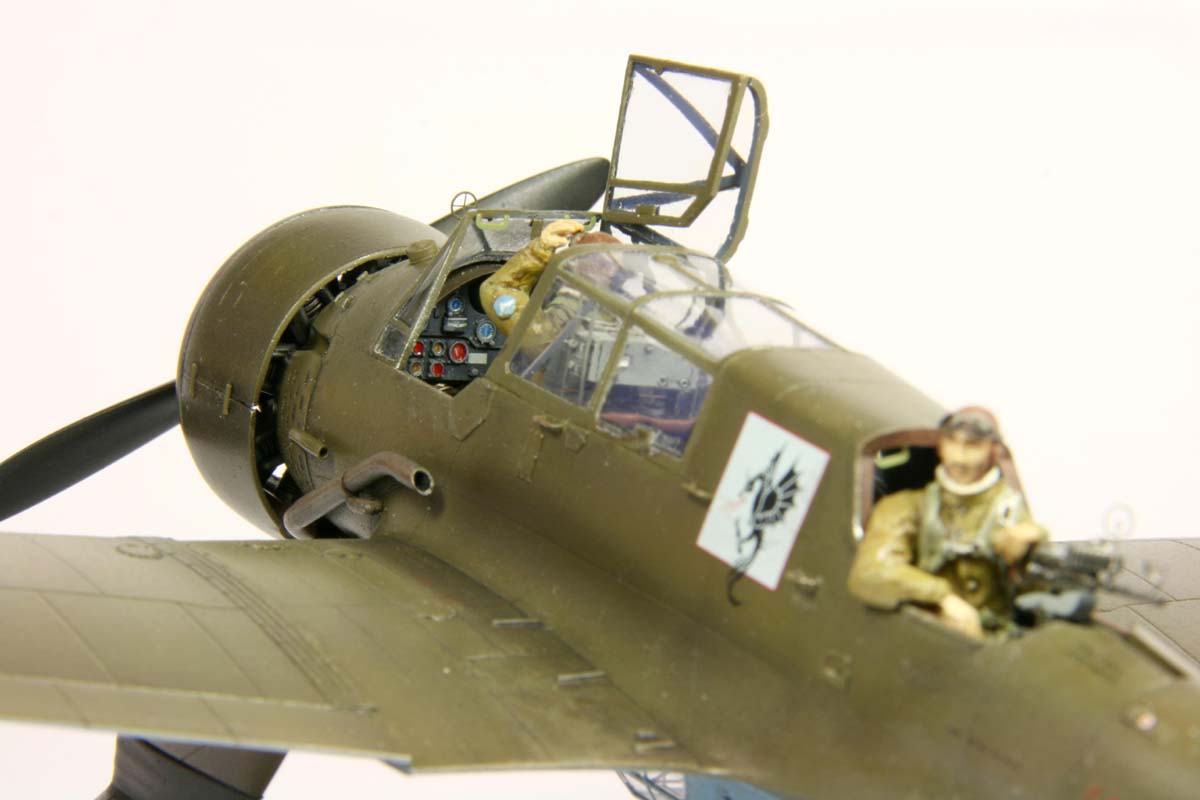
In the boxThe kit is a VIP-version of Mirage Hobby's 1:48 PZL P23B Karas offering (Kit number 134803). Featuring a "limited number" counter on the box, it claims to be sold only in Poland. As compared to the regular package, it contains some additional resin parts, being the crew, a load of Polish WWII bombs and a large plaque showing a dragon. The dragon was a symbol of the 22nd squadron which was located close to the city of Cracow. In this city stands the royal Wawel hill with a castle on top, and a cave. According to a legend well-known in Poland (and highly popular with children), it is said that the cave has been inhabited by such a beast (which was killed by a smart shoemaker, serving it a sheep-skin filled with sulfur). Therefrom the link between the location and it's emblem - and a drive to build this particular version, since two others are included.The model is a multi - media kit containing three regularly sprues of soft gray styrene with 119 parts, as well as another clear one with 15 more parts. Additionally there are five bags with the resin parts (one per crew member, one with the bombs, and one with cabin detail). Two frets of photoetch-parts are included, one of them being alone the slats for version A, since there's the option to build also that variant, too. A large sheet of decals, and finally the resin plaque with the 22nd squadron emblem complete the set. The 12 page full color instruction is quite well done, yet due to the very elaborate engineering of the kit not quite adequate. It really takes original photographs from the PZL operating manual to understand what Mirage Hobby wanted with all the tidbits of parts inside the cabin. I allowed myself another goodie - set of Polish Montex masks for this kit (SM 48207). They come on black vinyl, with two sets of masks as provisions for masking the inside and outside of the clear parts. The kitThe "limited version" counter on my box says 0420, indicating some type of limited batch. The quality of the injected parts, unfortunately also shows features of a short run kit: some sink marks, in particular in the ring of the engine cowling, and a rough orange-peel surface (known from other Mirage Hobby kits) are not what one would hope for. On the other hand, with the very careful (or maybe even somewhat over-enthusiastic) engineering of the kit, the manufacturer managed to compensate for many flaws in the production process. The result is extremely thin walls, and many tiny parts. What is good for the injection process and later for the reality of the model, puts up considerable demands on the dexterity of the modeler.One other thing to complain are the deeply grooved panel lines, in particular on the wings. To turn the vice into a virtue: they allow for sanding off the surface roughness, without deleting the surface patters. The clear parts are quite perfect, no roughness, smears blurs or such. The resin offering is cast in a light-gray material, with little flash. The resin is reasonably soft, and can be decently cut or sanded. Unfortunately the stabilizers on the bombs have in certain spots "zero thickness", where the walls in the silicone mold touched. The PE-parts are etched in two steps from a large yellowish brass sheet, and show decent quality, too. The decal sheet is printed by Techmod, allowing for four different versions. They look well printed, with perfect register, and on a thin dream of a carrier film. Their handling is again a different story. |
    |
ToolsFor the build I used number of purchased and self-prepared tools and consumables. Cutting was taken care off using a regular carpet knife with beak-away blades, small scissors and a side-cutting pliers for electronics. On top of that a whole range of tweezers, pliers and laundry pins. For sanding a set of squadron sanding sticks does a faithful duty. One cool gadget I used is a micro-saw from a Czech manufacturer, which is manufactured from razor-blades. Sometimes I used also a small powered high-speed drill/grinder with an flexible shaft and a number of small milling heads (5mm ball, cylinder and cone), to re-shape larger volumes of plastic.Among the consumables, I used a very thin cyanoacrylate industrial super-glue from the Dutch company OLBA, and a self mixed brew of acetone, ethyl- and butyl acetate as welder. I put high emphasis on strong capillary action. (For setting a part I generally make sure that the part is fastened by metal pins, if the contact surface is insufficient). Tamiya tape in 18 and 6mm were also indispensable. Putty in use was the regular Tamiya, and the whole range of Mr. Surfacer, mostly 500 for filling the large gaps, and the 1000 and 1500 for surface preparation. Last but not least, a hoard of toothpicks and a roll of toilet paper went for applying glue, mixing paint and cleaning the mess up afterwards. For spraying I use the marvelous Iwata HP-CH airbrush, for painting, a set of fine red marten hair brushes. The paints which were applied, were across the range of what's out there: Tamiya, Vallejo, Xtra-Color, Revell, Humbrol, Alclad and Future. But more of that later. |
  |
ConstructionFirst stepsIn the first step the whole set was washed with water and mild detergent. It's a good practice, in particular for the resin parts. That way adhesion of the glue or paint is assured. | |
|
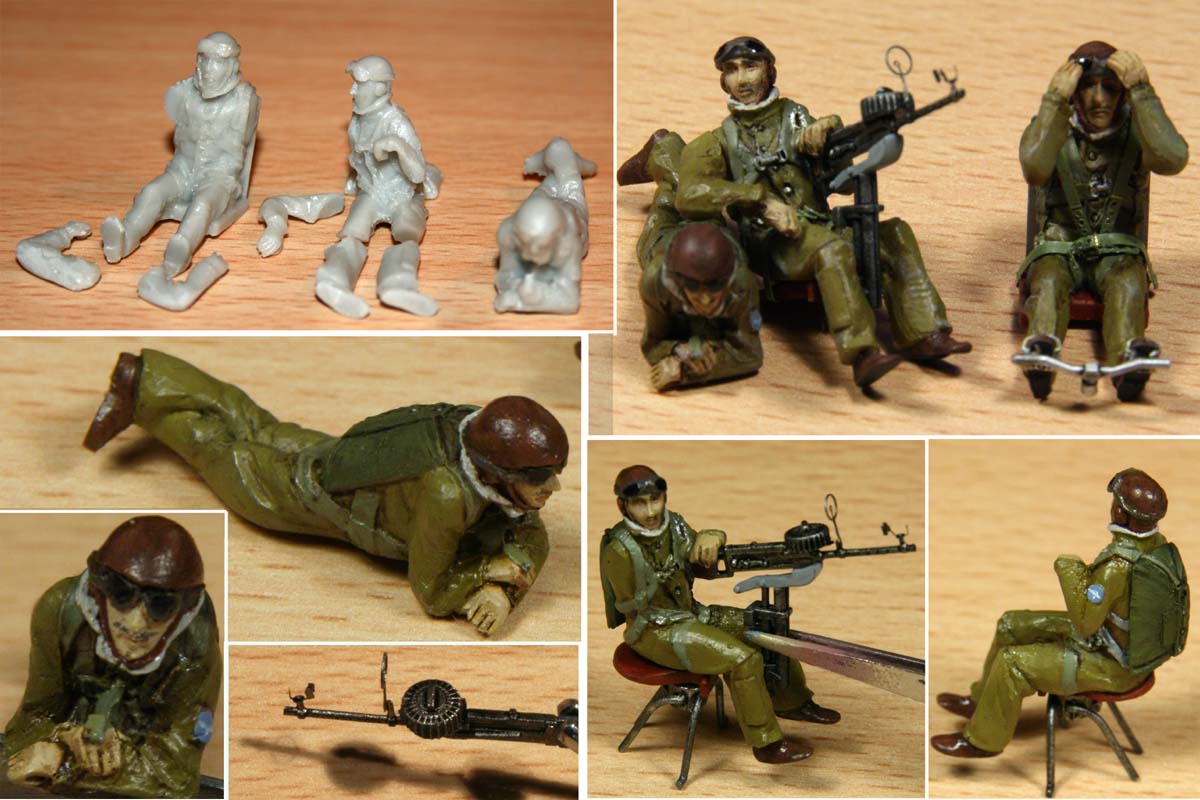
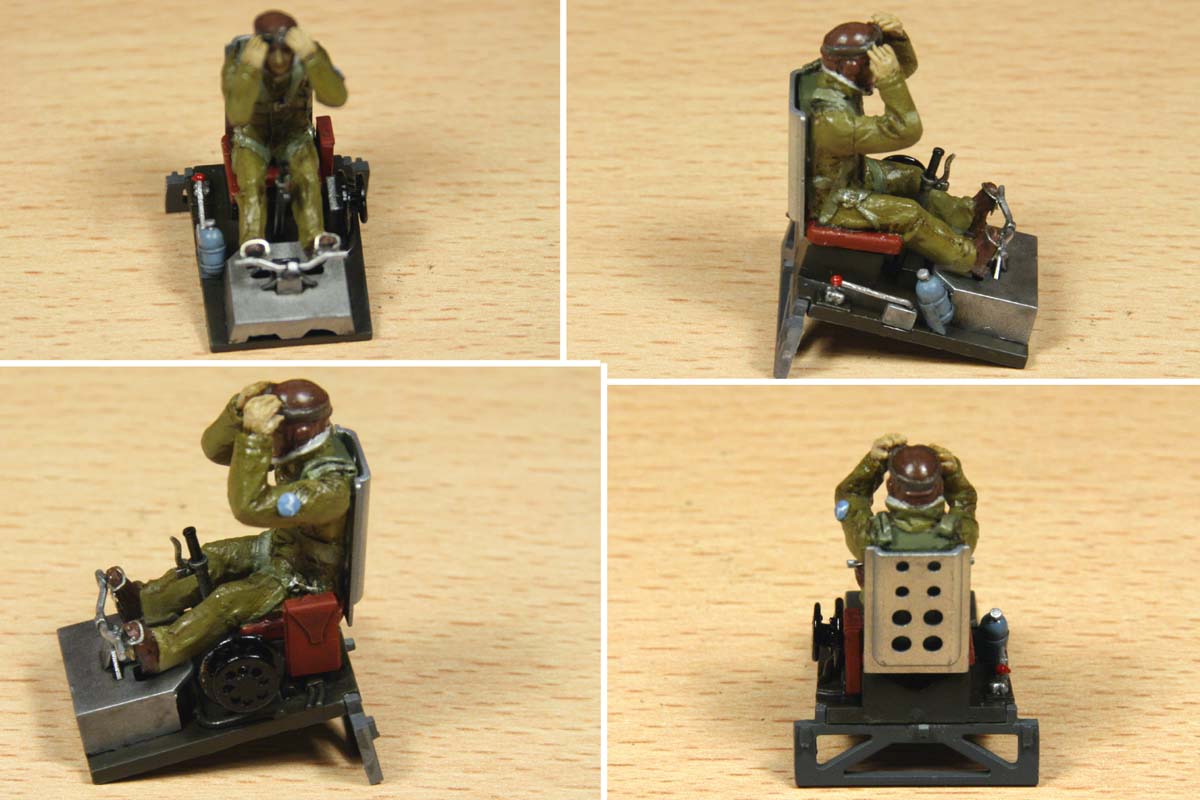
The next step was the crew: Since the gates were larger than the guys, it took cleaning,
to make them appear in the correct shape. The observer, lying prone, had all of his
bottom attached to the resin block. After the block was sawed-off, It took some carving
with the milling cutter to bring the shape of legs and arms out of the solid. It was
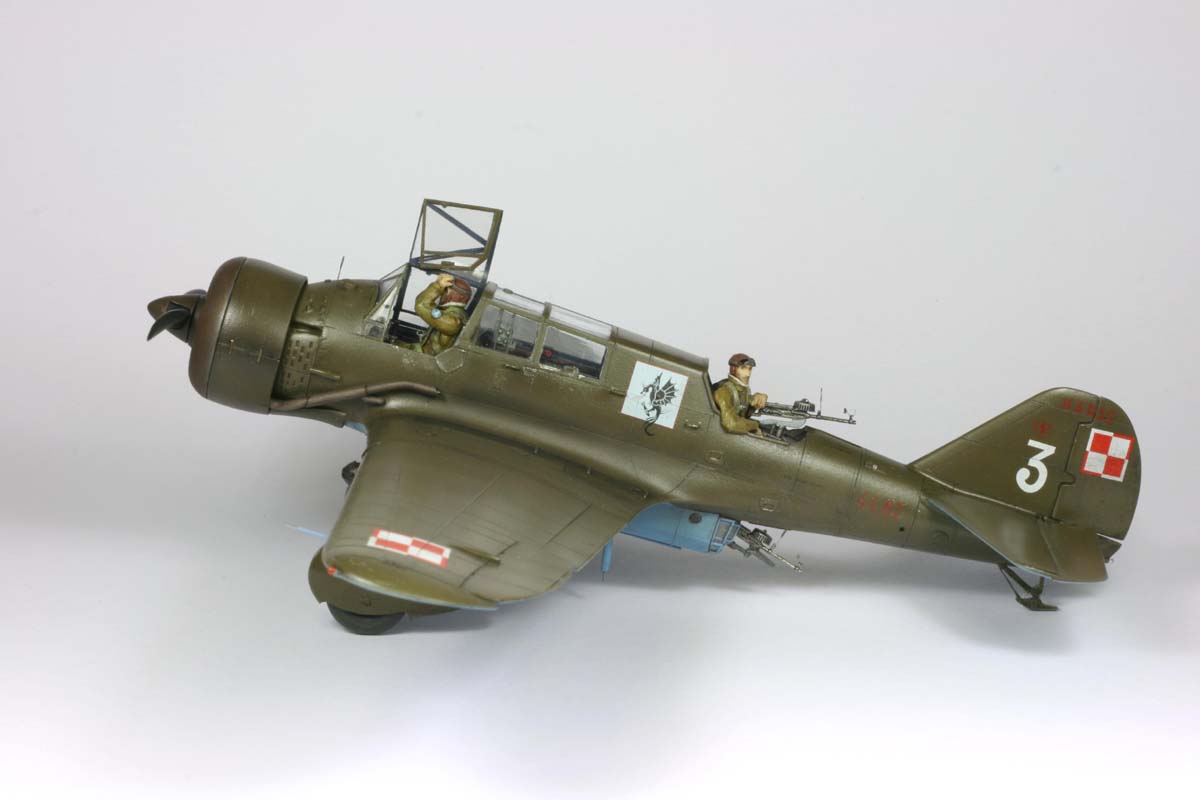
necessary, because the bottom part of the observer can be seen in the gondola. The pilot was cast with his rear unified with the seat, which I didn't like too much, so the seat was cut off, and his rear part sanded round, to fit into the regular seat. Looking at his arms, I presumed they would not obstruct with the cabin, so I glued them on. The gunner was a tricky one: one of his arms is supposed to hang leasurely over the border of the gunner's station. Since the positioning here was not clear, I decided, to leave that off for now. Just his legs were glued on. The crew got a Mr. Surfacer 1000 grounding, and then a first color: The skin tone, for which I just used Tamiya XF-57 (buff). After masking with Tamiya tape, I applied a coat of Revell 86 (olive-green) for the uniform. I presume the flight overalls were some type of olive, and the paint represents well the olive uniform fabrics I've seen in Poland. Revell 84 (brown) went for the boots and caps, the scarves were painted white, the goggles black. The belts and rigging were brush-painted in Revell 45 (gray-green). The figures got a coat of future, then weathering with black and burnt umbra "Schmincke" artists oils, thinned in turpentine. Everything was sealed off with a coat of Xtra-Color flat clear. To give the figures some more life, I painted the goggles with gloss, and dry-brushed elevated corners and ridges with Revell 45. And finally, the whole crew received the that-time-and-place fashionable moustaches applied with a sharp pencil. |
  |
Starting fuselage subcomponentsThe next step was actually the first one concerning the aircraft itself : the pilot's "throne". In the P23B, the seat is elevated to improving the forward visibility. That way the chair and the foot support including side rudder pedals, are on small pedestals. And there's space below for a number of bottles, levers and wheels. The pedals had loops for arresting the pilot's feet, but the positioning of them did not fit the figure. Finally, I ended locating the whole pedal set onto the pilot's feet, after he was safely set and strapped to his seat. |
 |
An intermezzo: The Polish khakiThe floor below the pilot's seat is indicated to be painted in polish khaki. And this hue requires an extra explanation: The color itself seems to be quite to pinpoint, since no originally painted aircraft survived up until today. The best in terms of historical research were chunks of paint, which were retrieved from a deeper layer of paint of the lone surviving PZL P11c in Cracow. Now, as it appears to be, the paint was prone to drift in shade, once subject to environmental weathering. An extremely helpful article going into significant depth on this topic has been posted on IPMS Stockholm by Andrzej Boniukiewicz:(http://ipmsstockholm.org/magazine/2007/05/stuff_eng_polish_colours.htm). It sheds some light on the mysterious matter. Apparently the elusive color was closest matched by FS 34088 (slightly greenish tint), but depending on the weathering condition (or the light) it could be also FS 30118 (more olive) or even FS 30097 (brownish). The instruction recommends for that matter Vallejo 970 (deep green) and 70982 (cavalry red) in a 1:1 mixing ratio. The shade looks OK. Unfortunately, the paint has a consistency which is good for painting with a hair brush. I tried to thin the paint with about 30% to 50% of water, to prevent sputtering of the airbrush. Now the strange thing happened: The red pigments in the paint fell out of the suspension, and collected on the bottom of the container, leaving a translucent, shiny green carrier fluid. And all that happened in a mater of about five seconds. I managed to get a go at the small part, giving it the desired painting. Unfortunately, on larger parts, which need to be sprayed slowly, there was a significant drift of shade from reddish to plainly green then the airbrush cup was running empty. I tried different solvents (pure alcohol - it coagulated, original Vallejo thinner: it was too thick for spraying). Since it was also clogging the airbrush every few seconds, I had enough. Finally, I decided to go and mix my own paint, by gut feel. I took Humbrol 155 (olive green) and Humbrol 170 (brown bass) in a 1:1 ratio. Compared to the FS templates on the web, the shade looked perfect to me. The paint was then thinned with turpentine, and - as usual - it sprayed like marvel. I used that paint for the rest of the project. |
  |
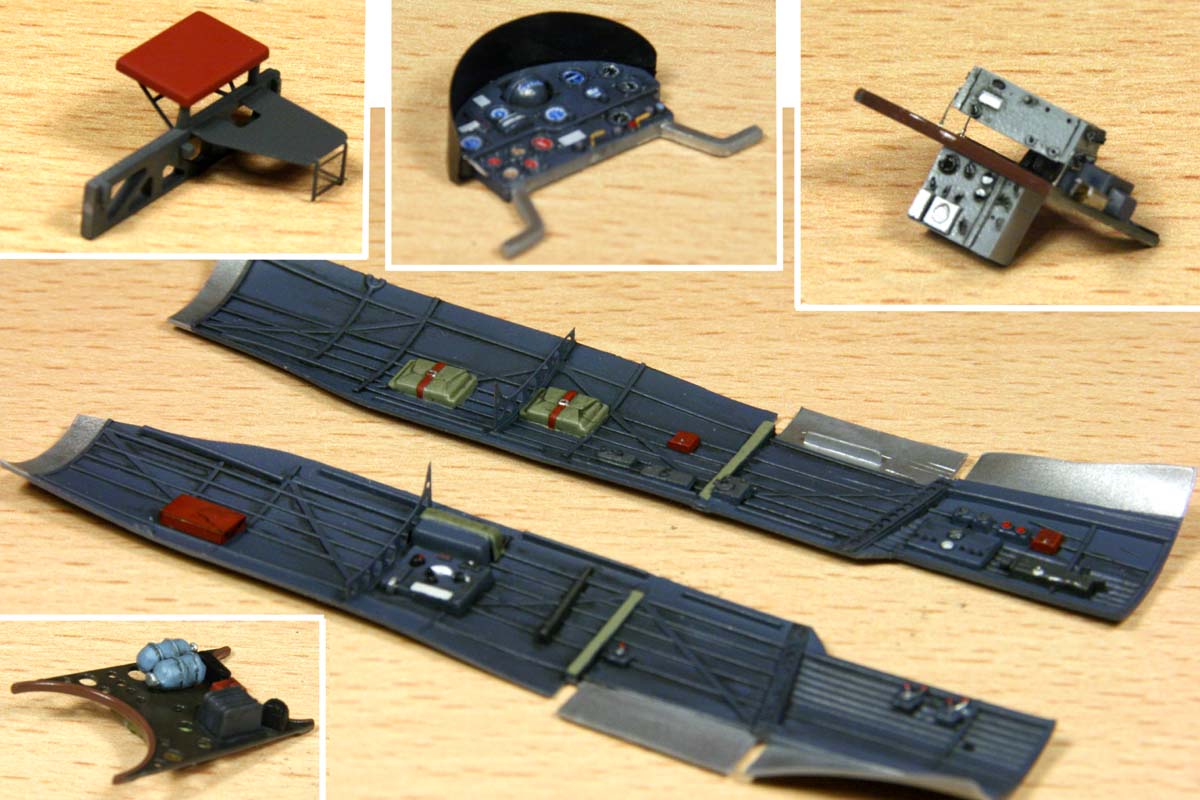
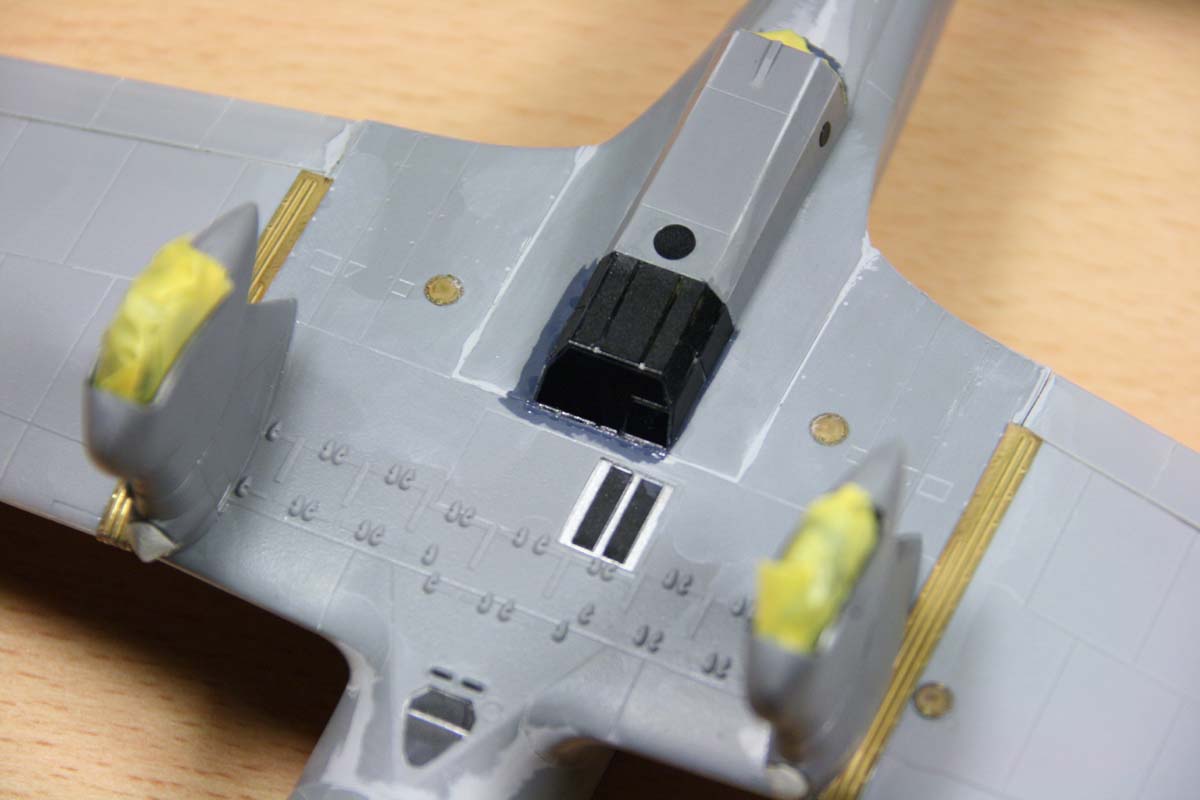
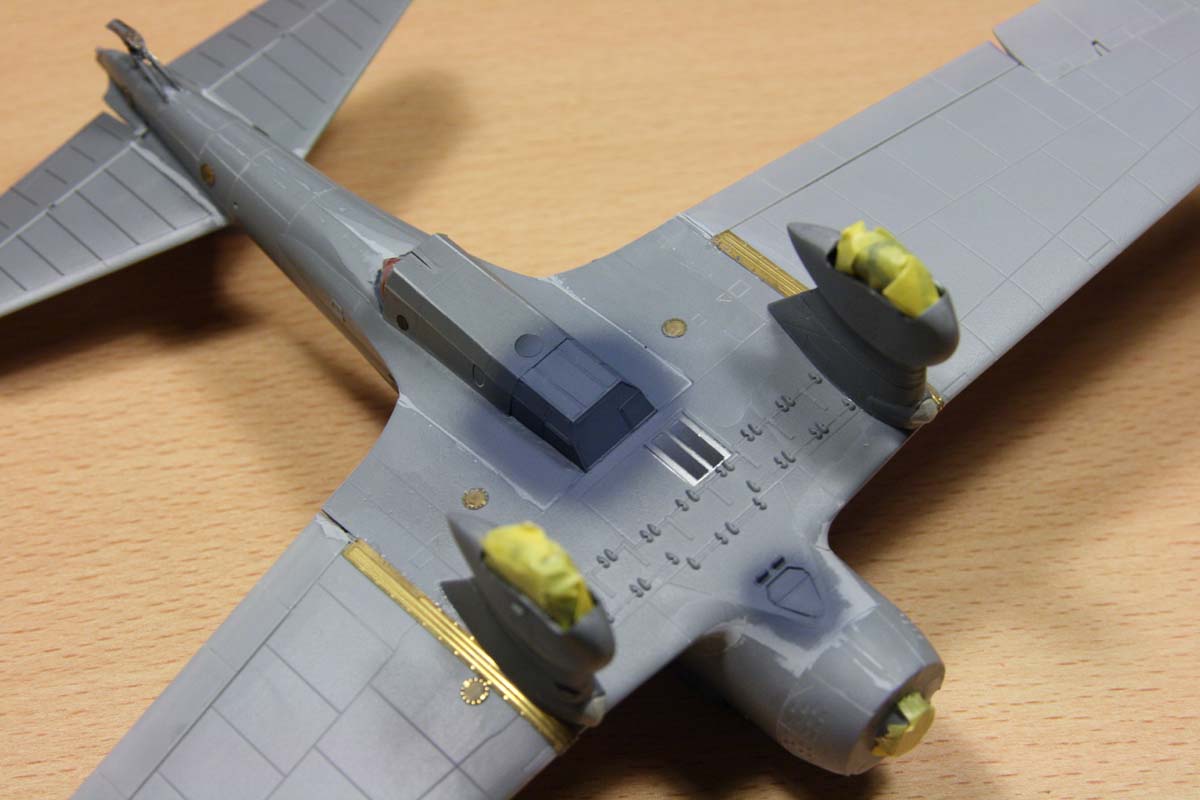
End of intermezzo - Back to fuselage sub-componentsThe upper part of the pilot's floor as well as all other decks was painted with the khaki.The instrument board is decent quality. The board was spayed flat with the Vallejo 008 blue-gray, like all the rest of the fuselage inside. I used then the original part with the decals and plenty of softener. The instruments got highlights with gloss lacquer. A khaki-painted sun-shield made from PE was added on top. The instruction claims that both parts of the radio are supposed to be glued directly to the radio deck. The pictures show though, that the sensitive lamp-powered radio-equipment was suspended by some type shock absorbers or springs. Therefore I mounted the upper box on pieces of wire. The other decks were arranged as far as possible in accordance with the photographs of the original operation manual. The resin photo-camera has four support points, which are unfortunately very flimsy. They had to be replaced with wire pins. The camera is mounted in the fuselage on two rails. As it came out, the bottom of the camera was too low, and collided with the window. I had to cut-off about 3mm off of the camera. Additionally, I added the lens, made from a clear piece of plastic, and several cables, as seen on pictures. The assembly of radio-operator's seat and foot support was not explained clearly in the instruction. I left off the plastic piece of the foot support, and used only the metal part. At this point of time I did not yet include the rear gunner, since he had to be aligned with his elbow to the rim of the final post. He was fixed to his chair, and received a machine gun, on which he's leaning nonchalantly. Machine gunsI selected the "Vickers F" guns. The ammo drums had unfortunately also plenty of sink marks, which I filled up as good as I could. Folding the gun sights was tricky to accomplish, but with few tweezers the required 3D bends are possible. That way two machine guns for the ventral and dorsal stations were prepared. The guns were painted with Humbrol 59, and after an acrylic coat, generously washed with thinned black artist oil. |
  |
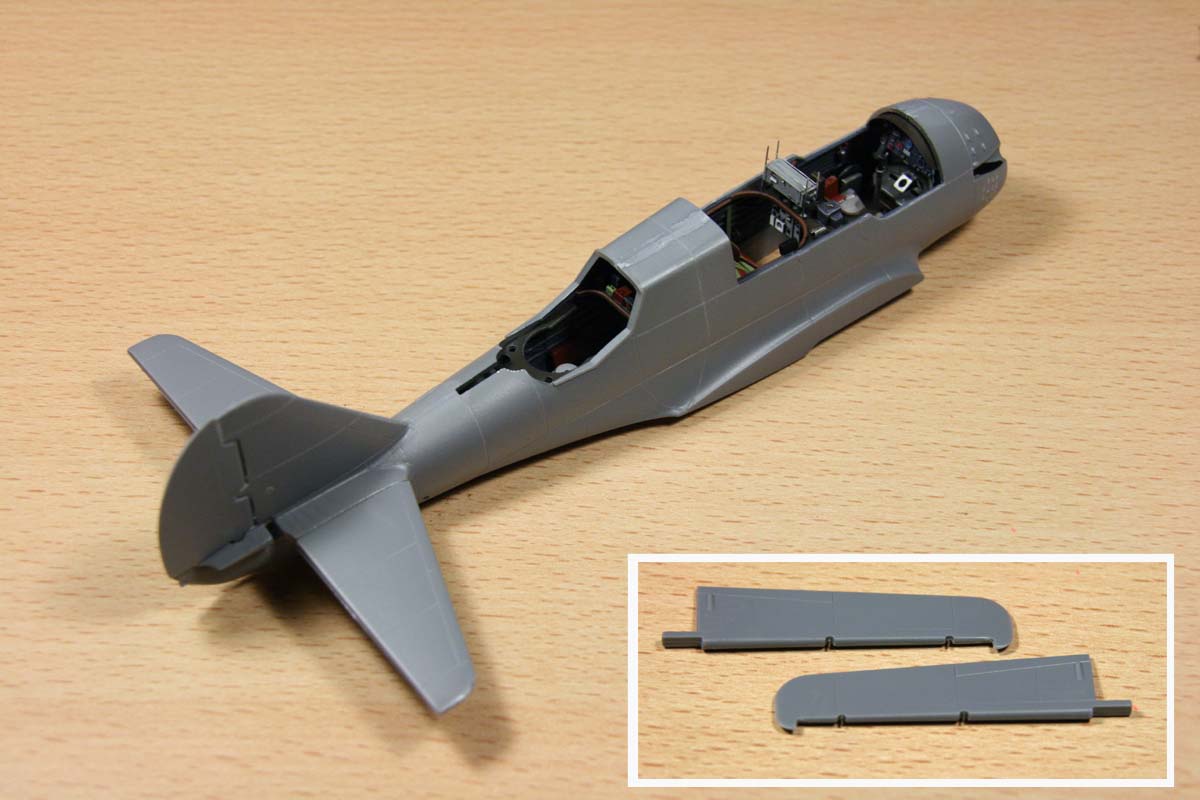
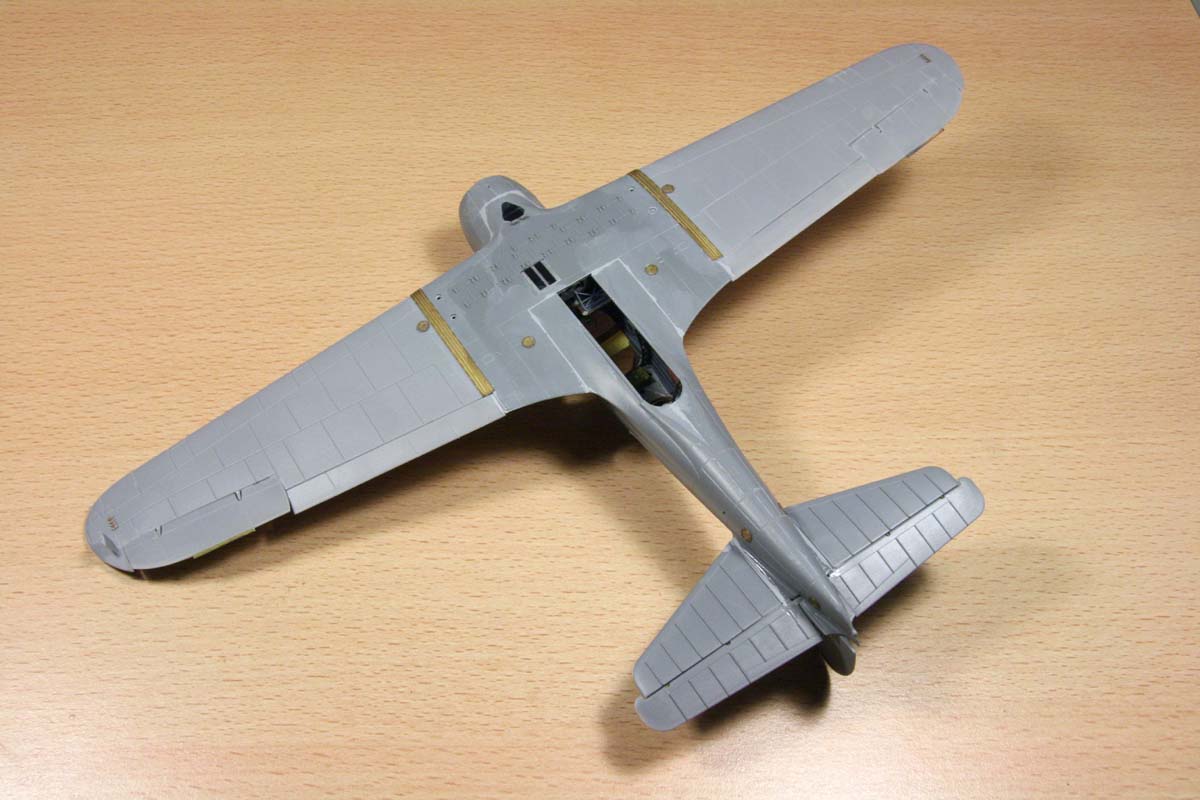
The fuselageAfter a black wash where necessary, the fuselage inside was assembled as a separate unit, including the pilot and all equipment, which is helpful for later handling. The walls are so thin, that they fit nicely into the outside-shell of the fuselage.To make the complex PE inside structure fit into the roof between the gunner and the cabin, I cut it symmetrically into a left and right half, and glued them into the fuselage halves prior to joining them, The fit of the body parts was surprisingly nice, and after a dry-fitting, I applied the capillary glue with a brush into the joints. The center body was finished off by attaching the wing central parts to the bottom, and the wing stubs to the top part of it. The wing center part had to be pre-painted from inside, since it is well visible. Here already the masks came into use, to provide the proper shape for the windows in the part. |
 |
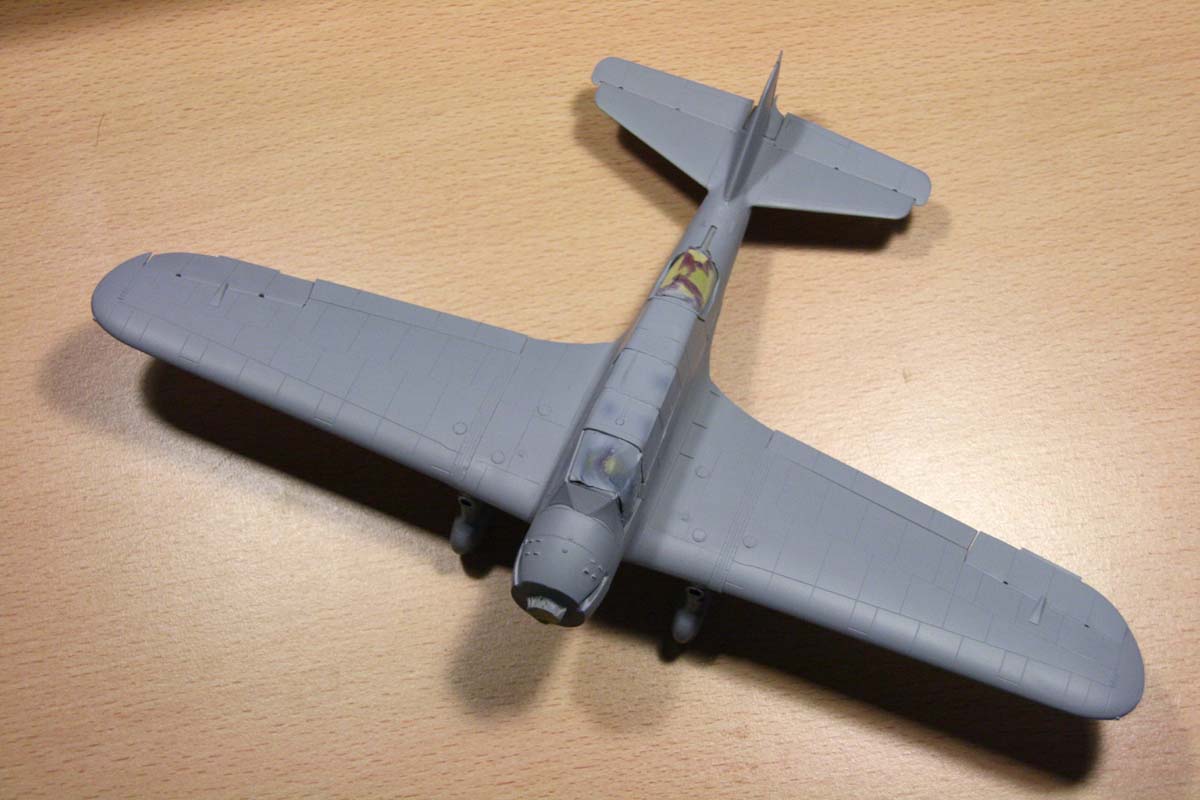
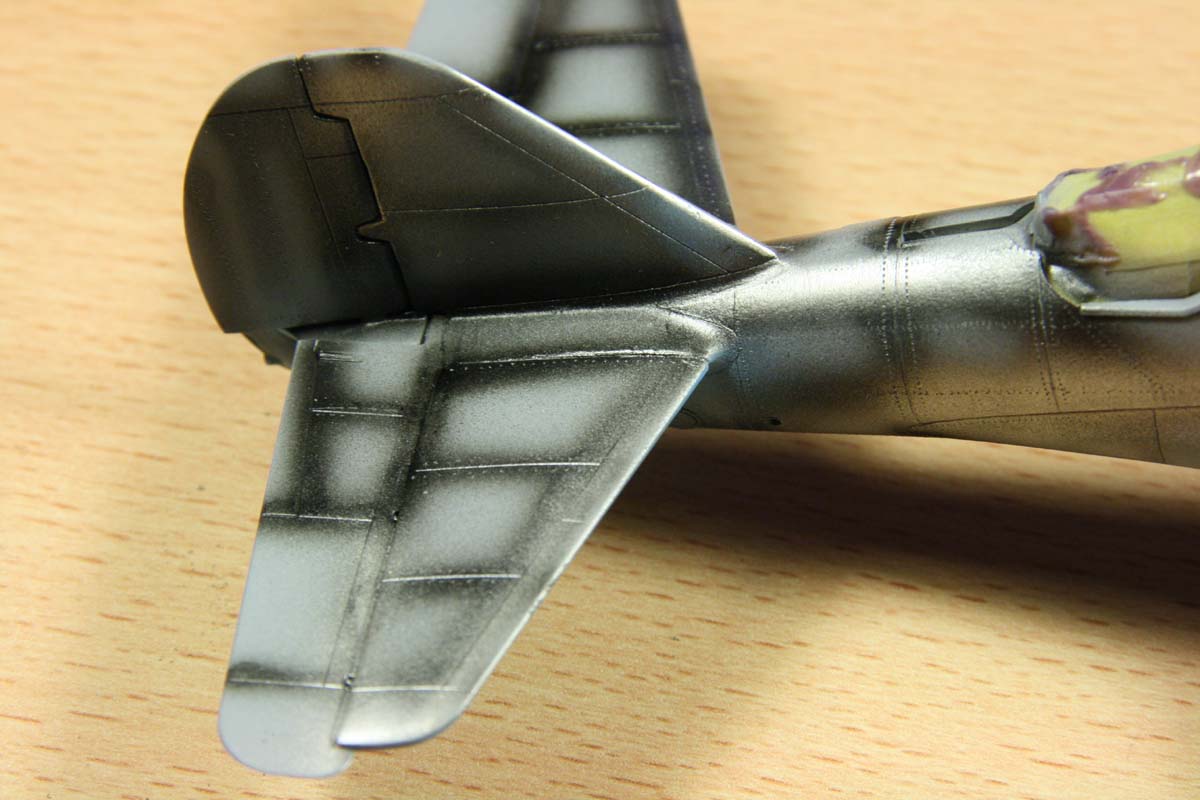
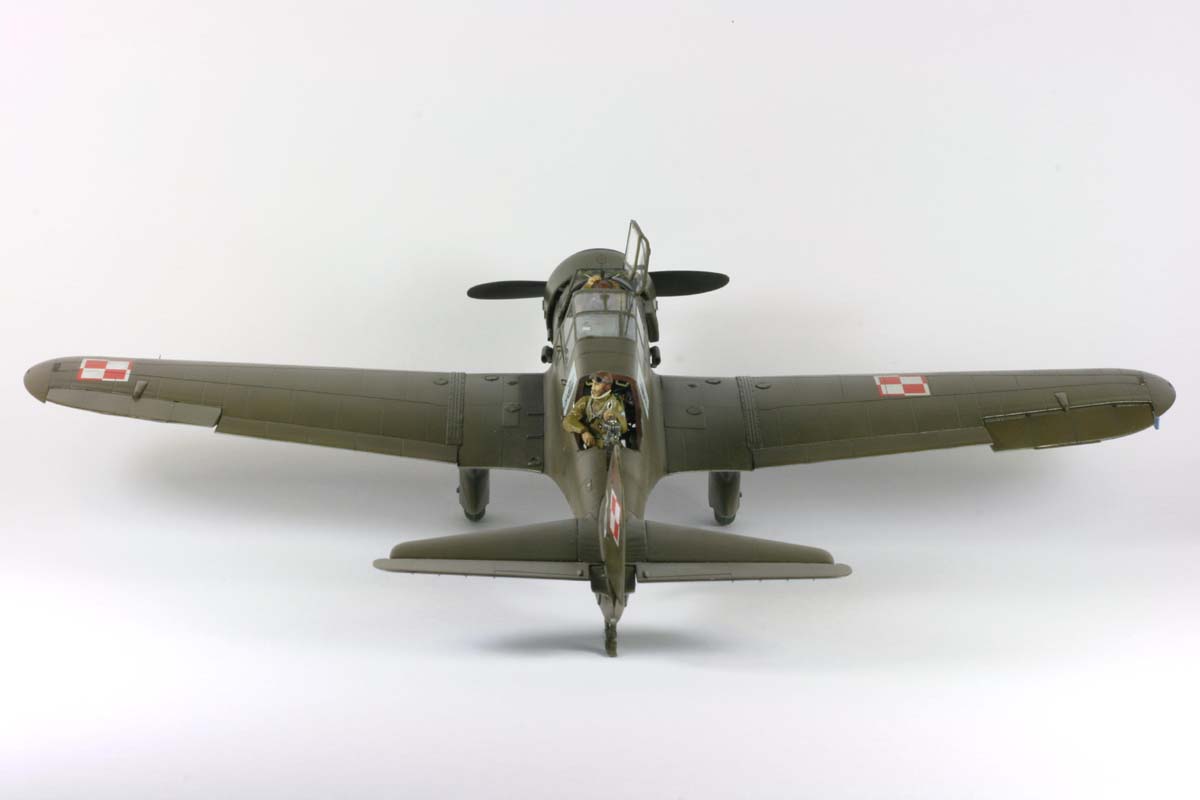
Tail assemblyThe assembly of the rudder required removing of material from the inside of the vertical stabilizer, I which is best accomplished with a small ball-point milling cutter. I decided for some deflection on all controls, so the rudder got a few degrees to the side.I remembered my own flight classes, and the instructions I got for a tail - dragger: always pull the stick, otherwise you may hop and kill the prop. I decided to attach the elevators deflected upwards. For that purpose the leading beam of the rudder has to be sanded-off somewhat, otherwise the surface will be arrested in a horizontal position. |
 |
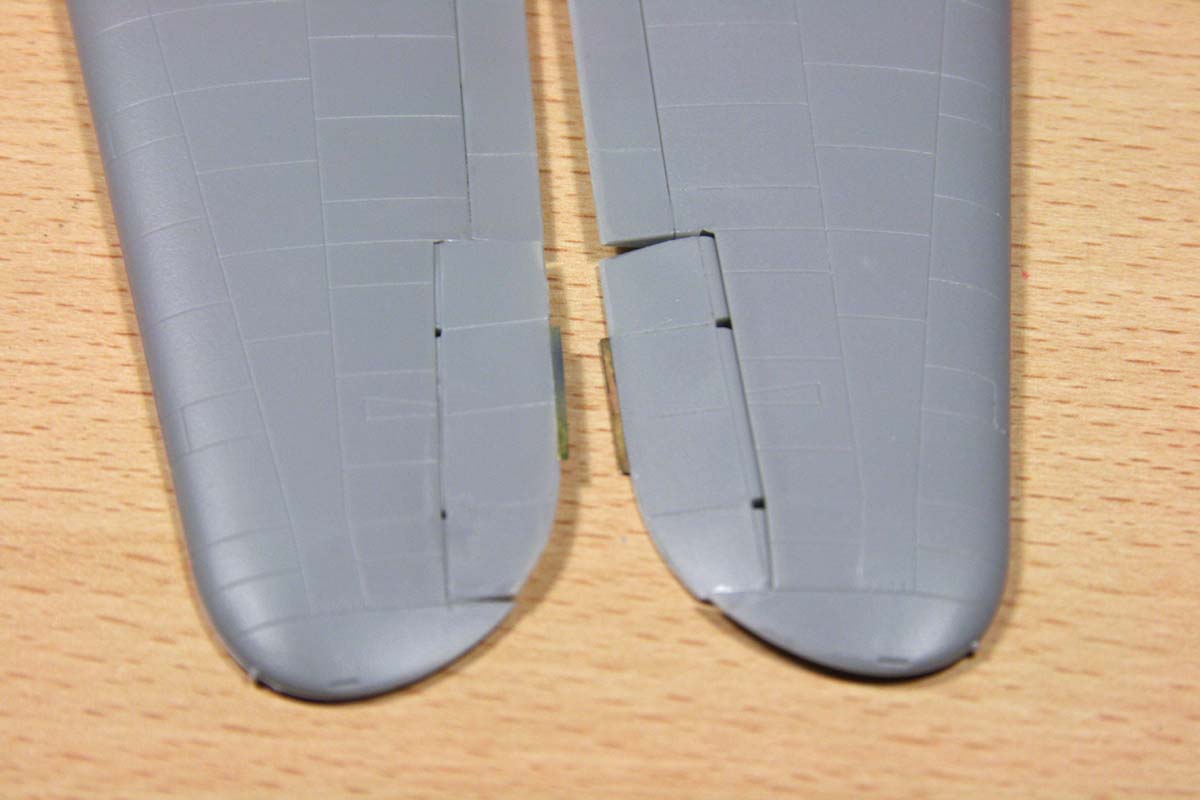
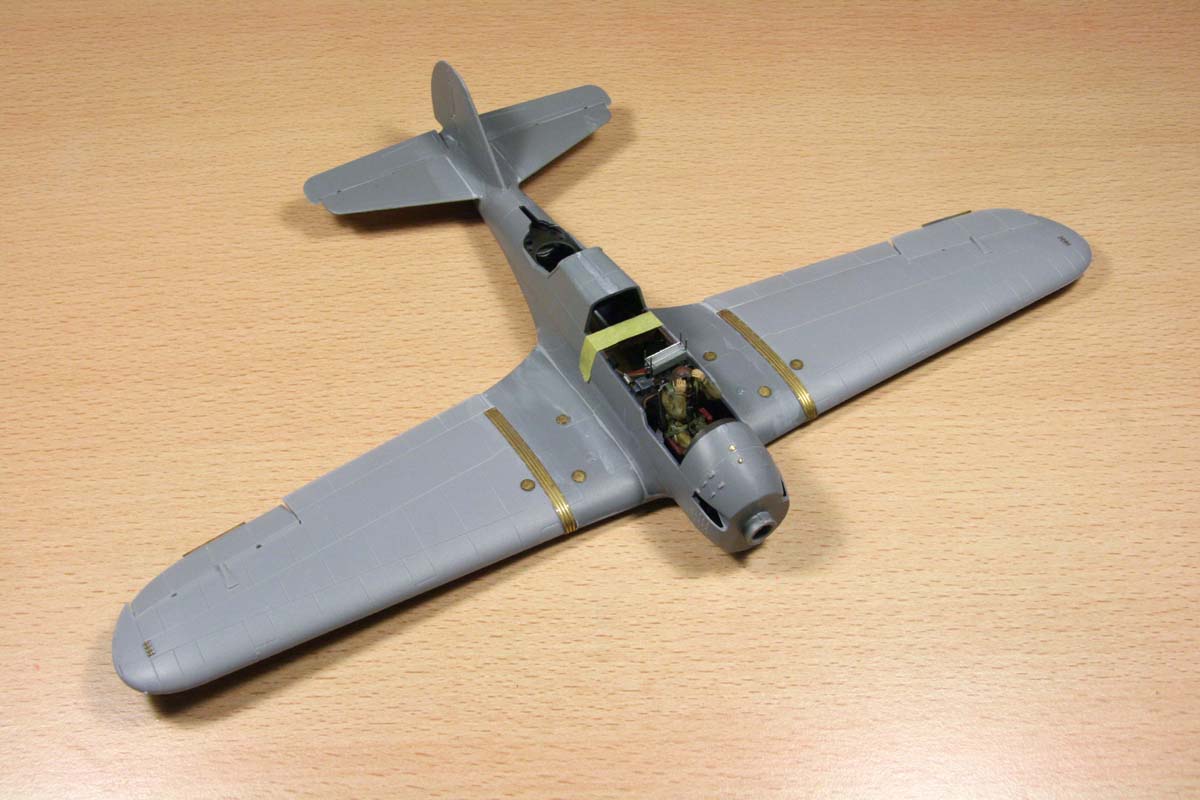
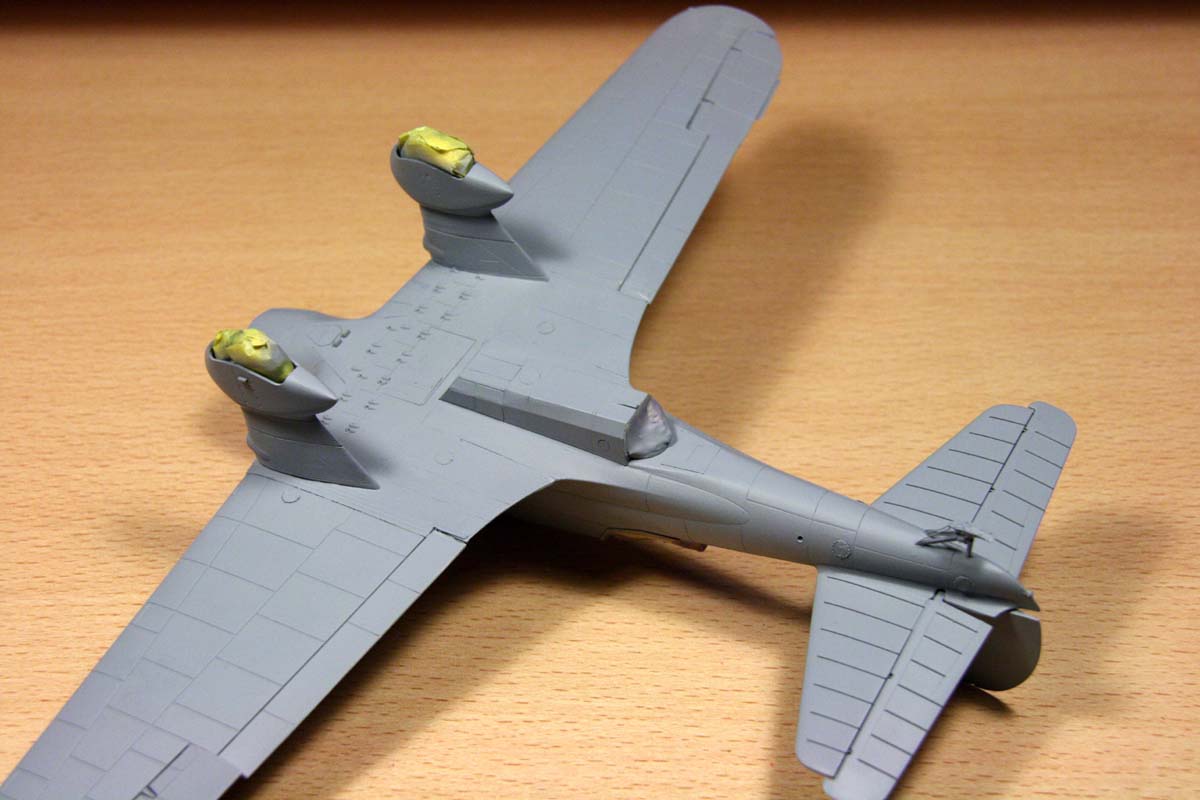
WingsThe assembly of the wings is straight forward. The surface required some smoothing, but that's all. The ailerons consist of upper and lower part, with a PE-trim tab in-between. The mounting to the wings requires the assembly of the some PE-hinges first. The wings are then attached to the stubs on the fuselage, and refined with a number of PE-extras, like a number of portholes and "stitches" on the wingtips.At this point, the basic body of the aircraft is finished. |
 |
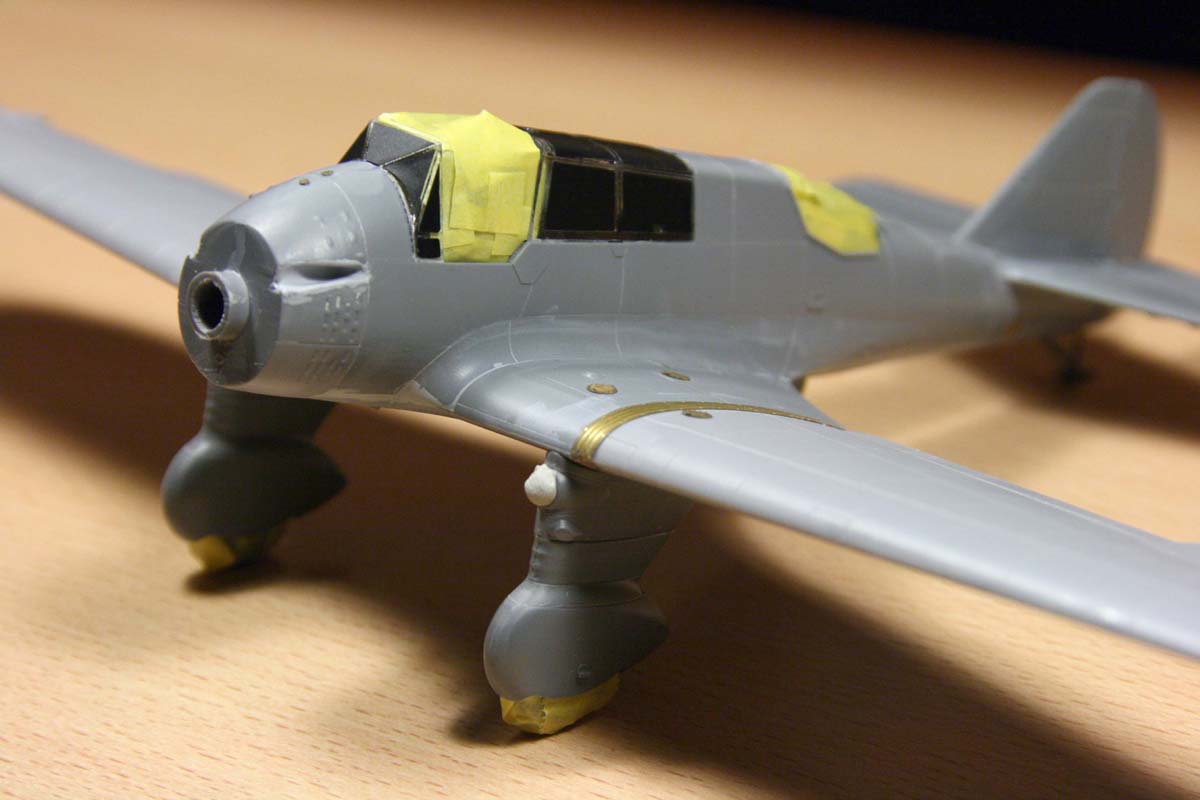
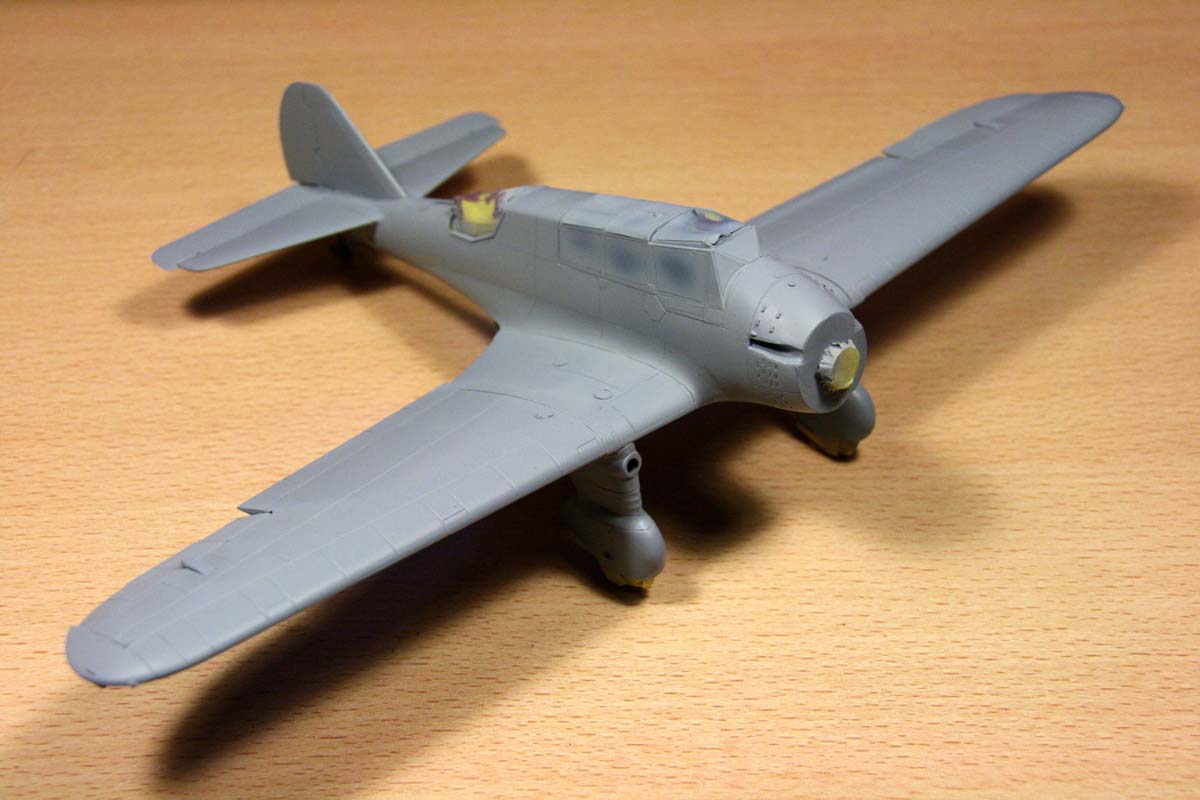
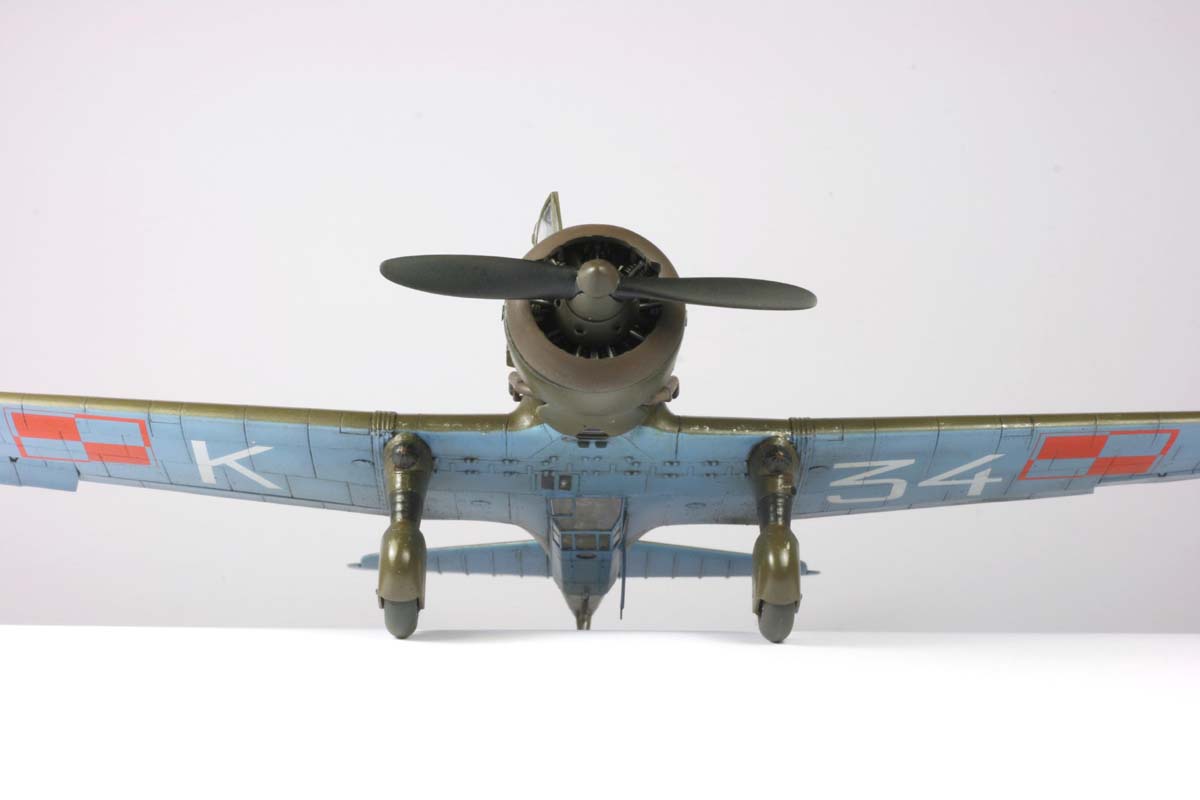
Front gun openingsThese two spots, left and right on top of the fuselage behind the engine seem to have been forgotten by the designers. The aircraft had one MG on the right side, the right side was supposed to maybe get one later, but actually, this opening was closed. Even the hole for the MG was too big. I closed them off with pieces of sheet metal and plenty of putty. It was actually rather late in the assembly process: it's better to do it really upfront.Landing gearThe assembly is complex, and consists of four thin parts for the fairing alone. These parts had in my case even tiny casting defects, where the wall had no thickness. Nothing though, which could not be fixed with some Mr. Surfacer. I painted the inside silver, but that is actually not necessary, since this area is not visible after the assembly.The wheels were painted using the masks provided in the Montex set, with Revell 9 and Alclad 2. After the assembly into the landing gear legs, the area was masked with Tamiya tape. One interesting thing is the bubble-shaped landing light. Initially I was wondering, what the strange star-shaped PE bit was supposed to do on it. Old photographs showed though, that the lamps were covered by a leather or canvas cap, reinforced by leather straps arranged in this funny way. I decided to apply this variant, but that would follow later. In the first step I closed the hole with plasciline. The location is well established with two pins per leg, so it's nearly a no-brainer. It should be only noted, that the left leg has the pilot's light. The tail spur consists of too many flimsy parts, and requires a reinforcement of the main skid to the axle with a wire pin. On top it gets two threads as return springs. |
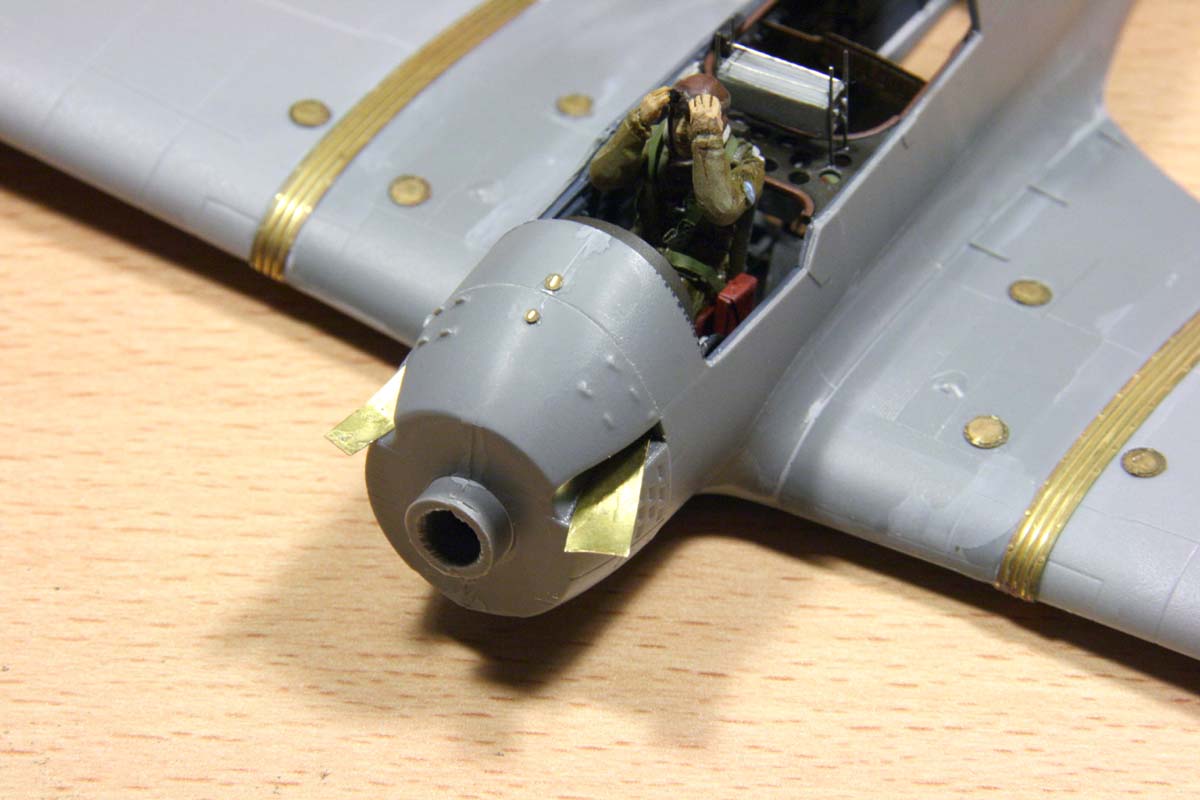 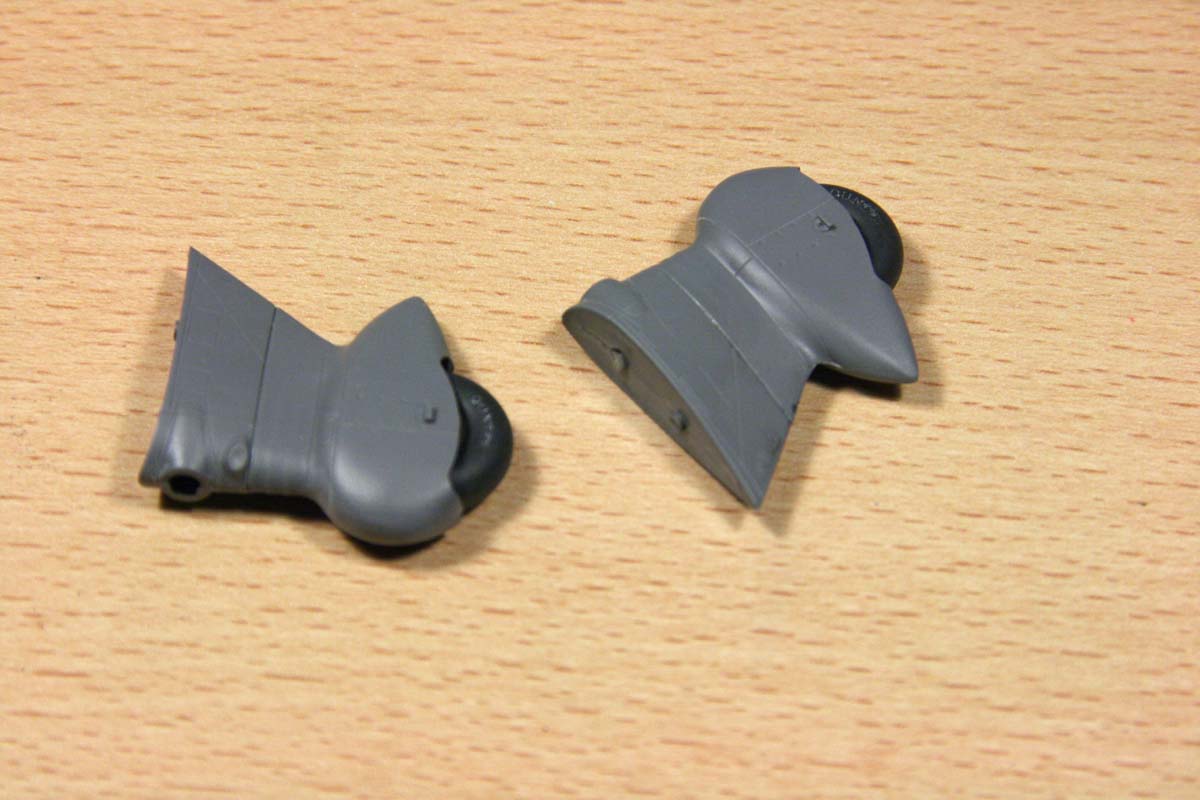 |
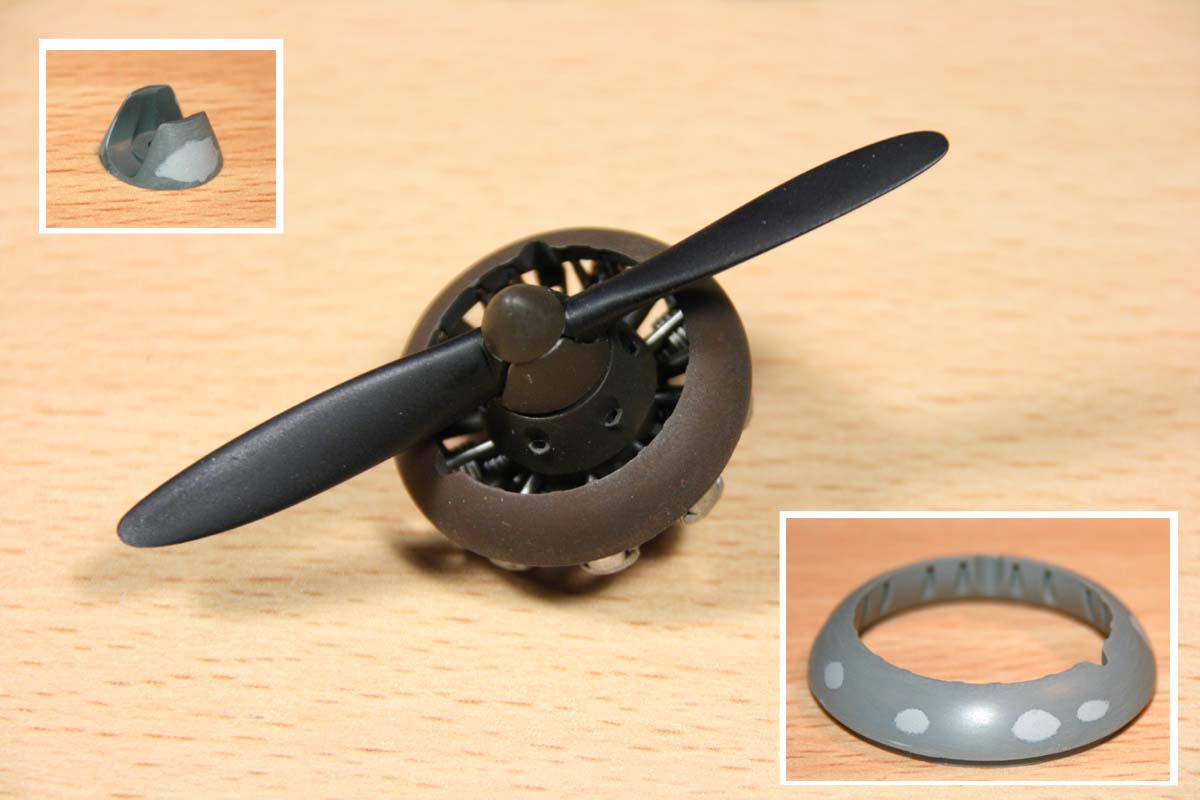
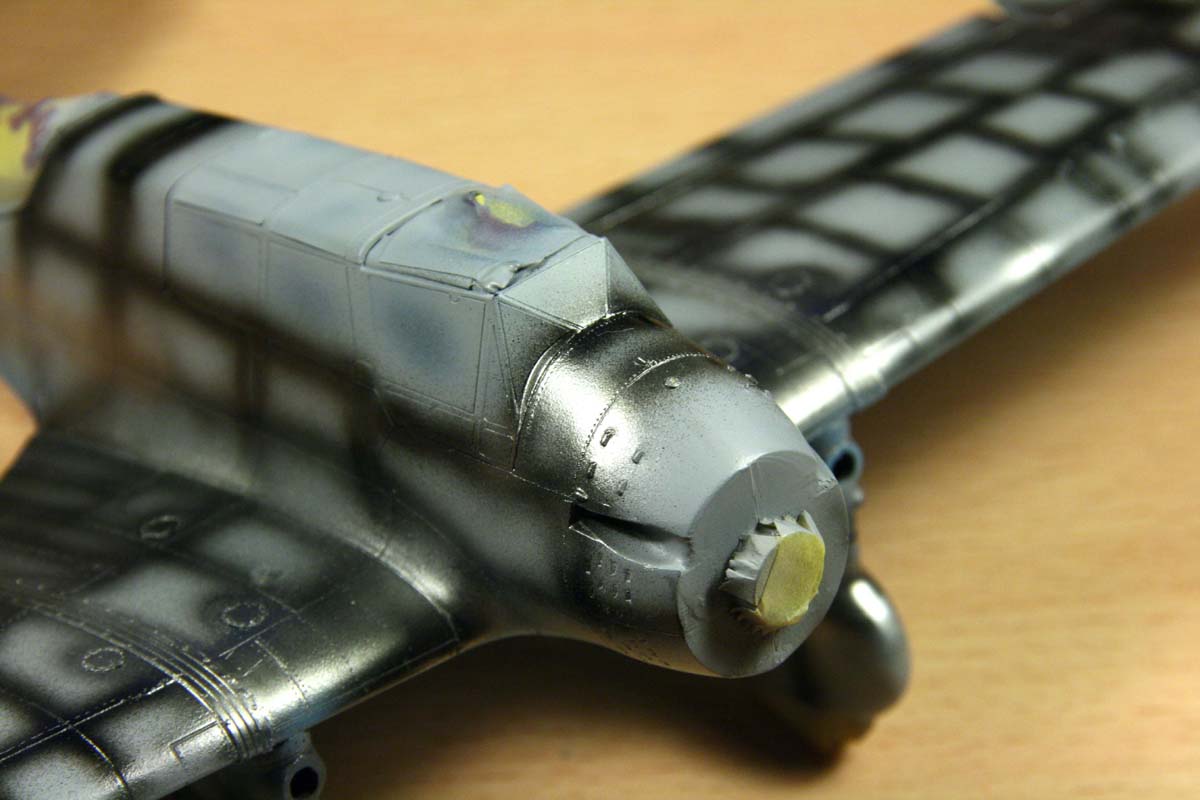
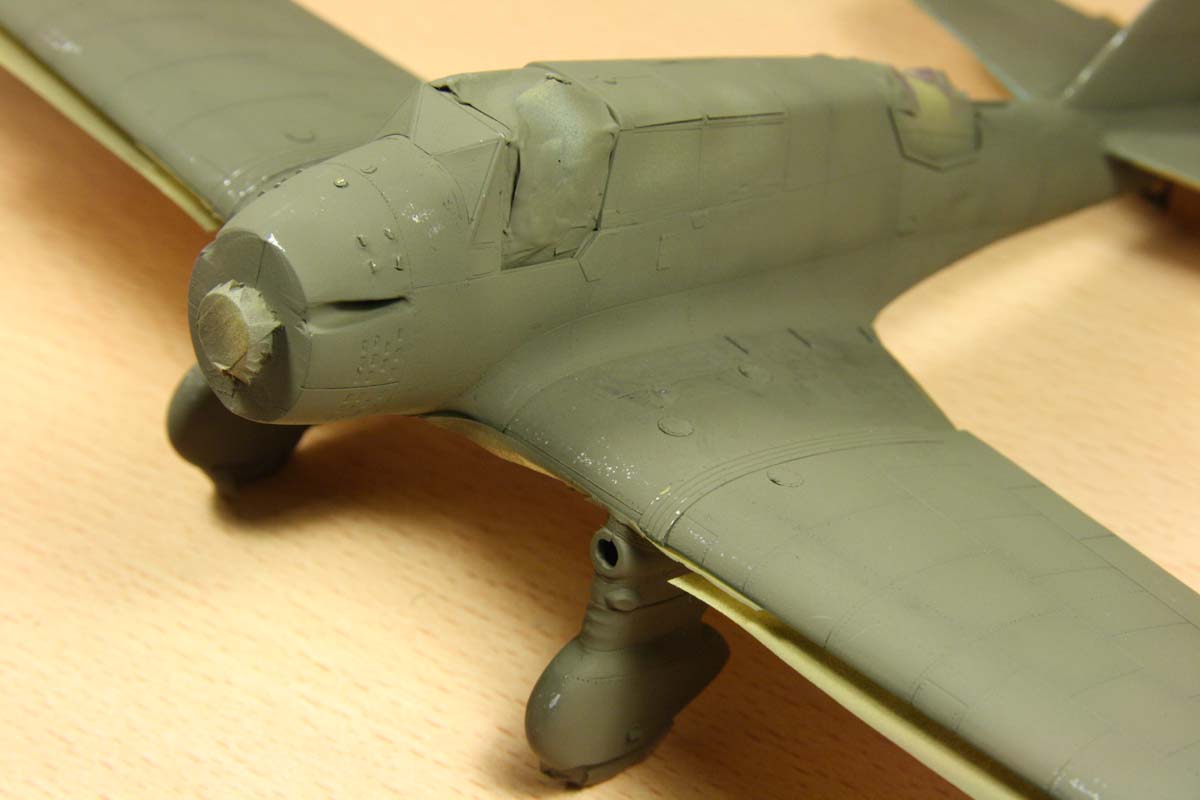
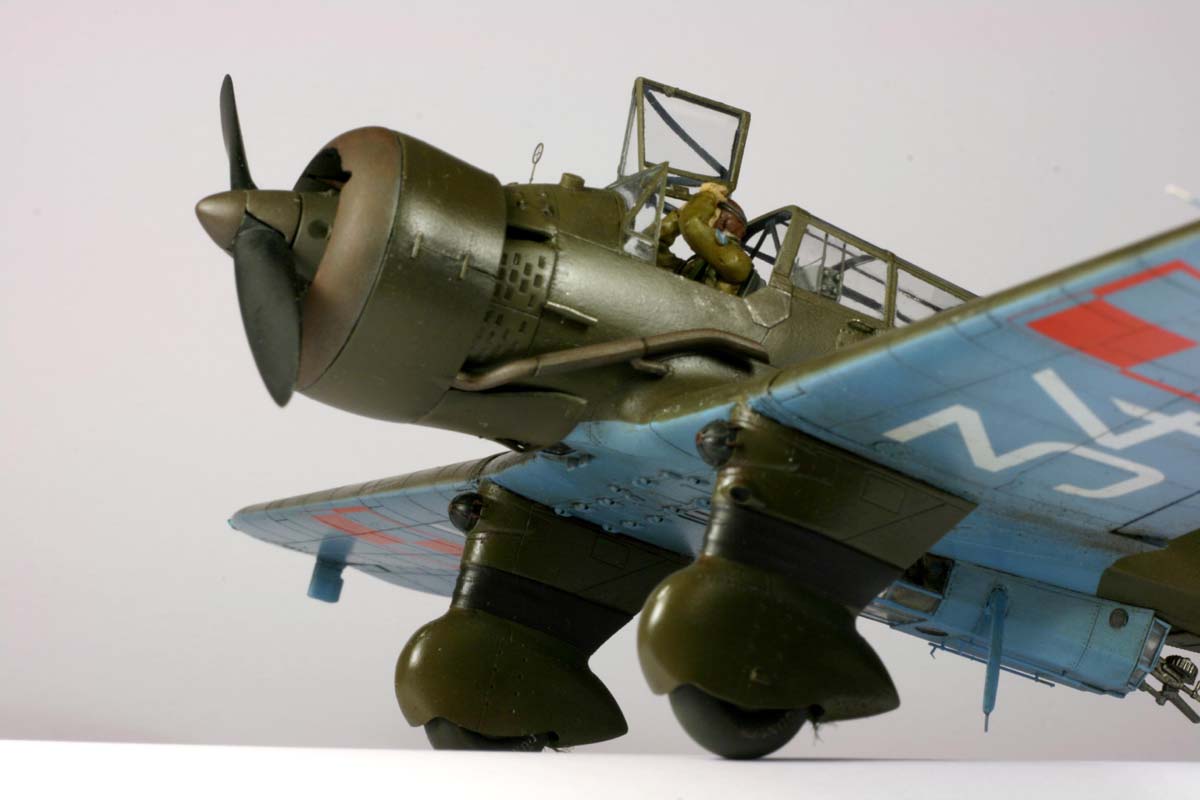
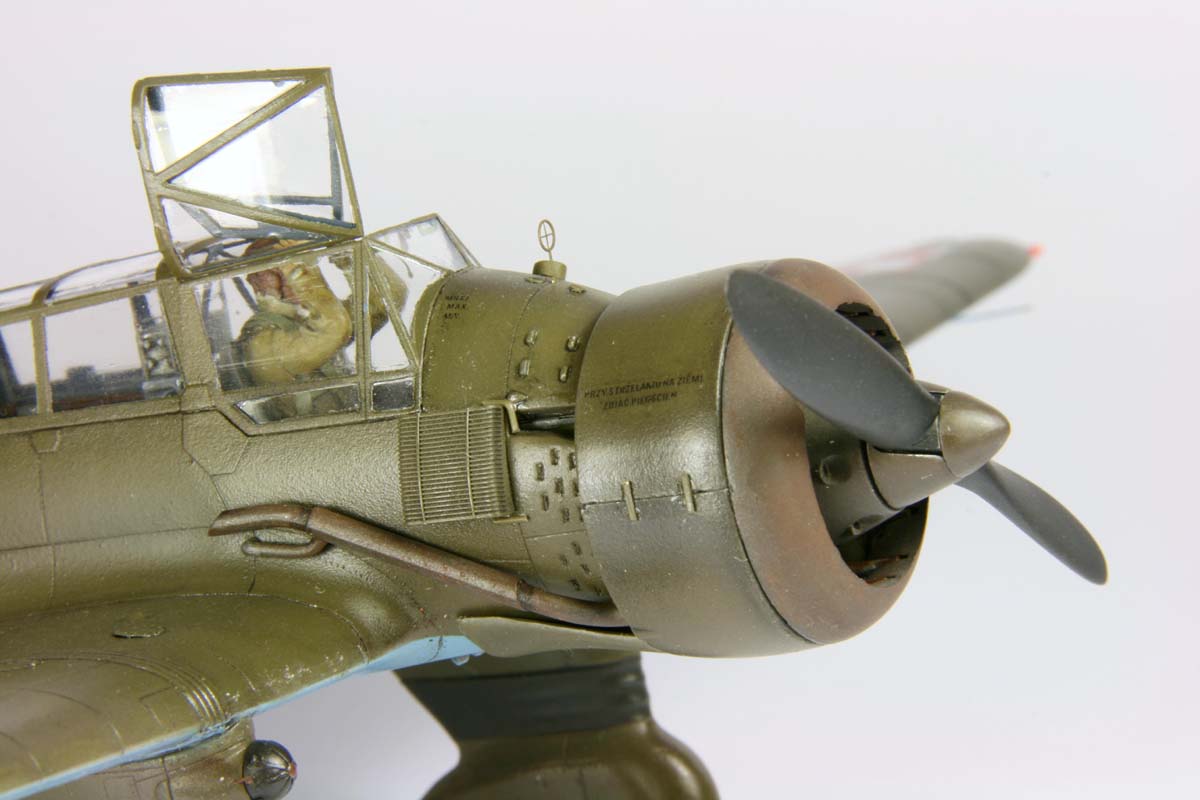
Engine assembly.The cowling and the spinner were most affected by sink-marks, and required of a lot of filling. I did not do much about the engine itself, and the assembly went straight from hand. The hub and cylinders were painted silver and washed with thinned black artist oils. The front ring was on the real aircraft from a metal which used to rust after a time in service. To get the effect, I painted the ring with Humbrol 53 natural metal, and then rubbed it with MIG brown pigment. After fixing the paint the flat varnish, the surface looks quite authentic.In order to make the prop spin nicely, I attached a thick syringe to the back side of the spinner, and a drilled-out piece of thick sprue frame into the engine. After feeding the syringe through the engine hub, I fixed it at the back with a small piece of plastic. That way the prop had its bearing, and would spin freely in moving air. |
 |
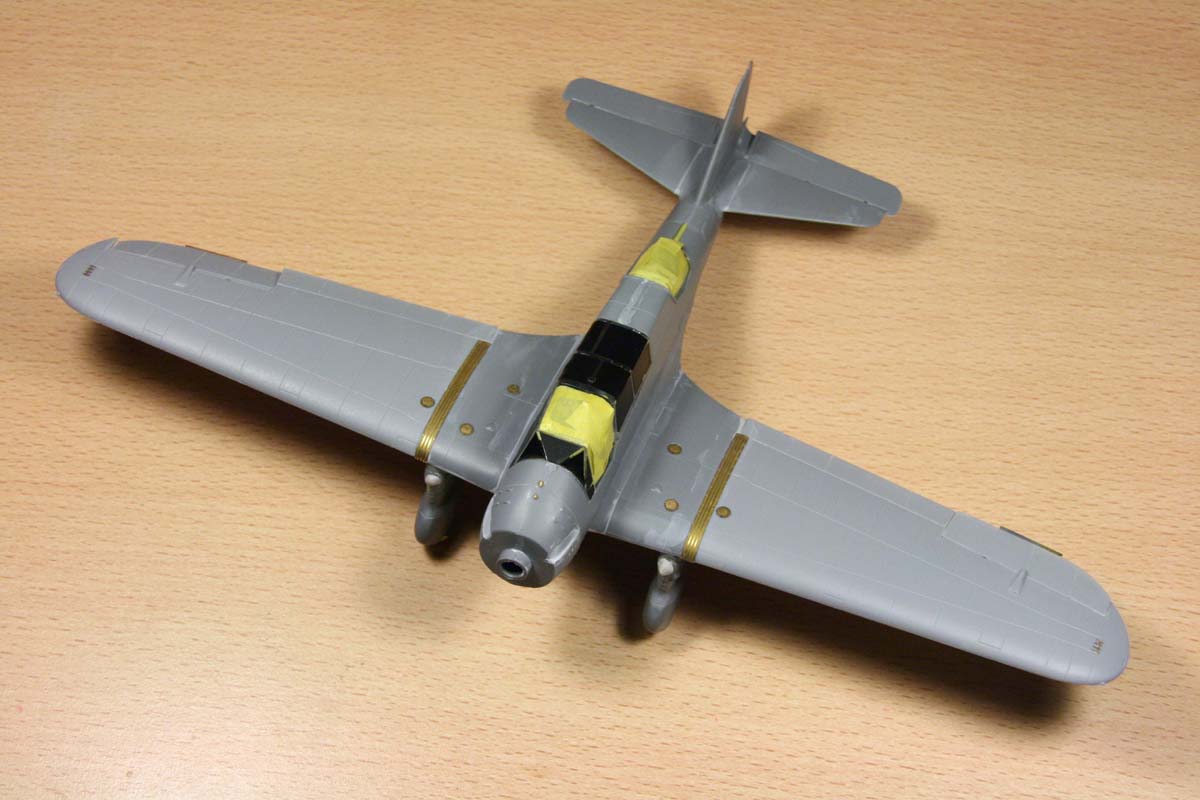
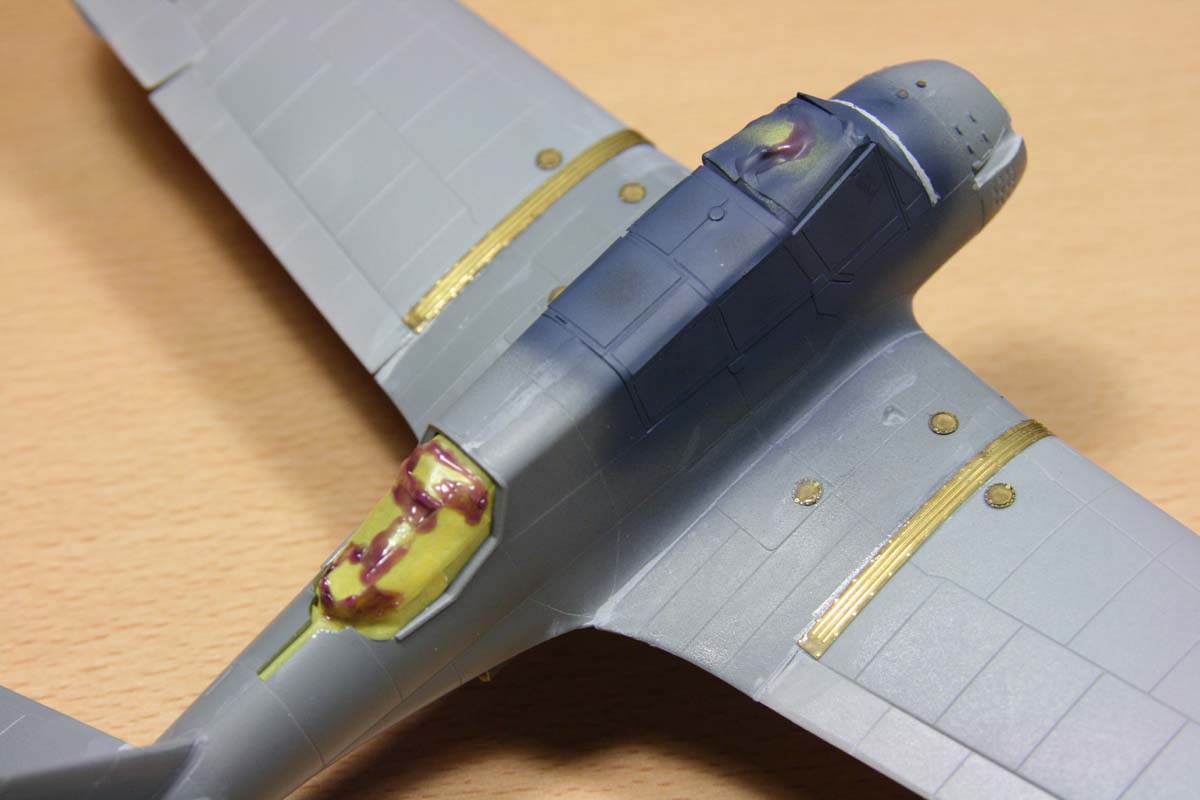
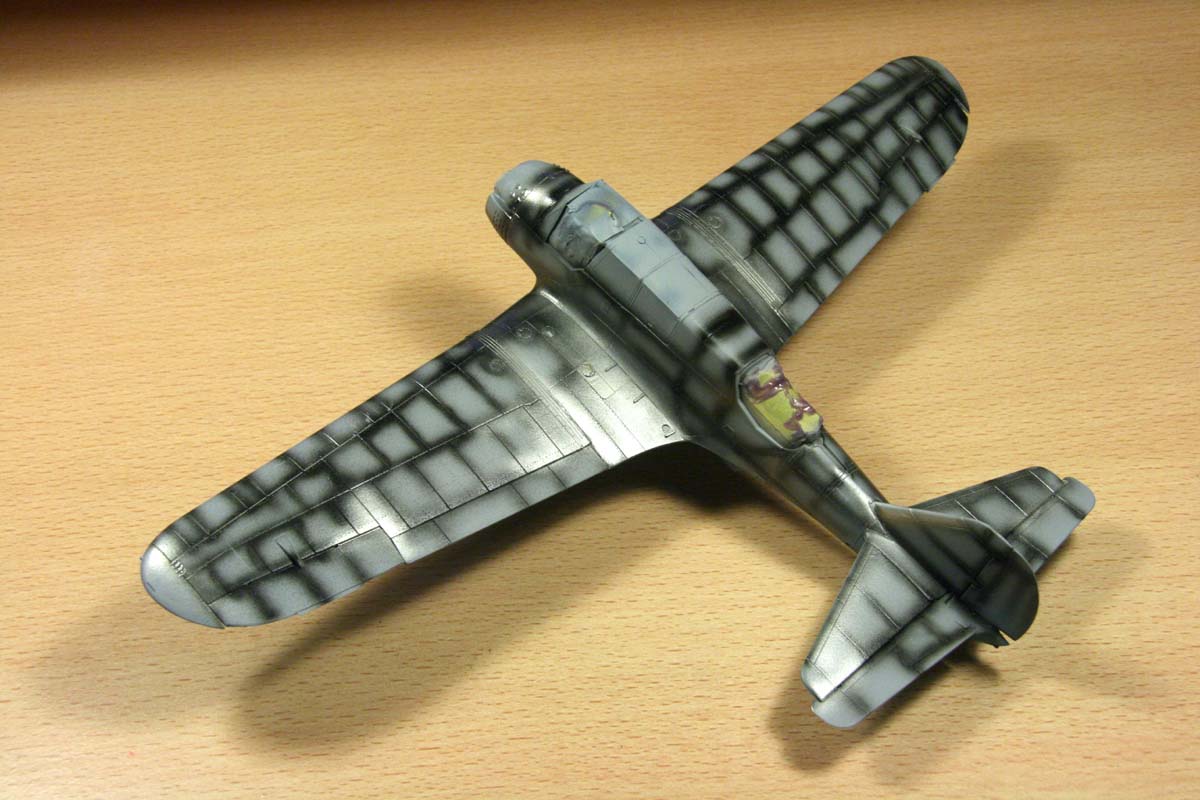
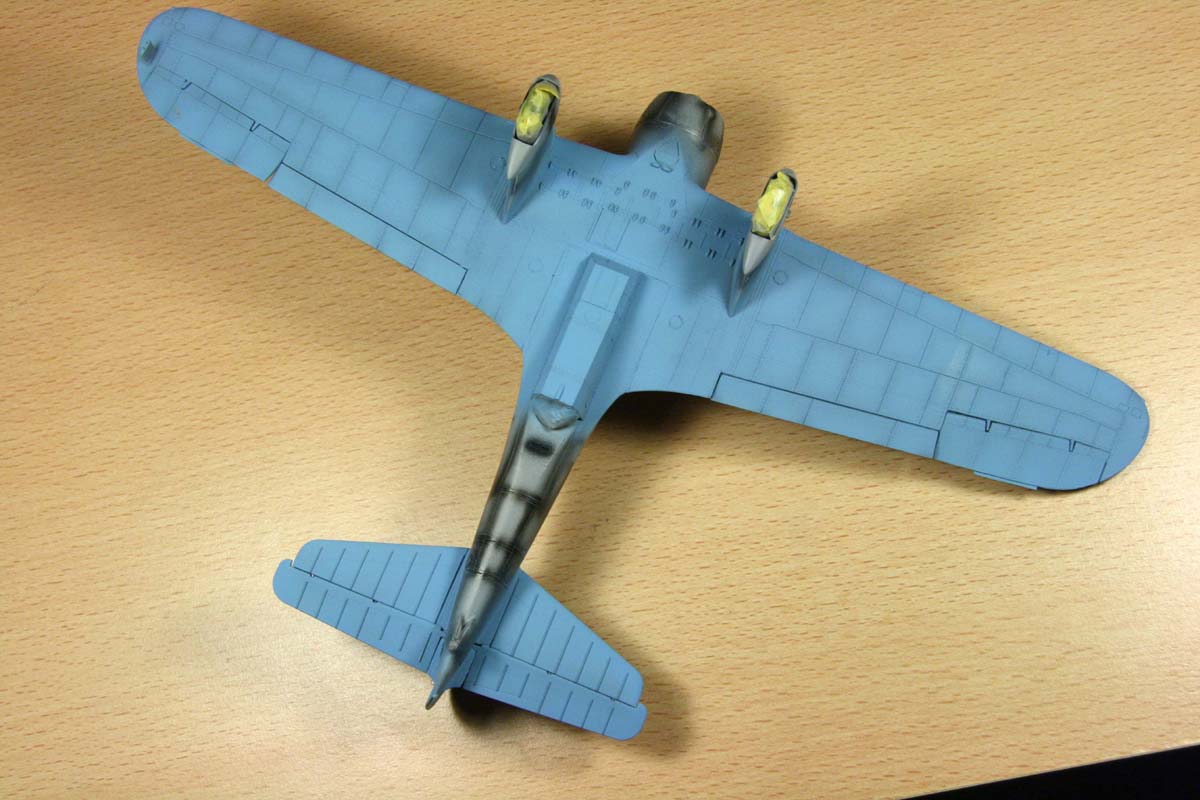
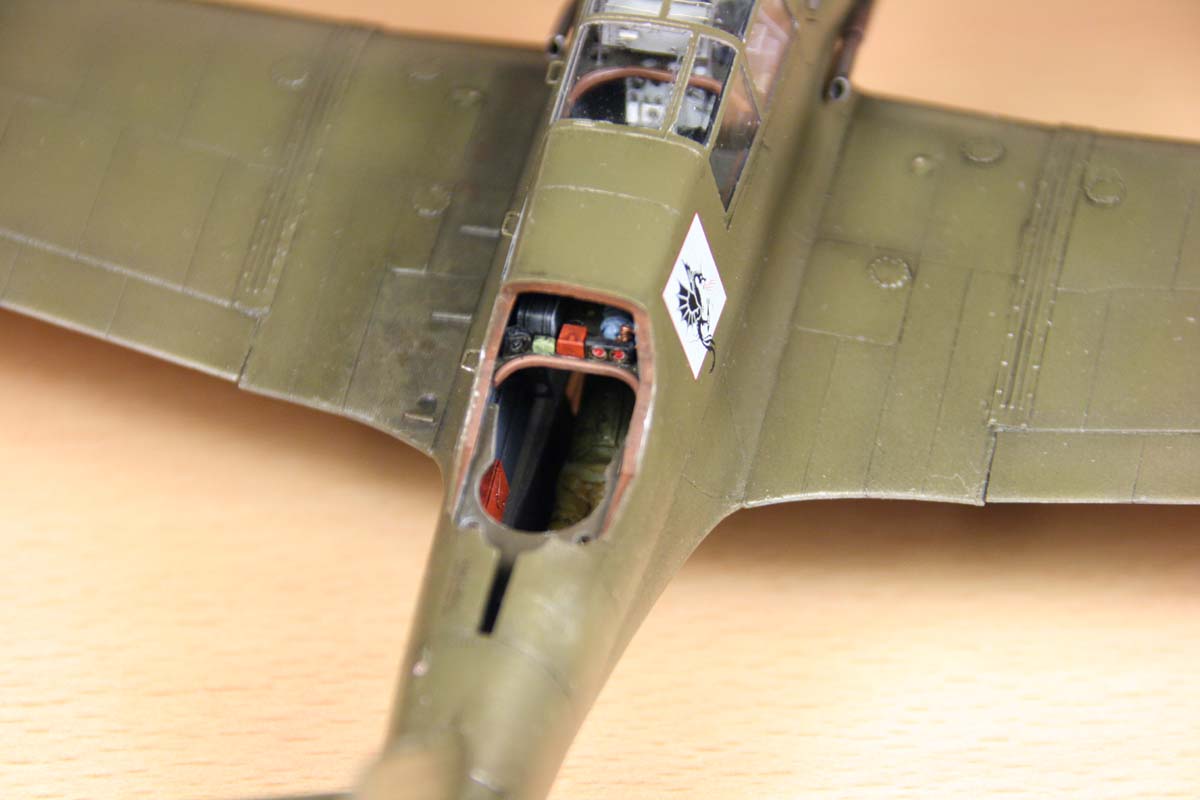
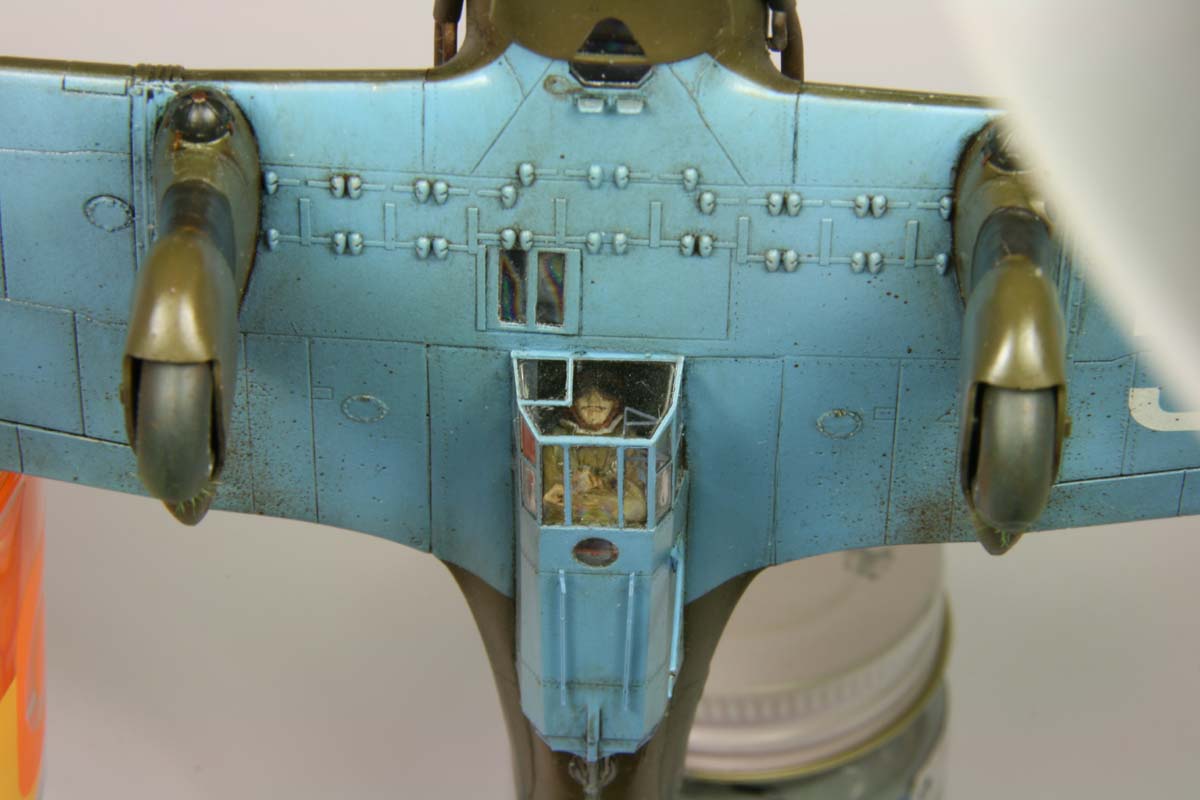
Further steps:The cabin was carefully installed and masked. The open area of the canopy, as well as the gunner's post was masked off with Tamiya tape. The windows below the fuselage got their masks, too.At this point, the ventral gunner's / bomber's tub was prepared. This part is bent in a U-shape from a flat part. It's tricky to get the proper angle, without breaking the outside wall. I'd rather have it from 3 separate parts. The bomber / observer figure was then glued into the tub, and the whole assembly applied to the opening in the fuselage. For painting the clear parts I decided to apply the coating only from the outside, so I attached the tub, and masked it on the outside. The rear of the tub was then closed with Tamiya tape, the rear fairing would be attached later. To get the inside color on the canopy frames inside, all the (clear) window frames were first painted with the inside color (blue-gray) from outside. Now was time for a complete priming with Mr. Surfacer 1000! Here followed the lengthy process of riveting the model. I was not too sure, if it's not through the roof on this scale, but I was rather happy with the result. For applying the tiny indentations I used the Czech micro-saws on curved surfaces, and a needle plus a straight metal template to get a straight line of points on flats. The model received a pre-shading with Tamiya black. Then, the areas like wing leading edges, part of which will be later aged by stripping off the top paint, received a coat of Alclad 2. |
  |
 | |
|---|---|
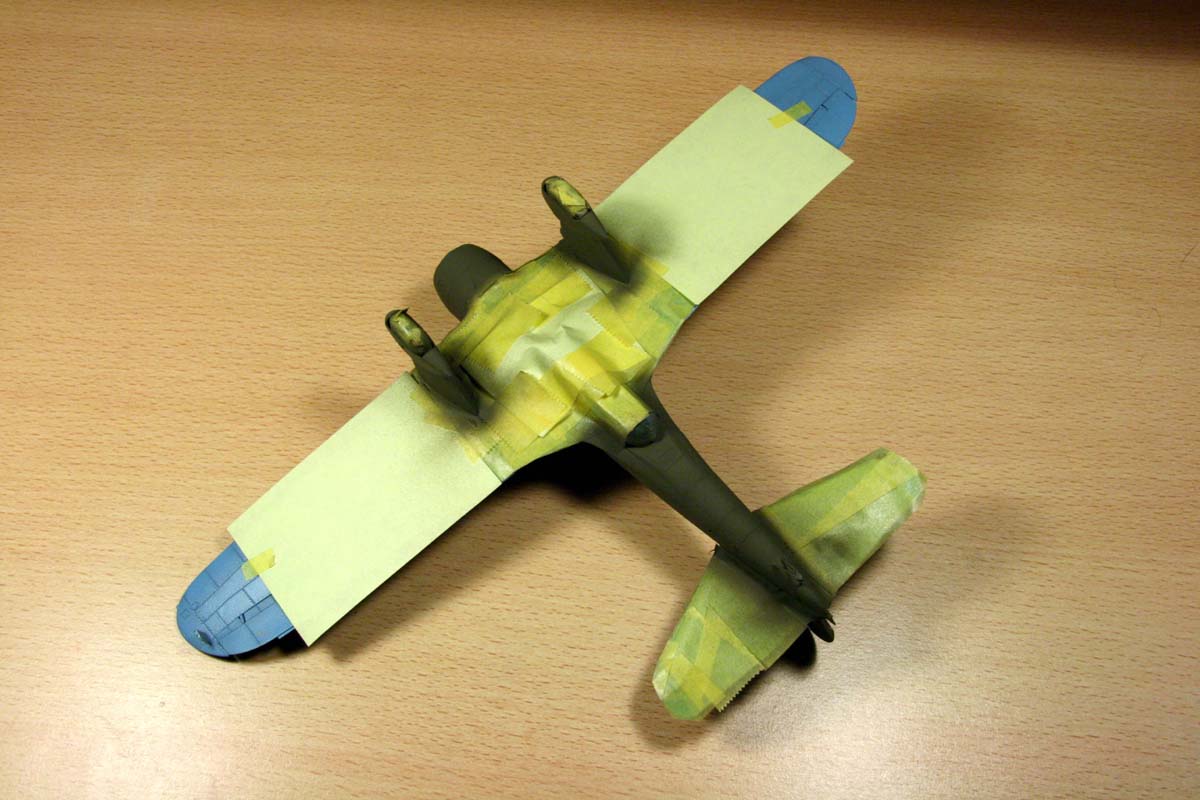
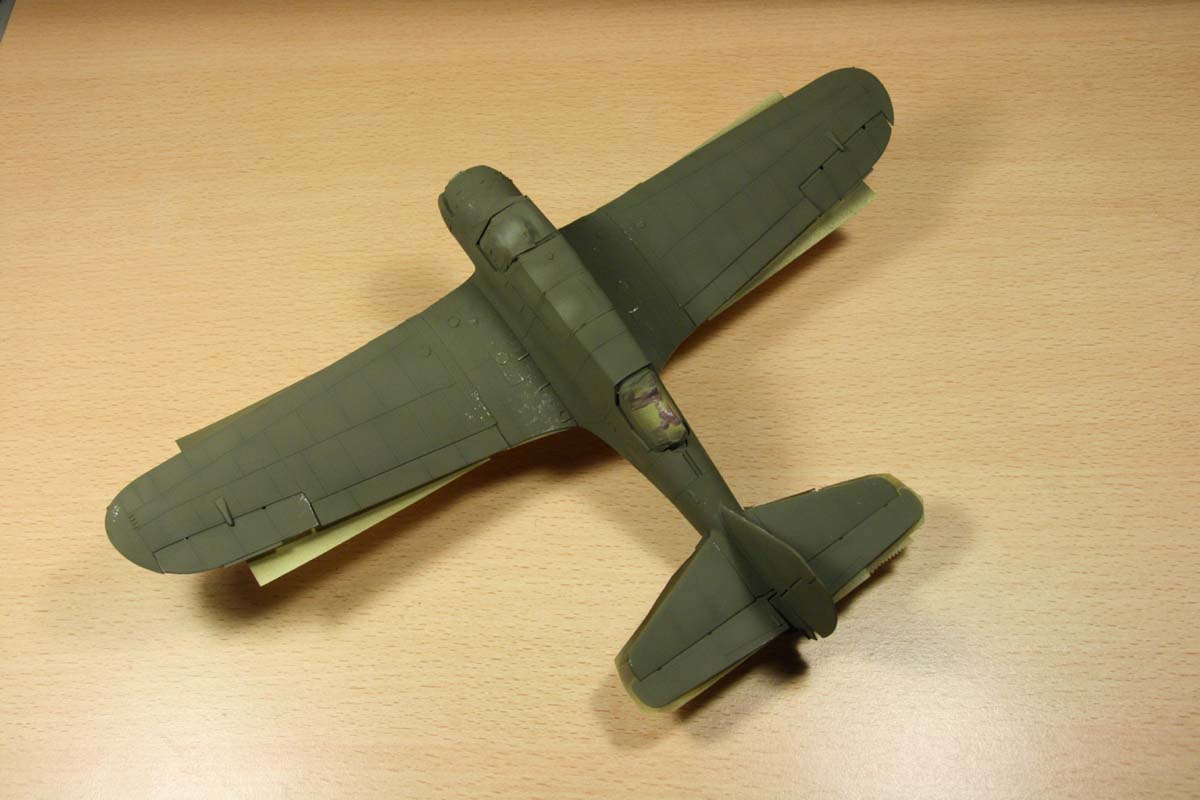
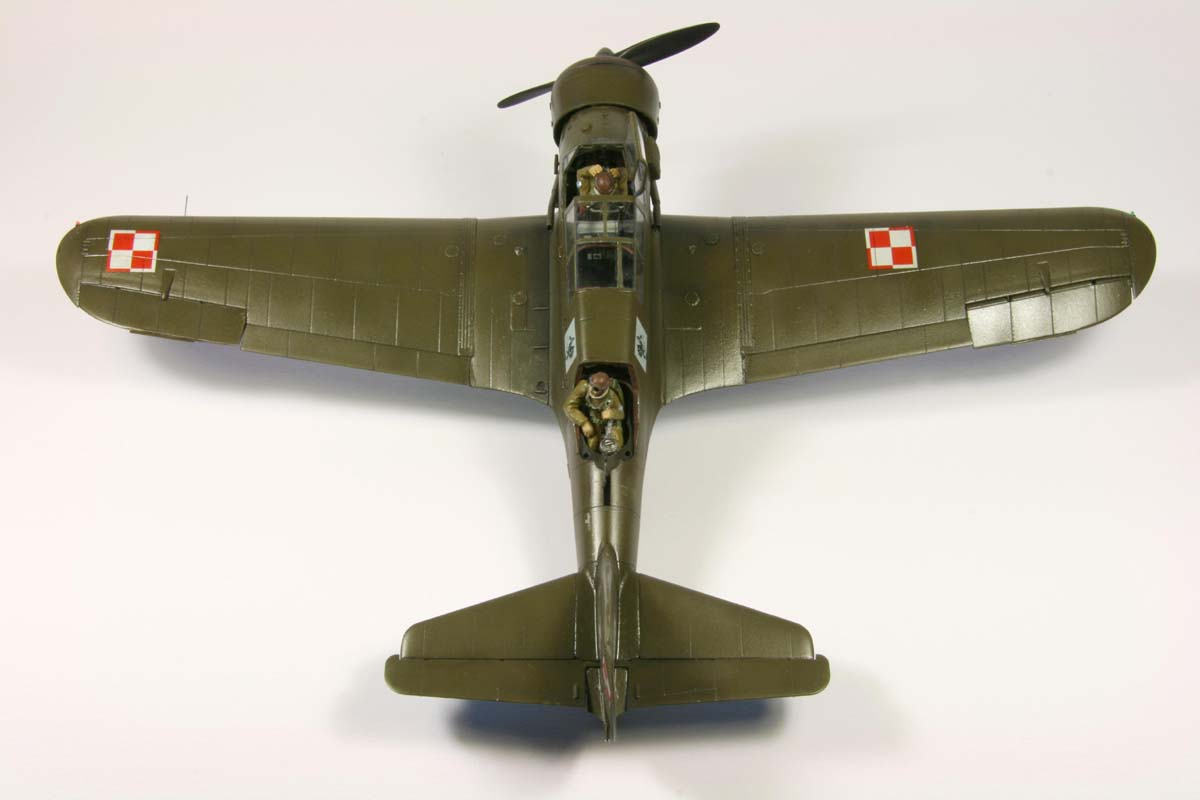
Painting.The bottom was painted with the recommended mix of Vallejos: 901+844+919 in equal parts. While this mix did not separate into layers as quickly as the khaki, fast action is also required. Additionally, I think the color came out too dark. If I did it again, I'd add more white, and probably stay away from the mixed Vallejos.The model was then masked off where necessary, and the top coat of enamel khaki was applied. Still fresh, I used strong tape to strip off some paint in the previously silvery painted areas. The effect is quite nice. The next step was a thorough coat of future, and the decals. As mentioned, the decals are quite good, maybe with the exception that they did not respond to softener too well. The virtue can be sometimes a vice, though: Once positioned, the decal can be hardly moved, and dries rather quickly. Attempts to move - or remove - them, results in cracks and a destruction of the decal. Swimming them upon a pool of water is not always the best idea, since the decals below the wing consist of large transparent areas and that could lead to silvering. Removing the clear parts is not really helpful either, since the carrier film is sensitive and easily damaged, so handling (and in particular aligning) only the intransparent frames would be extremely difficult. All I can recommend is to use plenty of water, and make sure that the pieces are as small as possible, and as well placed as possible from the very beginning. I managed to locate one marking in wrong position, and re-location was not possible anymore. All that was left was to sand it out, over-spray new, and replace them. Luckily I had some from a different kit, so I could keep on with the build. Kindly, Mr. Mrozowski from Mirage/WCM sent a replacement sheet. |
   |
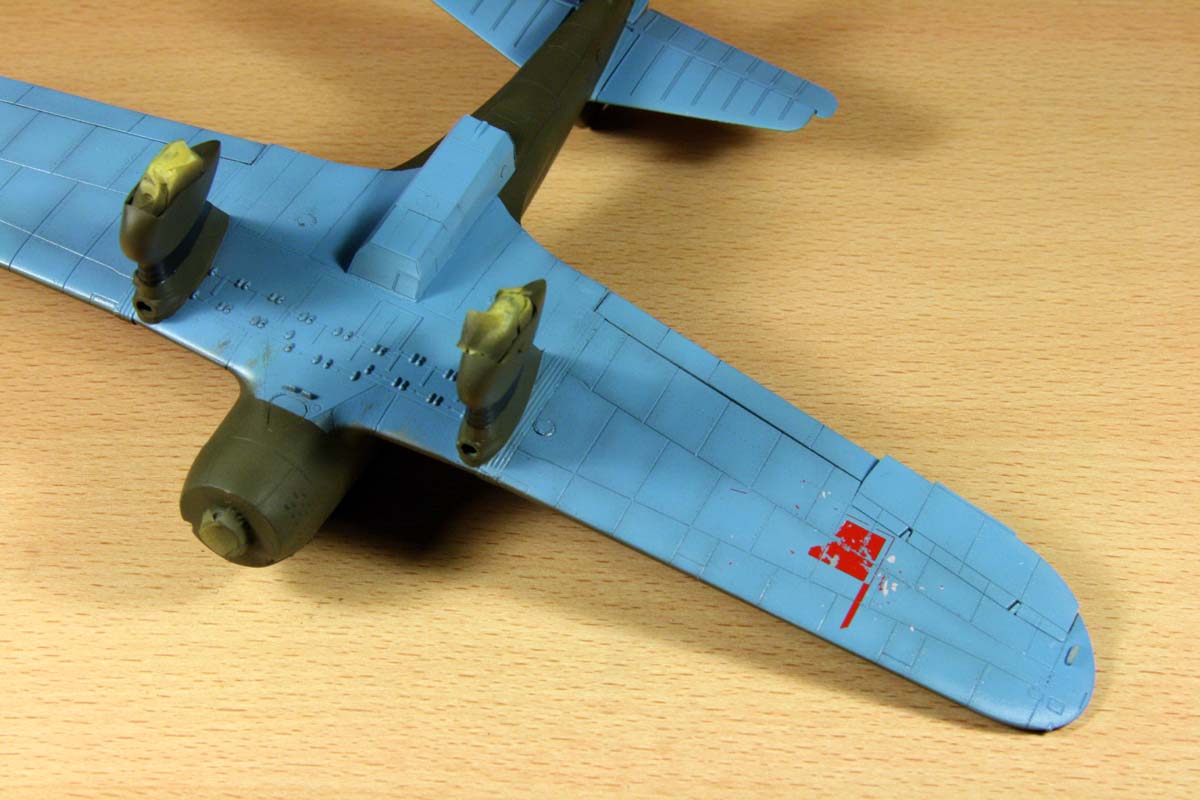 | |
Post-shadingThe pre-shading turned out to be much too strong after the future, so I over-sprayed the top once again. Then the results proved to be insufficient. Three time's the charm, so the last coat proved to be the trick.Afterwards the model was washed with black and brown thinned artist's oils, and fixed with some more Future, which was applied in a way to create a slightly "dusty" appearance. Since the real aircraft looked rather glossy on the pictures, I did not apply any flat coating, just Future in different manners, to create sometimes more, sometimes less shiny appearance. FinishingI prepared the exhaust pipes the same way as the cooler ring on the engine. They were drilled out, and attached with metal pins to the fuselage. An array of small PE bits and pieces were furnished to the model, the gunner inserted, and the fairings of the ventral tub added.The motor assembly was then applied, and the Towned's ring closed. In order to align it properly, I fastened it with cable binders and fixed with superglue. The superglue was applied into the joints, and can be wiped off easily from the "Futured" surface with some tissue. After removing all the masks, the remaining part of the canopy was added. The masks were not bad in terms of shape, but in my opinion they were too thick and rigid, resulting in corners detaching from curved areas. The oil cooler was slightly dry-brushed after the painting, and superglued to the fuselage. The pilot's gun was fixed from a PE element rolled around a needle. It was attached at this point of time, which was a bit tricky - it would be better to do it before attaching the engine. I've scratch-built the hourglass-nozzle on the left side of the fuselage front, as well as the filler cap on top in front of the canopy. At the very end I added some dirt spray from the wheels on the underside of the wings, since the planes more often than not operated from muddy airstrips. A final tender touch was provided by attaching pieces of scale grass from railway model supply to parts of the wheel fairing and the skid. I used the provided large resin squadron symbol on a base I prepared for the model. It was done using a hard plastic foam board, and railway model grass. |
    |
ConclusionThis was probably my most ambitious project so far. While the model is well engineered and excellently researched, it has not only some shortcomings concerning the manufacturing, but it also implies significant modeling skills as prerequisite, on hands of the aspiring modeler.All in all, this demanding kit rewards with an excellent model of an aircraft with plenty of character, and another exotic kit, which is not seen on every other club meeting or hobby show. |
 |

 | |
May 2008